In today’s digital world, Webex Meetings has become the ultimate hub for seamless collaboration and powerful video conferencing. Have you ever experienced a webcam malfunction during an important online meeting? Maybe your video was blurry, choppy, or frozen. Maybe your face was too dark, too bright, or out of focus. Maybe your Webex camera was not working at all.
So whether you’re stepping into a game-changing business meeting or reconnecting with loved ones, ensuring your camera is ready to deliver top-notch performance is essential.
Don’t fret! We’ve got you covered with this article, where we’ll walk you through simple yet powerful steps to test your Webex camera.
How to Join a Test Meeting in Webex?
The easiest way to test your camera for Webex meetings is to join a test meeting. A test meeting is a real Webex meeting that you can use to try out the features and settings of the platform.
Here are some steps to help you test your camera for Webex meetings.
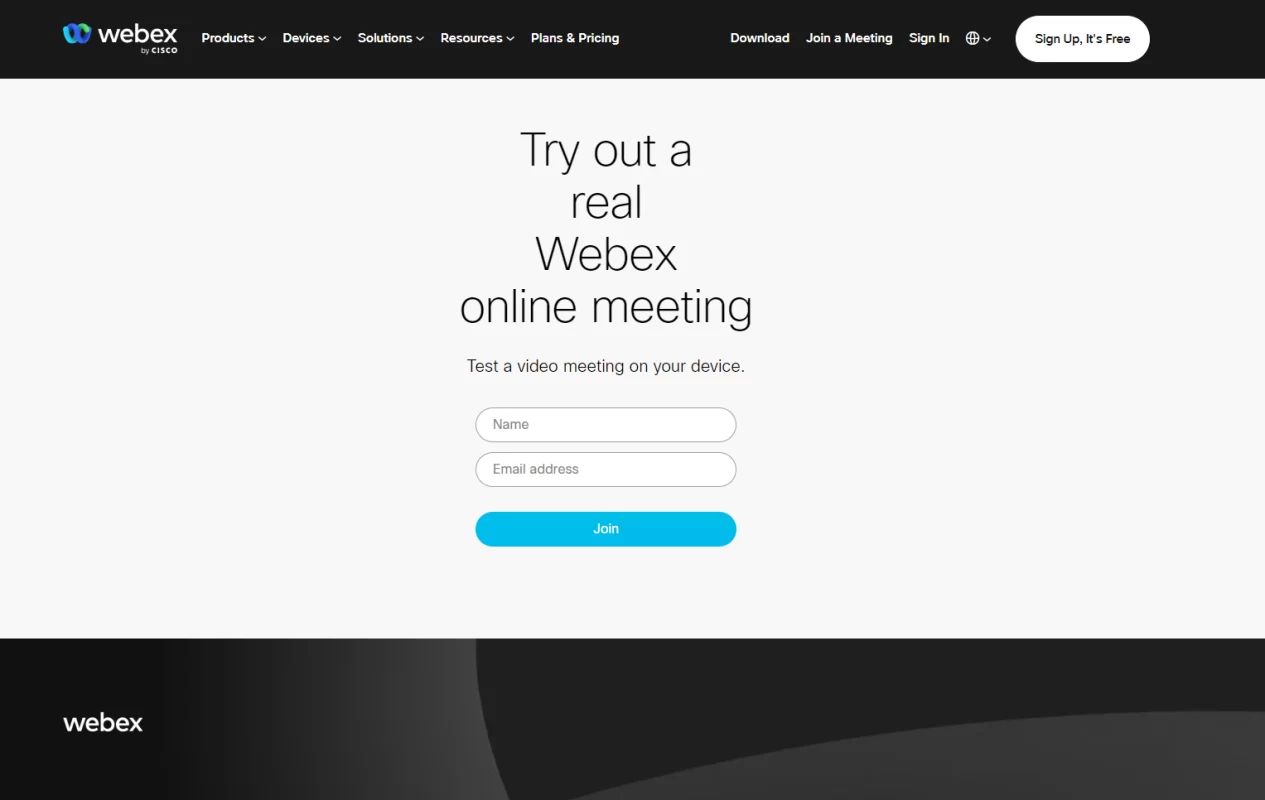
Step 1: Go to https://www.webex.com/test-meeting.html.
Step 2: Enter your name and email address, and then click Join.
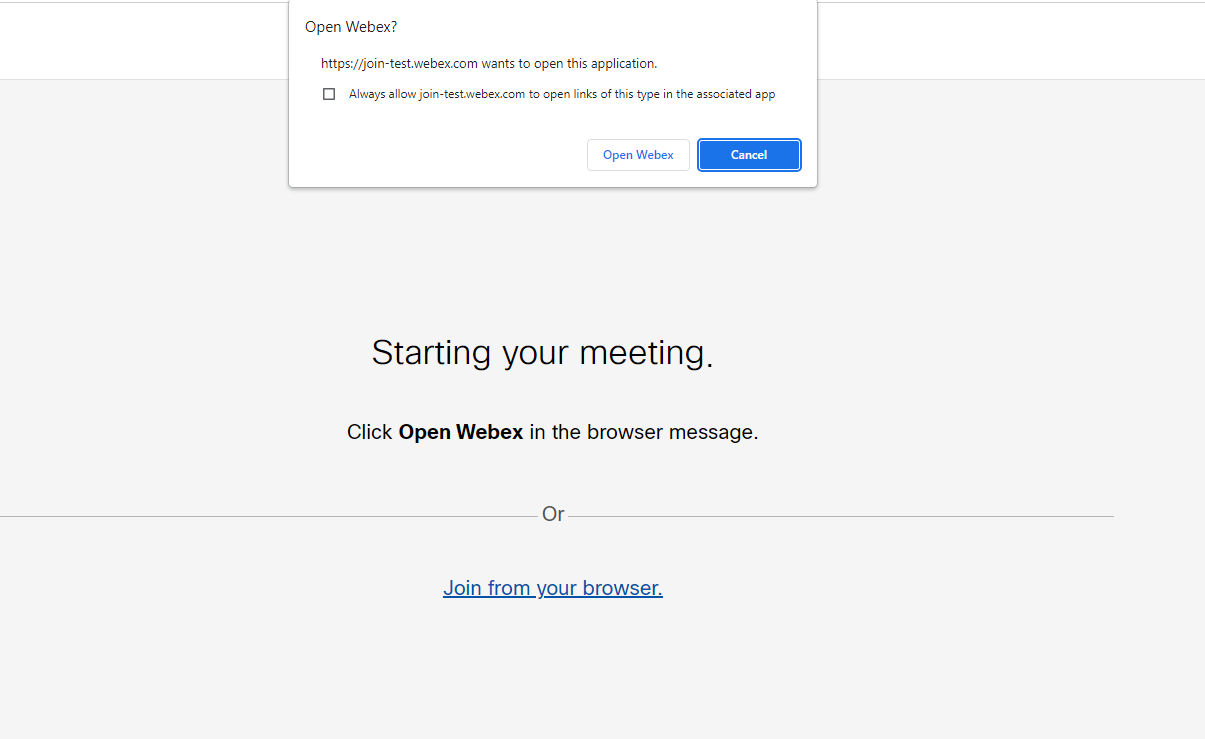
Step 3: If you have already installed the desktop application, click Open Webex to do so. If you do not have the application installed, click Join from your browser to join directly from your web browser.
Step 4: Under Audio Connection, select Computer audio. Then under Speaker and microphone, click the Test button on the right.
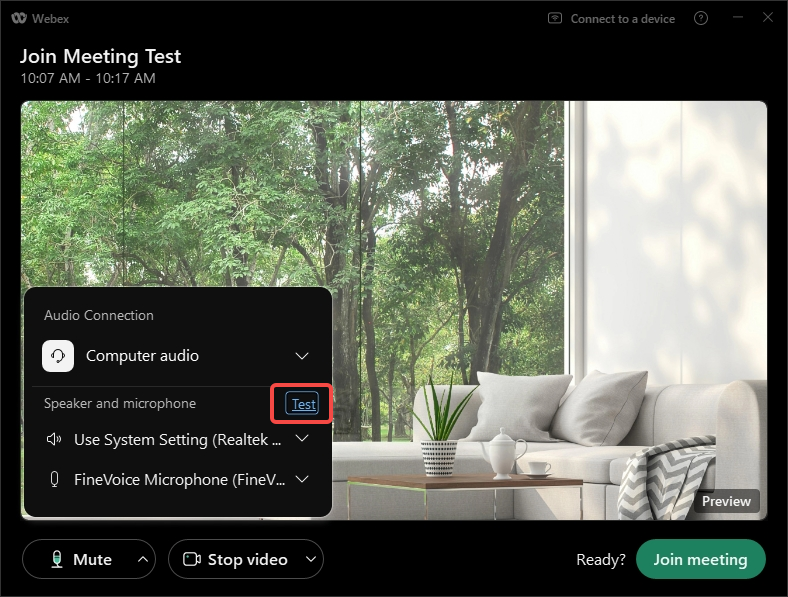
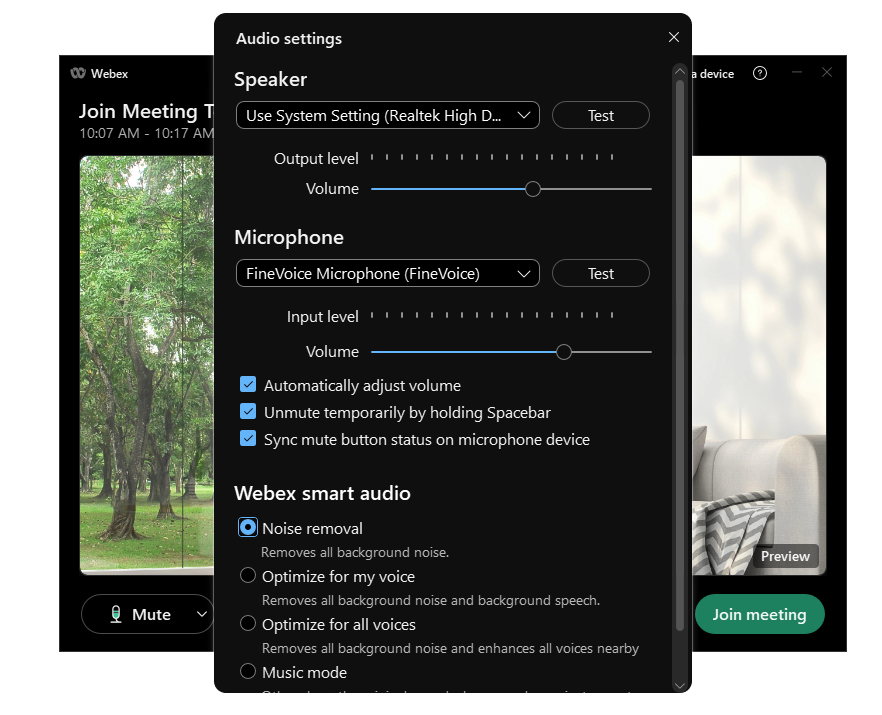
Step 5: Select the appropriate Speaker and Test it, adjusting the Output level and Volume.
Step 6: Select the appropriate Microphone and Test it, adjusting the Input level and Volume.
Step 7: You can also select some advanced settings under Webex smart audio, such as Noise removal, Optimize for my voice, Optimize for all voices, Music mode, etc.
If you want to join with the microphone muted, click Mute. You will see when the microphone is muted. When you want to speak, click Unmute.
Step 8: Select the right Camera, and you can add a virtual background, or Blur the background.
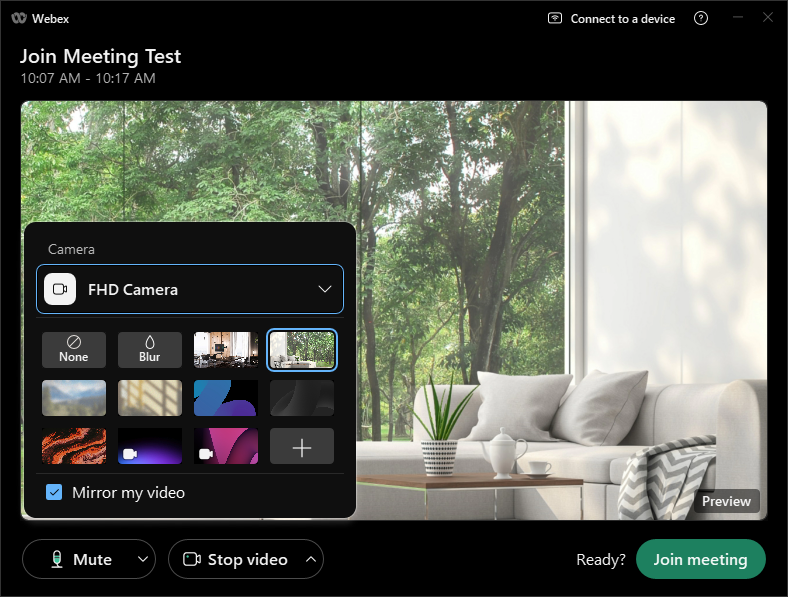
If you want to join the meeting with the video off, click Stop Video. You will see when your video is turned off. Click Start Video when you want to show the video.
Step 9: After all the settings and tests are done, click Join meeting in the bottom right corner.
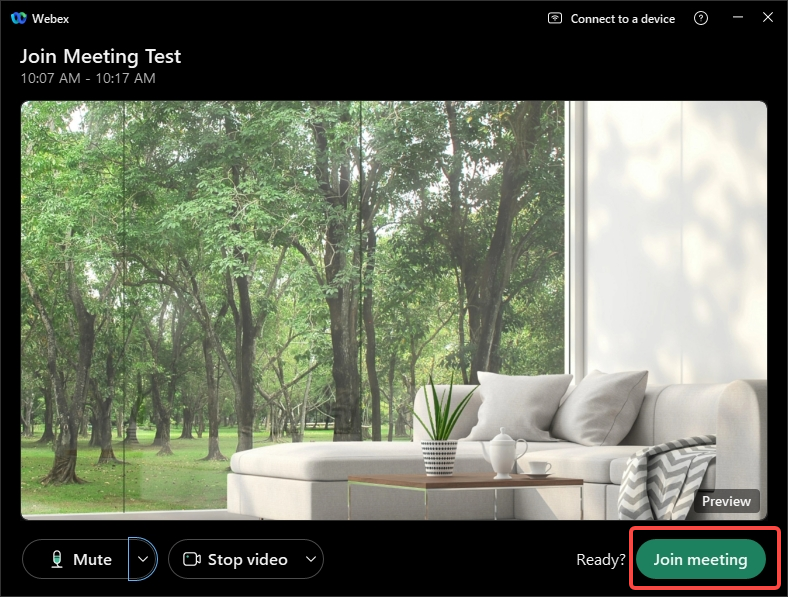
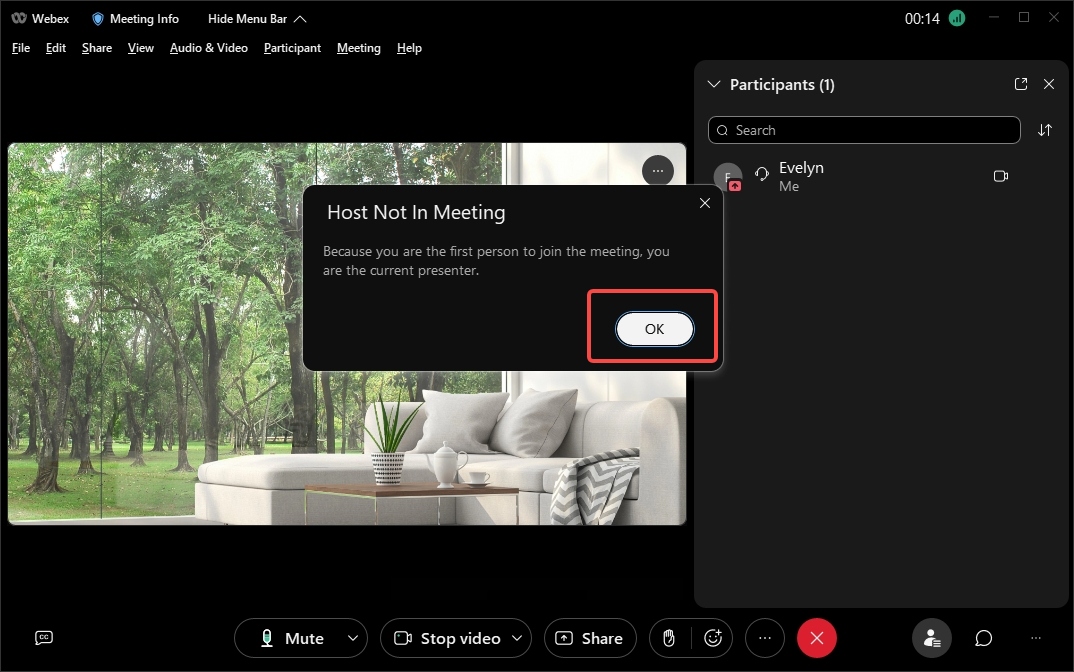
Step 10: In the new pop-up window prompting you that Host Not In Meeting, select OK.
You may also like: Zoom Camera Test: How to Check and Boost Your Video Quality.
How to Test Your Webex Camera While in a Live Meeting?
Sometimes, you might need to test your Webex camera while you are already in a live meeting. For example, you might want to check if your camera is working properly, adjust your video settings, or switch to a different camera device. Fortunately, Webex has a built-in feature that allows you to do that easily and quickly.
To use the Webex test camera feature while in a live meeting, you can follow these steps.
Step 1: While you are in a live meeting, click More Options (three dots) at the bottom right corner of the screen.
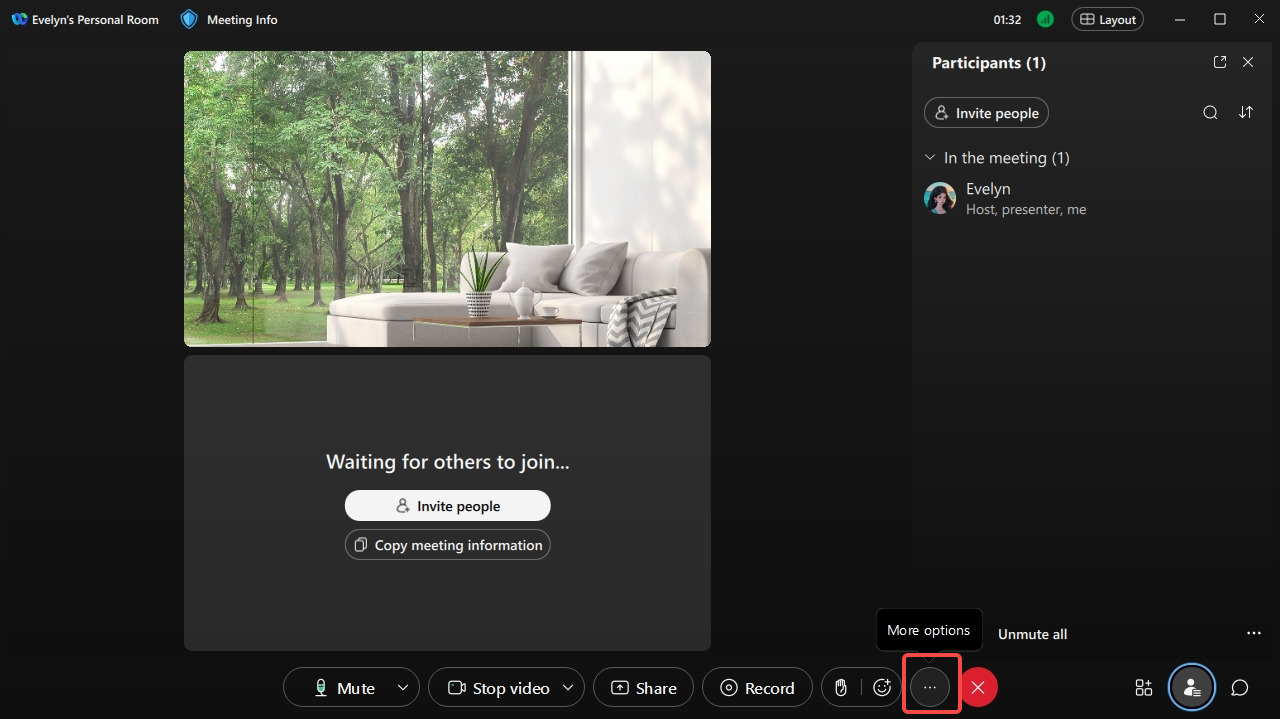
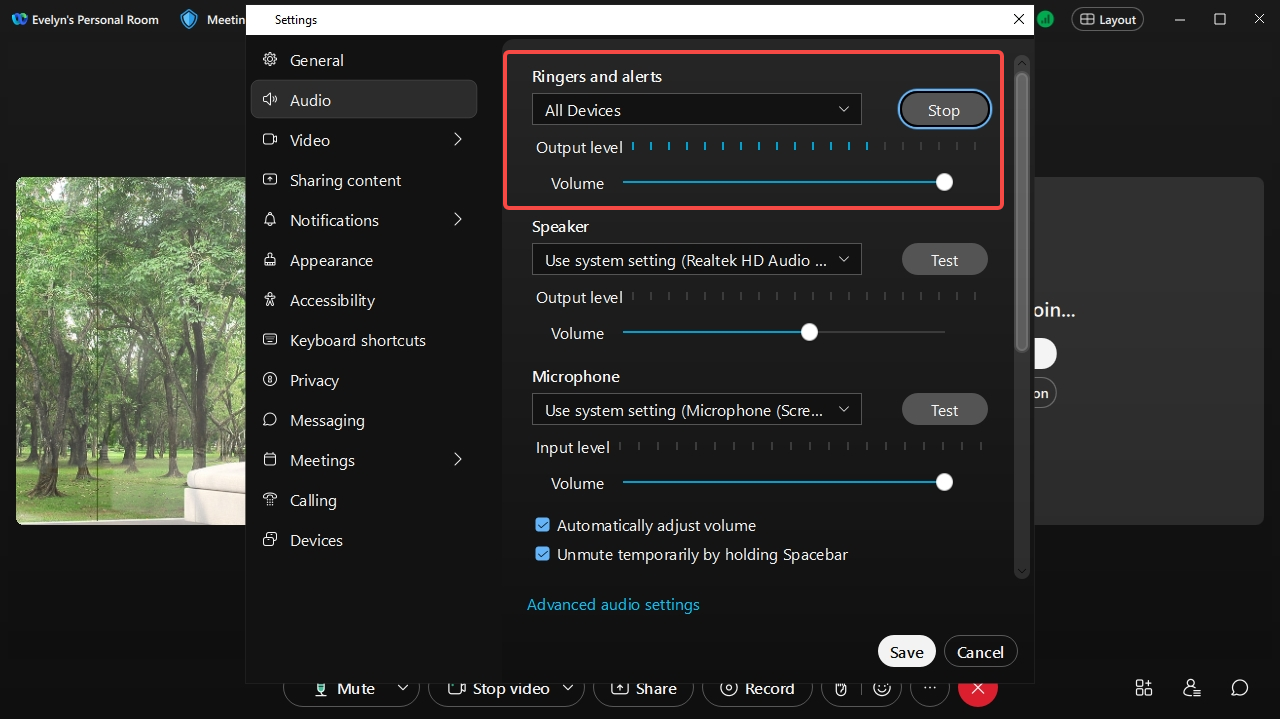
Step 2: Select the appropriate Ringers and alerts, and the right Volume. Click Test to start the test and Stop to end the test.
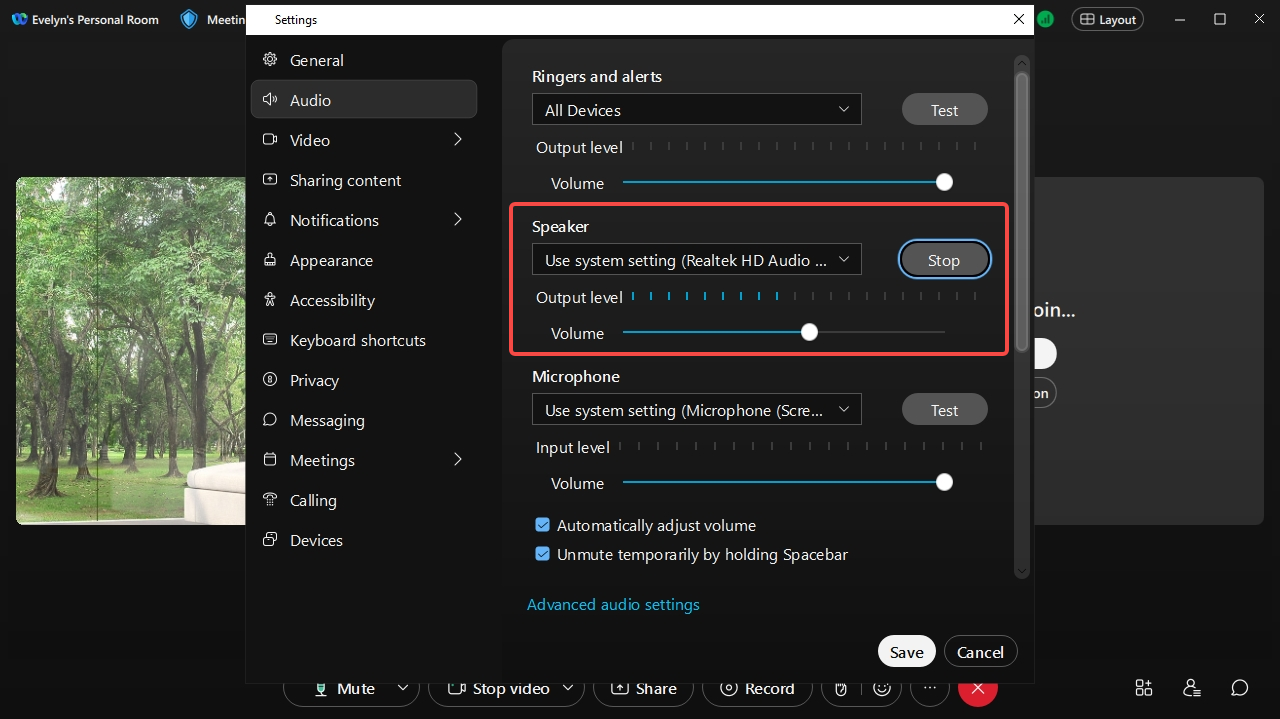
Step 3: To check if your Speaker is working properly, select Test.
You can adjust the Volume and Stop the test.
Step 4: You can test the Microphone by saying a phrase and then Recording and Playing it.
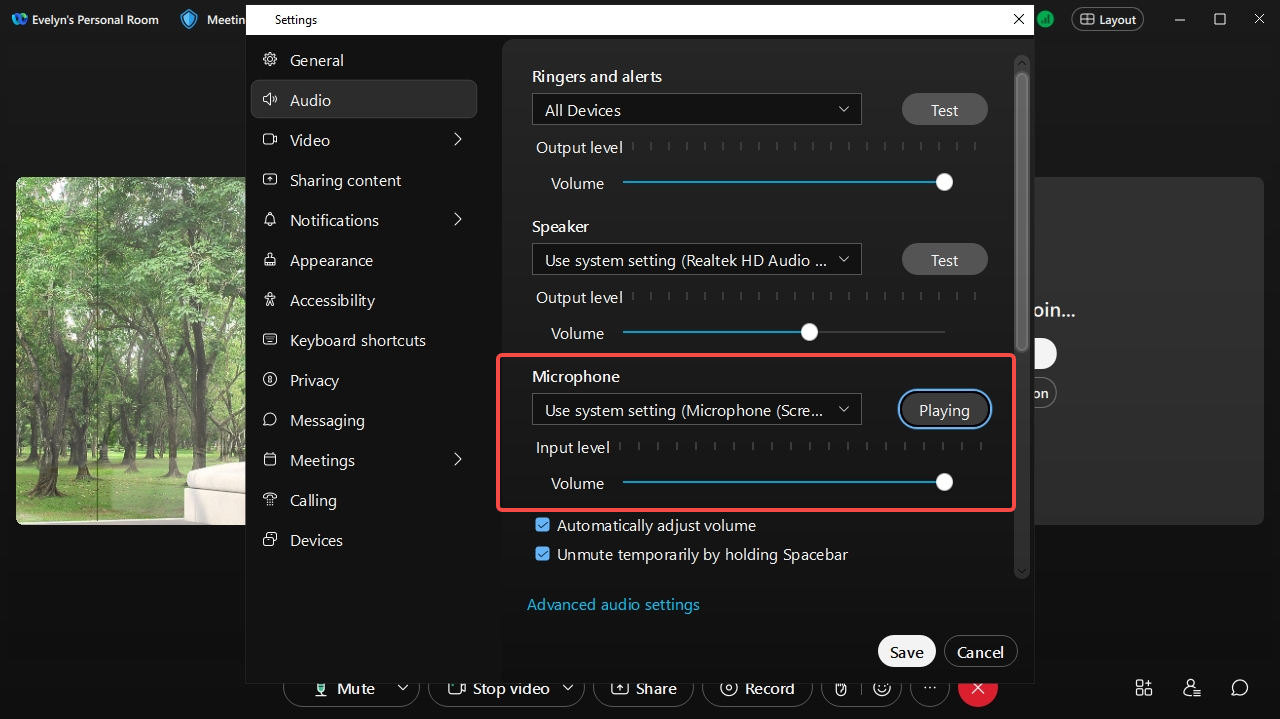
You can adjust the microphone Volume and Mute/Unmute it by clicking the microphone icon at the bottom of the video window.
Step 5: You can also switch to a different camera device by clicking Settings>video>camera.
You can also read: How to Test Camera and Boost Video Quality in Microsoft Teams.
If you are not satisfied with your built-in camera, or if you want to try out a different option for your video communication, you might want to consider using Fineshare FineCam as a Webex webcam.
FineCam is an AI virtual camera software that allows you to use your smartphone as a webcam for your computer. It works with Webex and other video conferencing platforms, and it offers some advantages over a regular webcam, such as:
- More cost-effective and space-saving
FineCam can save you money and space by not having to buy or use a separate webcam.
- Higher resolution and quality
FineCam can deliver up to 4K video quality. This can make your video look more clear and sharp than a regular webcam.
- More flexibility and mobility
FineCam can let you use your iPhone as a wireless webcam, which means you can move it around and adjust it to any angle or position you want.
- More fun and creativity
You can blur, remove or change your webcam backgrounds. And you can choose from millions of unique and creative backgrounds to enhance your meeting.
- Content sharing
You can share your iPhone screen, app windows, YouTube videos, web pages, presentations, videos, and photos during the meeting. This can help you communicate your ideas more effectively and creatively.
- Filters and effects
You can choose various filters and effects for your videos, such as Instagram-like filters, old film effects, glitch effects, and more. You can also change your camera shapes to overlay yourself on any content.
- High-quality video recorder
With FineCam, you can record a Webex Meeting in high quality and save it as MP4 files. Additionally, you can record many videos at once using the segment recording feature, which enables you to continue recording at any time.
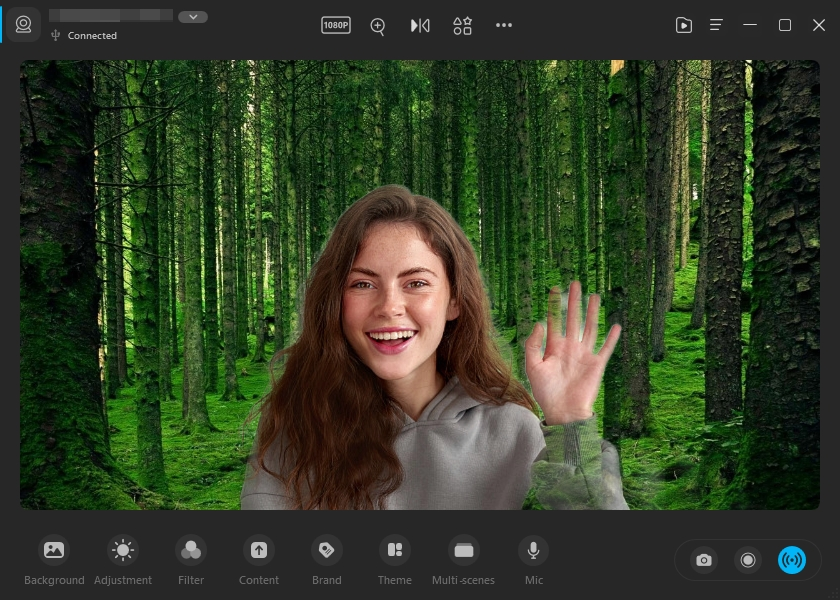
Are you ready to upgrade your video quality and experience? Download FineCam today and unleash your creativity!
Conclusion
Testing your Webex camera before and during a meeting is a simple and effective way to ensure high-quality video communication. By using the methods described in this article, you can avoid any technical issues or glitches that might affect your video quality or appearance.

