Can I look better in Zoom meetings? That’s when you can use a virtual camera, which can improve the quality of your video calls.
What are Zoom’s recommended virtual webcams? How to use a virtual camera for Zoom? In this post, I will introduce you to two of the best free virtual cameras for Zoom.
How to Use the Best Virtual Camera for Zoom
When it comes to virtual cameras that can support Zoom, the best and easiest product to use is FineCam. It supports Windows and Mac computers and all video chat and streaming platforms.
With it, you can not only use iPhone as a webcam but also set various mobile camera devices such as iPad, Android phone, GoPro, etc. as a Zoom camera source.
Step 1. Download the free version of FineCam from the FineShare website.
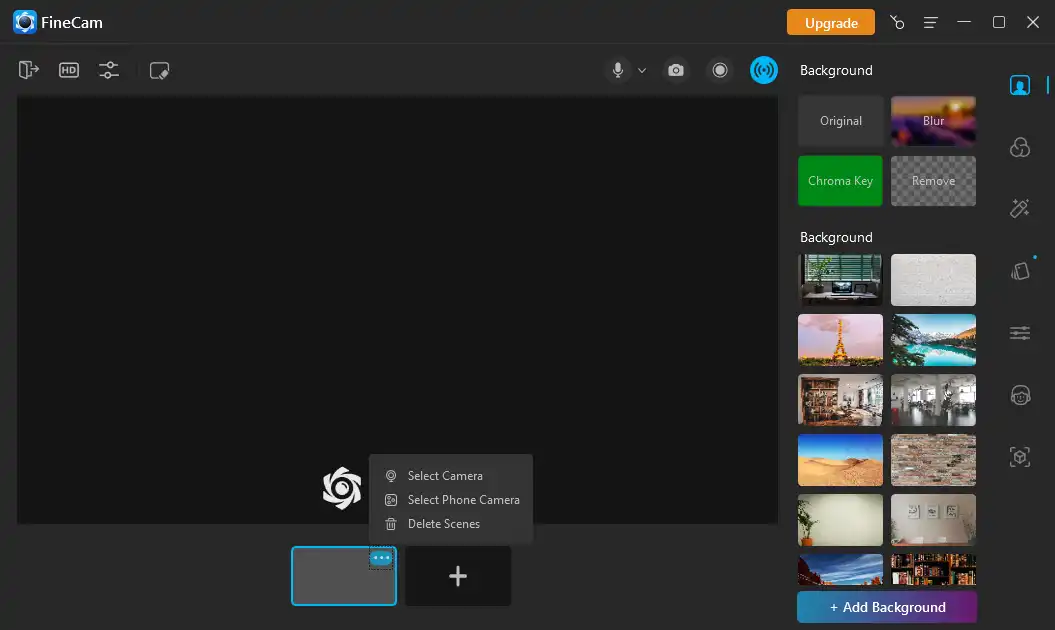
Step 2. Launch FineCam and click the + box at the bottom of the interface.
Click the blue three dots icon to select the camera you want to use.
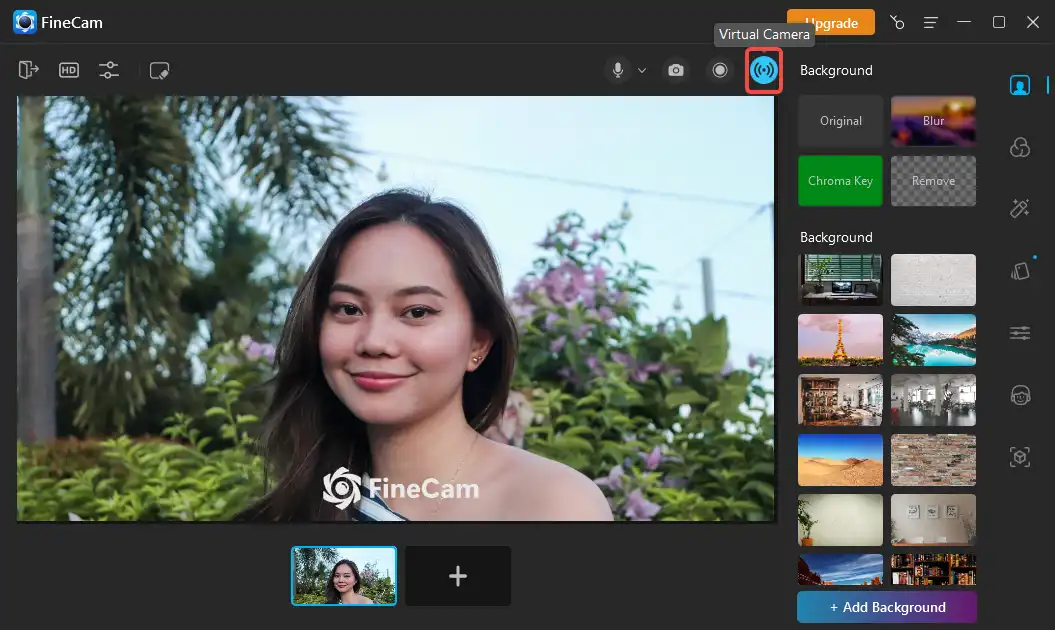
Step 3. After connecting the camera and adjusting the angle, click the blue Virtual Camera icon in the top right corner of the interface.
When the icon turns green, it means you have enabled the virtual camera feature.
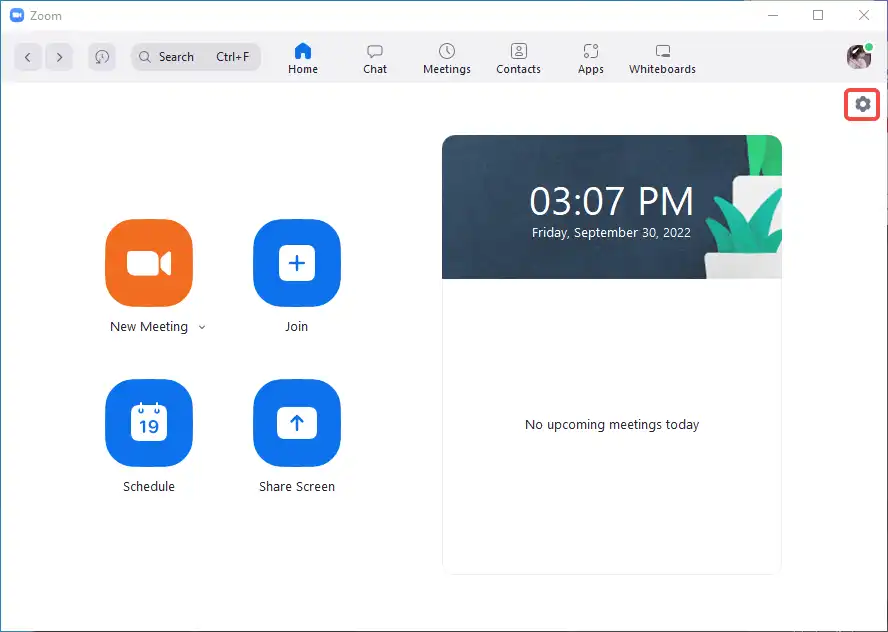
Step 4. Open Zoom on your computer and find the Settings gear in the upper right corner.
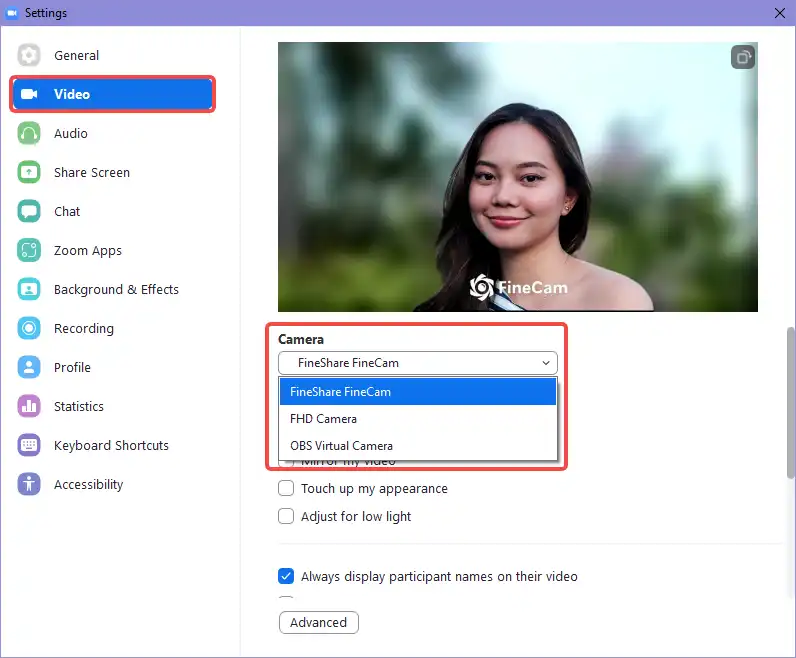
Step 5. Find the Video tab on the left side of the Settings window. Then select FineShare FineCam in the Camera list.
Related article: How to Add and Change Video Background in Zoom
How to Use OBS as a Virtual Camera for Zoom
We all know that OBS Studio can be used as a screen capturer and webcam recorder for video production and live streaming.
Do you know that this free open-source software can also be used directly as a virtual webcam for video chat Platforms like Zoom and Microsoft Teams without the need to install a virtual cam plugin?
Next, I will show you how to set up OBS virtual camera for Zoom.
Step 1. Download the latest version of OBS Studio from the official website.
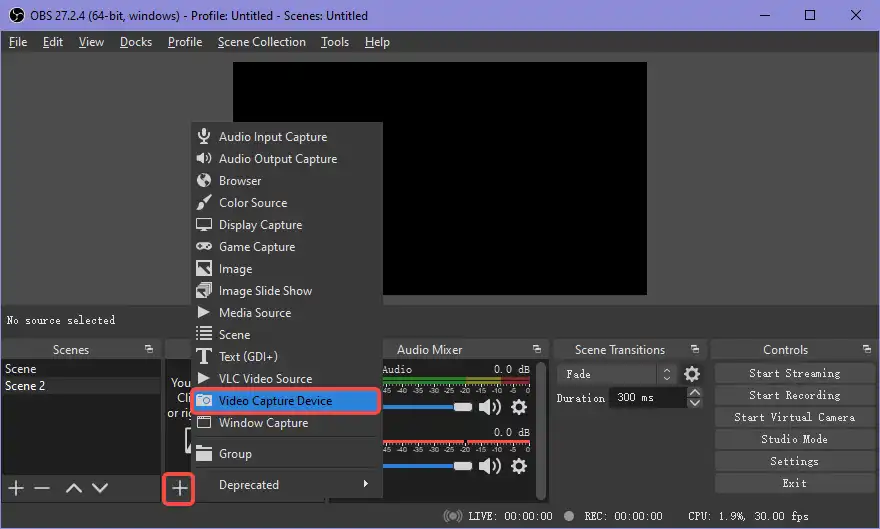
Step 2. Launch OBS, find the Source panel on the bottom of the main interface, and click the + icon in the bottom left corner.
Step 3. Select Video Capture Device in the drop-down menu and set the camera and microphone in the pop-up window. Then click OK to apply the camera.
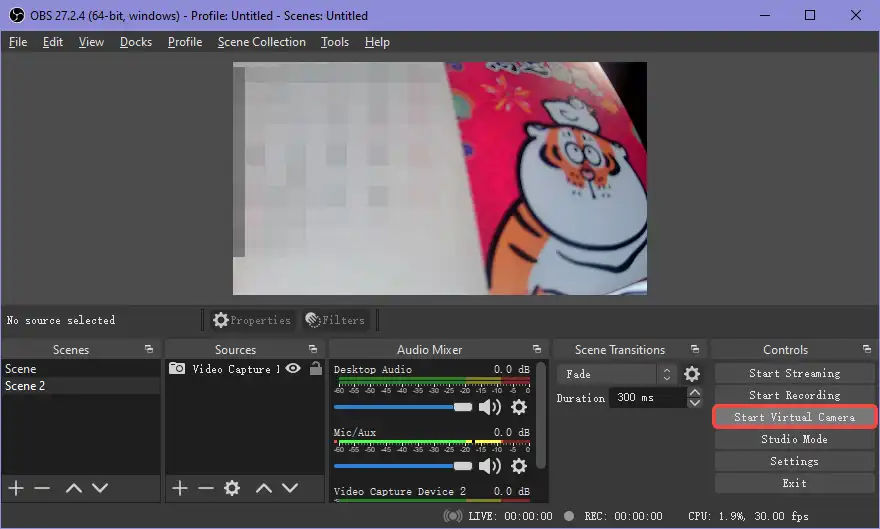
Step 4. Now you can see the footage captured by your camera. Go to the Controls panel at the bottom right corner and click Start Virtual Camera to enable OBS as a virtual camera source.
Step 5. Restart your Zoom and find the Settings gear in the upper right corner.
Step 6. Find the Video tab on the left side of the Settings window. Then select OBS Virtual Camera in the Camera list.
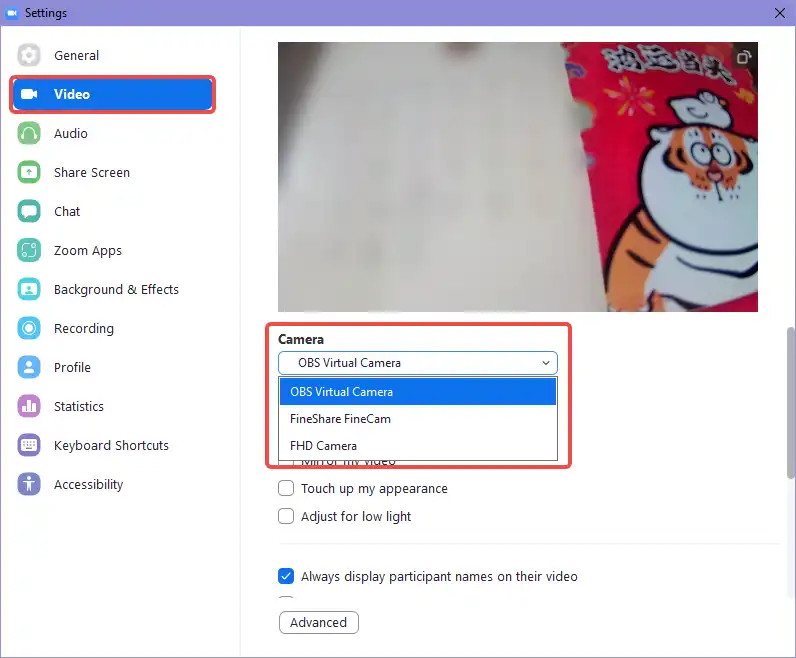
Step 7. Open a meeting and you will be able to see the video footage captured by OBS.
Can I set OBS as the virtual camera during a meeting?
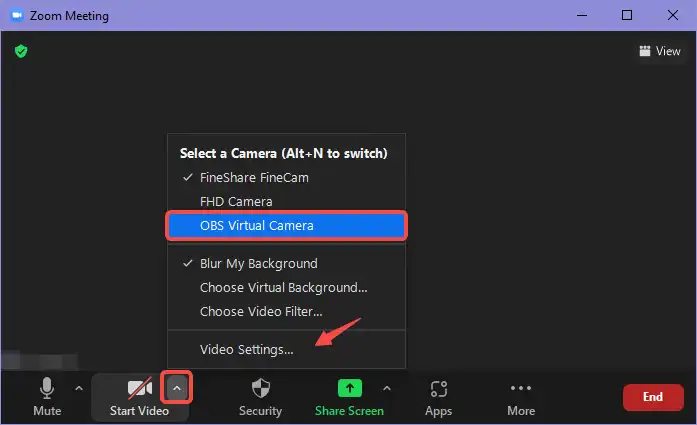
Of course, you can. Find Start Video in the bottom left corner of the conference window and click on the small up arrow next to it. Select OBS Virtual Camera as the camera.
Or you can click Video Settings and we will go to the settings window described in step 5, where you can make more adjustments to the video.
Conclusion
In this post, we introduce two free Zoom recommended webcams to you and tell you how to use a virtual camera for Zoom. Hope this article can help improve the video quality of your Zoom meetings.


