Do you want to ace your video meetings in Microsoft Teams? Do you want to avoid common pitfalls like poor camera quality, choppy audio, or laggy video? Do you want to make your video meetings more engaging and enjoyable?
In this article, we will show you how to test Microsoft Teams’ camera and improve your video quality before you join a video meeting.
How to Test Camera on Microsoft Teams Before a Meeting?
Before you join a Teams meeting, you can check how your camera works and how you appear on the screen by using the camera preview feature. This will help you adjust your lighting, angle, and background to make sure you look professional and confident.
To Test camera in Teams and access the camera preview, you can follow these steps.
Step 1: Launch the Microsoft Teams desktop app or web app.
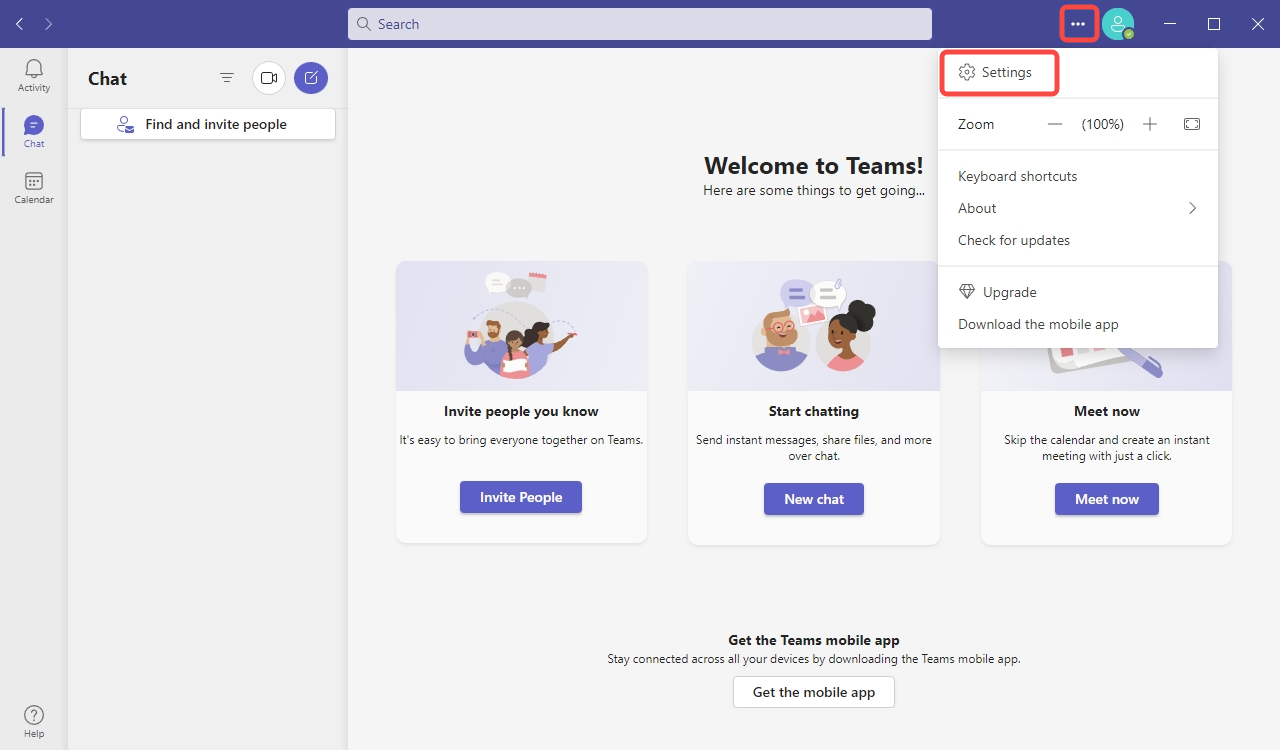
Step 2: Once you are logged in, click on the icon next to your profile picture at the top right corner of the screen.
Step 3: Go to Settings.
Step 4: Click on Devices. This section allows you to configure various audio and video settings for your meetings.
Step 5: Locate the Camera section, you will see a preview of your camera.
step 6: To test your camera, choose the appropriate camera from the available options. Then it will launch a preview window displaying the live video feed from your camera.
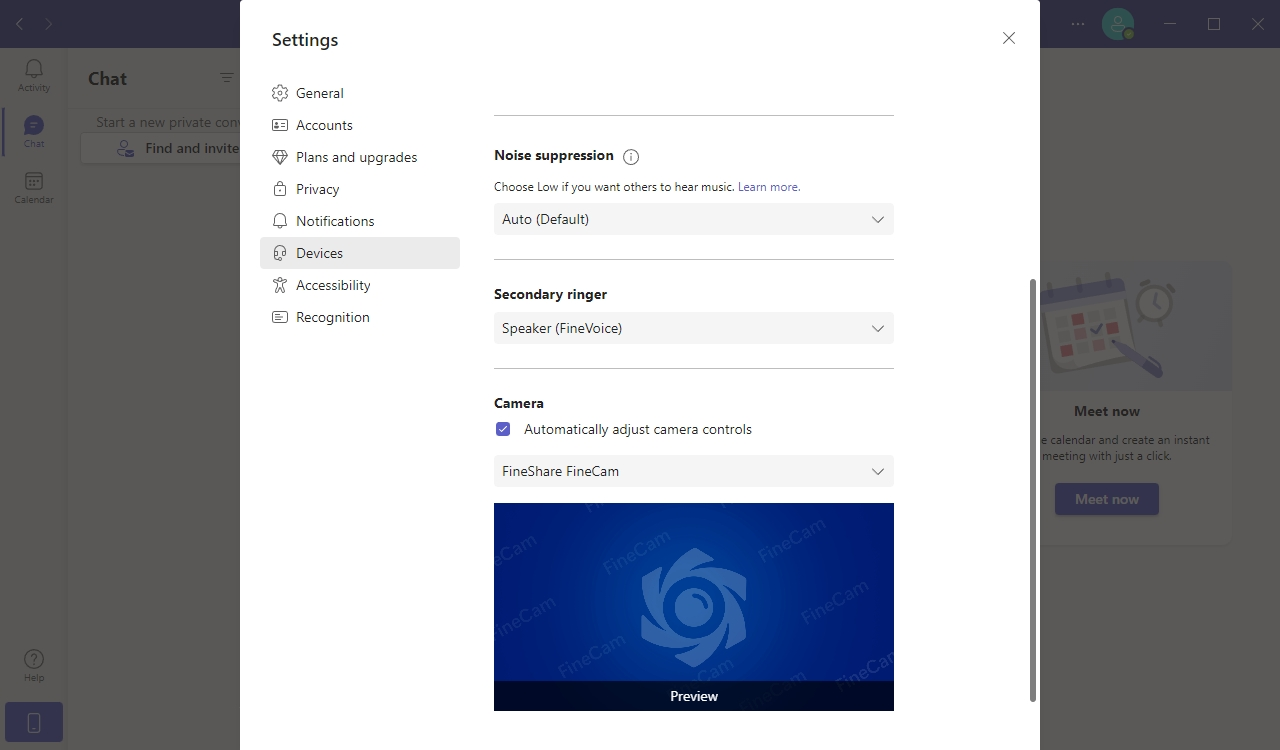
Step 7: In the camera preview window, carefully observe the video quality, clarity, and overall appearance.
You can also read: Zoom Camera Test: How to Check and Boost Your Video Quality.
How to Make a Test Meeting in Teams?
Another way to test your camera in Teams is to make a test call. This way, you can check your audio and video quality and make sure everything is working properly.
Here are the specific steps about how to make a Teams test call.
Step 1: Open the Microsoft Teams app.
Step 2: From the dropdown menu, select Settings>Devices.
Step 3: Under the Audio devices section, find Make a test call and click on it.
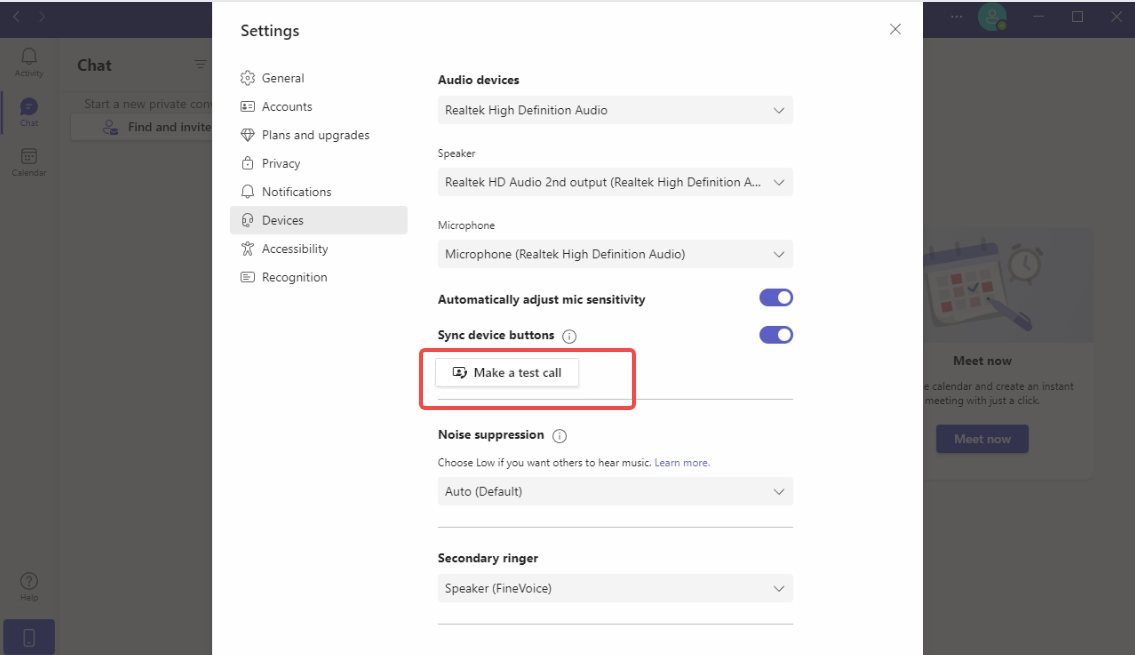
Step 4: Listen to the instructions given by the Test Call Bot and record a short message to check your audio and video quality.
Step 5: After you record the message, it will play it back to you so that you can hear and see yourself.
Step 6: The test call will end automatically after a few seconds and the test recording will be deleted immediately.
Related article: How to Blur Background in Teams for Better Video Meetings?
Troubleshooting Tips
While testing and optimizing your camera settings in Microsoft Teams, you might encounter certain issues or challenges. Here are some troubleshooting tips to help you address common problems and ensure a smooth video conferencing experience.
- Update Microsoft Teams
Ensure that you are using the latest version of Microsoft Teams. Updates often include bug fixes, performance improvements, and compatibility enhancements that can address camera-related issues.
- Update Camera Drivers
Outdated camera drivers can cause compatibility issues and affect video quality. Visit the manufacturer’s website or use your device’s automatic driver update feature to ensure you have installed the latest camera drivers.
- Check Internet Connection
An unstable Internet connection can lead to video quality issues, such as pixelation or freezing. Consider switching to a wired internet connection or moving closer to your Wi-Fi router for a stronger signal.
- Close Other Applications
Running multiple resource-intensive applications simultaneously can strain your device’s performance, impacting video quality. Close unnecessary applications and processes to free up system resources and ensure smoother video playback.
Related article: Teams Camera Not Working? 8 Effective Ways to Fix It.
Are you tired of looking dull in your Teams meetings? Do you wish you could use your phone as a webcam and show off its incredible camera quality? Then you need to get FineShare FineCam, the ultimate AI virtual camera software that can turn your smartphone into a professional webcam in Teams.
With FineCam, you can easily use your iPhone as a webcam in Teams or any other video conferencing software. You can choose from a variety of backgrounds provided by FineCam, such as office scenes, nature landscapes, abstract patterns, or even famous paintings.
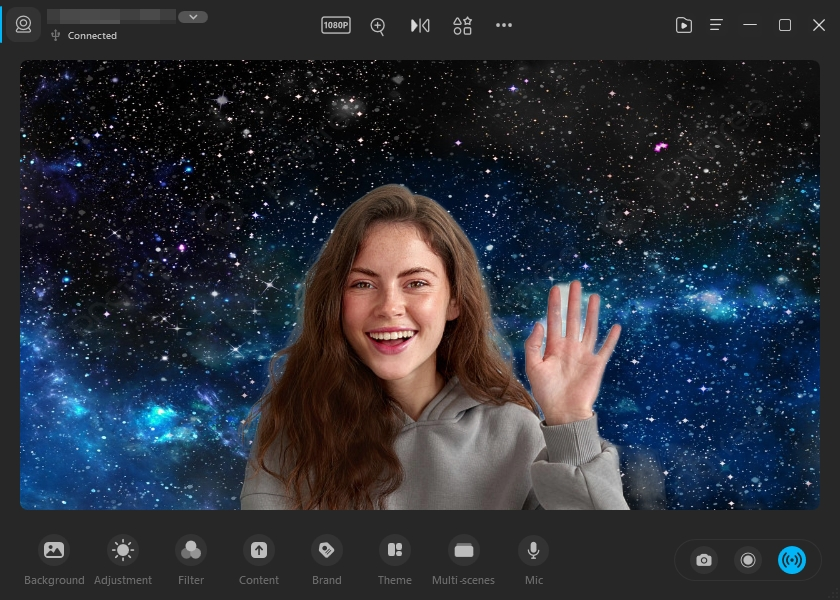
During your Teams meeting, you can seamlessly switch between different scenes. You can also record your Teams meetings and save them to your computer or cloud storage. You can adjust video brightness, enhance the vividness of colors in your video, smooth out skin imperfections, or add makeup effects.
Here is how you can use FineCam to turn your phone into a professional Microsoft Teams camera in just a few steps:
Step 1: Download and install FineCam on your computer and your phone.
Step 2: Launch FineCam on both devices.
Step 3: Connect your phone and computer to make sure they are paired.
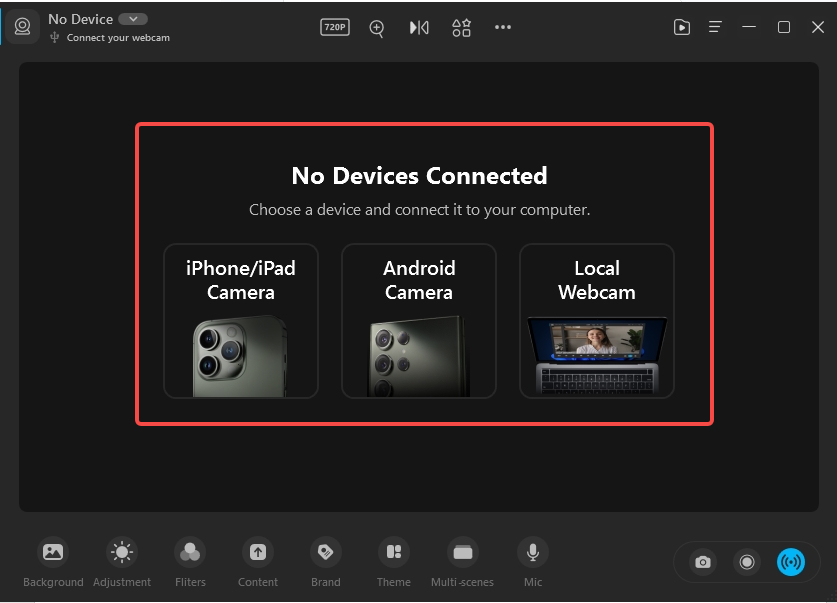
Step 4: Open Teams on your computer and go to Settings > Video.
Step 5: Select FineShare FineCam as your camera source.
Step 6: Position yourself in the frame of your phone and adjust the camera settings as needed.
Step 7: You can remove, blur, or change your webcam background to make a professional meeting.
Step 8: Enjoy your Teams meeting with high-quality video from your phone.
Conclusion
We hope this article helped you learn how to test your Microsoft Teams camera and improve your video quality in Teams. With these tips, you can make your video meetings shine and impress your colleagues and clients.


