Google Meet is a video call software with a wide user base worldwide. It supports Windows, Mac, and Linux operating systems, and is available in Android and iOS mobile versions.
To meet the high demand for video chat and to provide a better user experience, Google Meet has developed Visual Effects. This feature allows us to change the video background or use Google Meet filters to make our video calls easier and more fun.
(If you want to use your phone as an HD webcam for your Google Meet, you could download the free webcam software FineCam. It also provides cinematic filters to improve your lighting conditions and make you look better in the chat.)
Next, I’ll show you how to use filters on Google Meet for a computer and phone respectively. Please try to make sure your device and browser are the latest versions, otherwise, it may affect the effectiveness of the filters feature.
How to Use Filters on Google Meet [Desktop]
Filters for Google Meet were previously only available on iOS or Android mobile apps, but do you know that the web version of Google Meet now supports the use of face filters?
In this part, I will show you how to add filters on Google Meet on a desktop. You need to know that school or work accounts may not be able to use this feature, so please make sure you are using a Google personal account.
Use Google Meet Filters before a Video Chat
Step 1. Open meet.google.com to start a new meeting or join a meeting by entering a code or link.
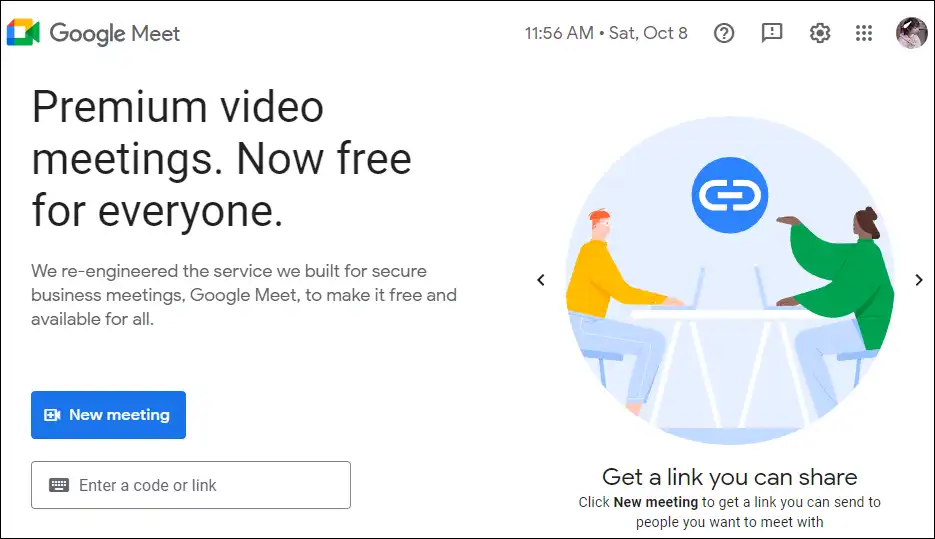
Google Meet website
Google Meet also provides a PWA version to install as you like.
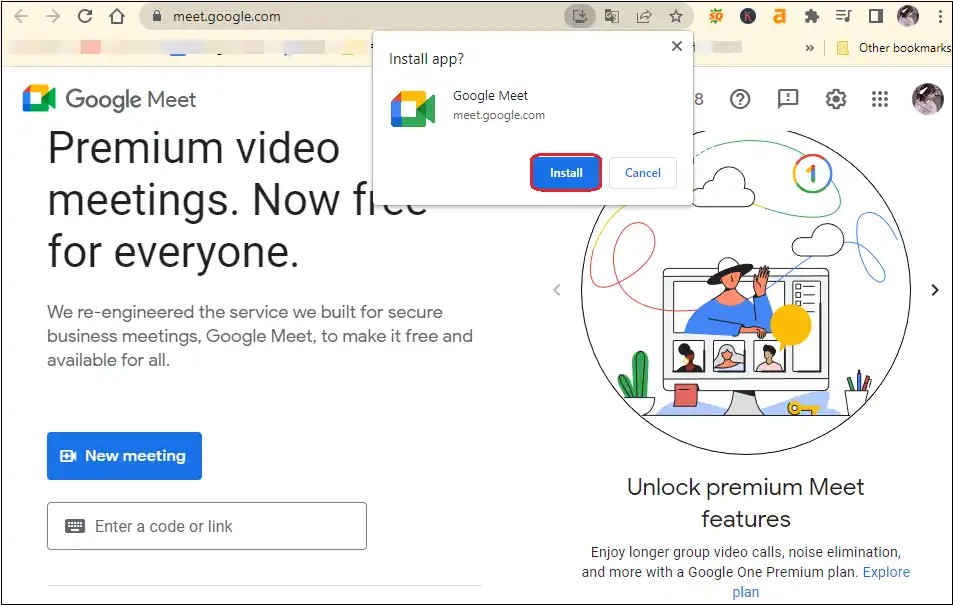
Google Meet PWA version to install
Step 2. On the Get ready window, you should check the camera and microphone you want to use first. Then, click the Effects tab and scroll down to find the Filters section below.
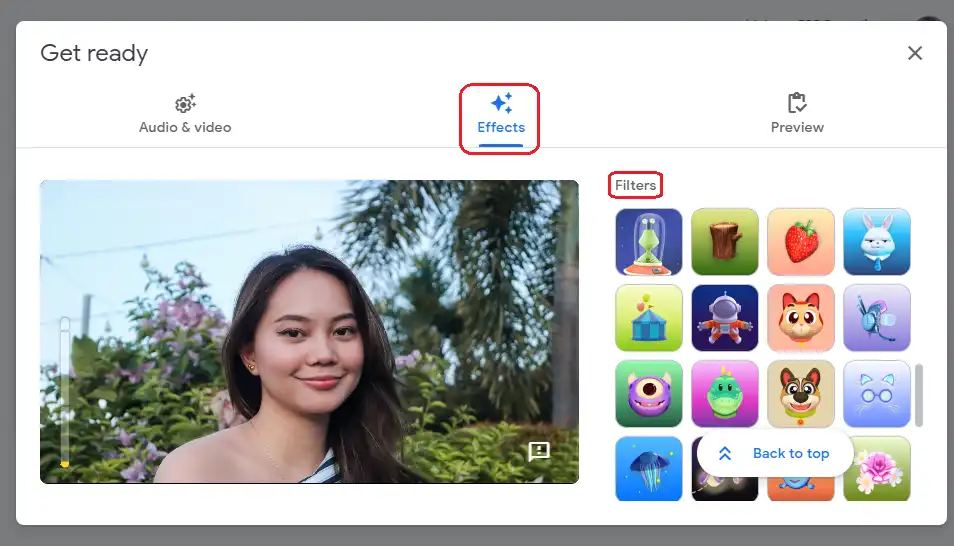
Google Meet visual effects
Step 3. Click the filter you want to apply, and after loading, you can see the preview on the left. After deciding the effects, close this window.
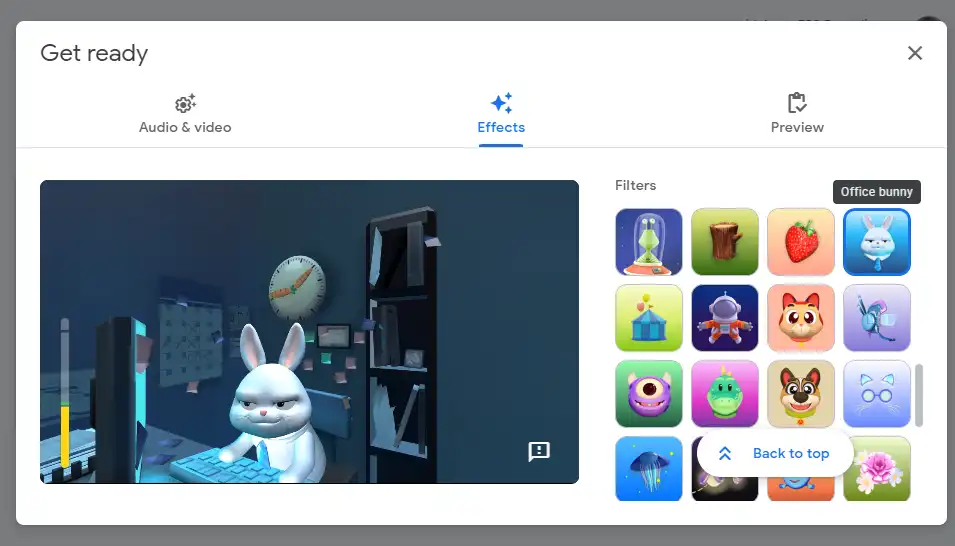
choose filters on Google Meet
Step 4. Click Join now and you can see the mask on your face during the call. But after finishing the call, the face filter will be removed, so you must select filters each time.
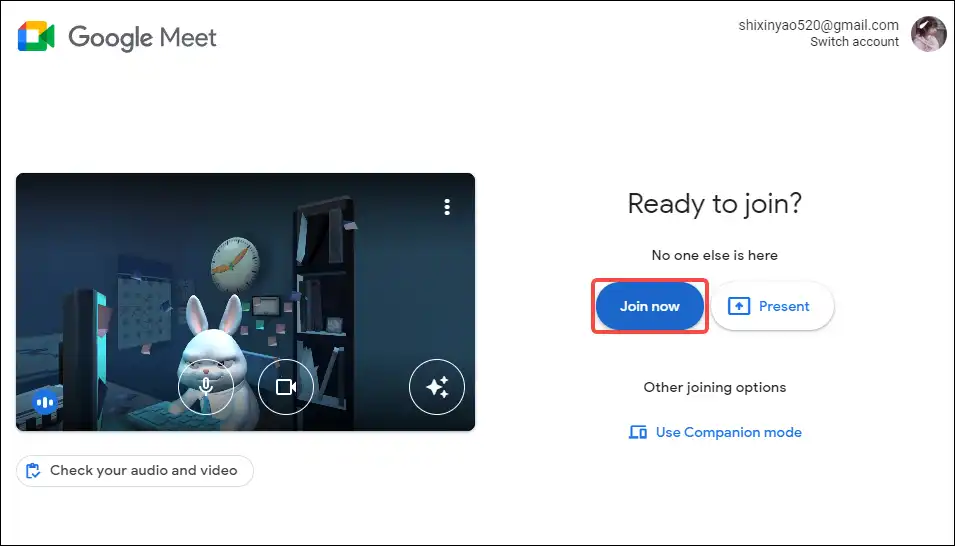
join a Google meeting
Use Google Meet Filters during a Video Chat
Step 1. Make sure you have turned on the camera.

turn on the camera on Google Meet
You could check the below two pictures to select the camera and mic you want to use. Click the three dots icon below your image to find Settings.
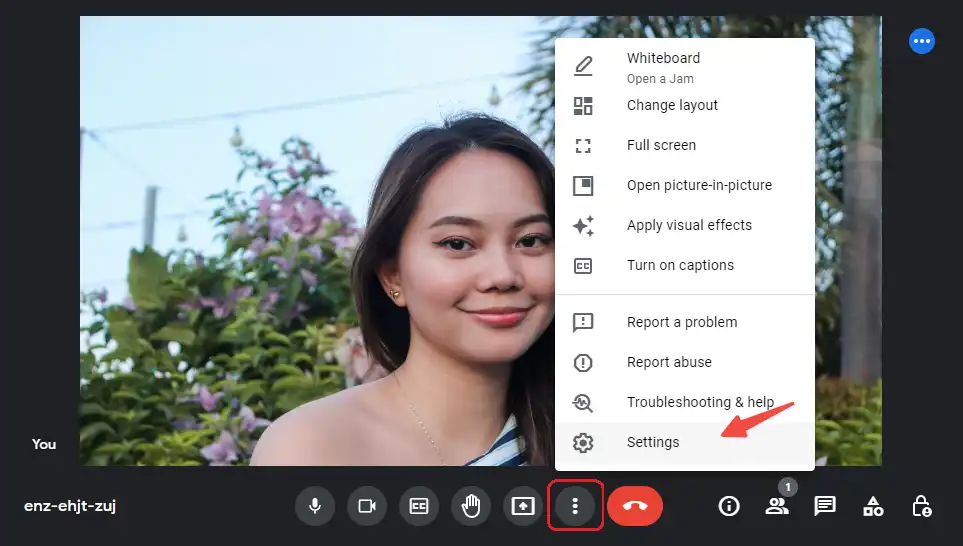
Google Meet Settings
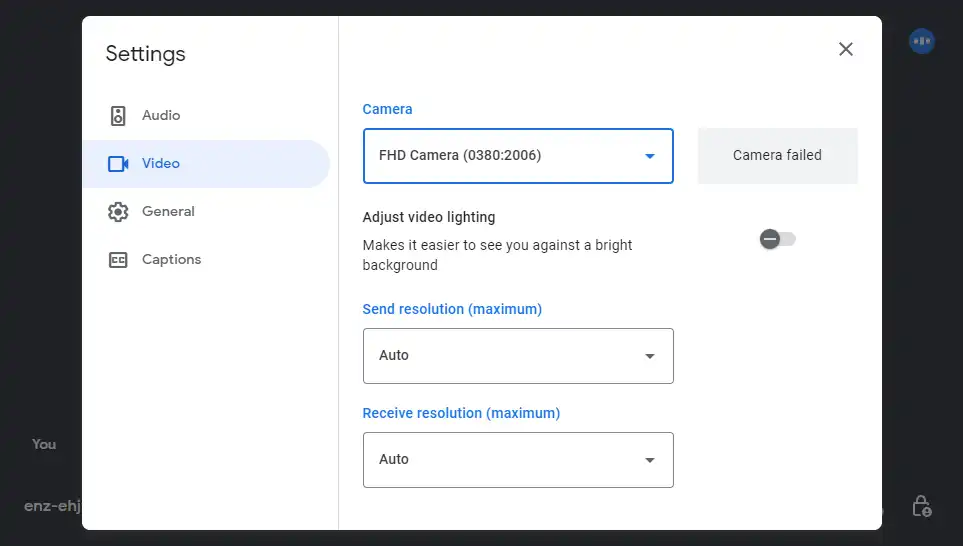
check video settings
Step 2. Find the Apply visual effects options also in the More Options button.
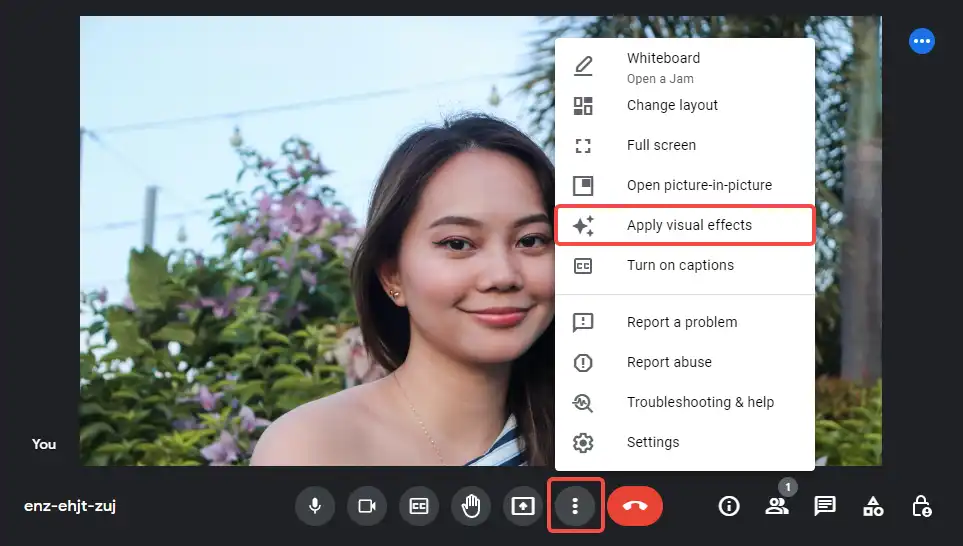
apply visual effects for Google Meet
Step 3. The visual effects will appear on the right of your image. Scroll down to the Filters section.
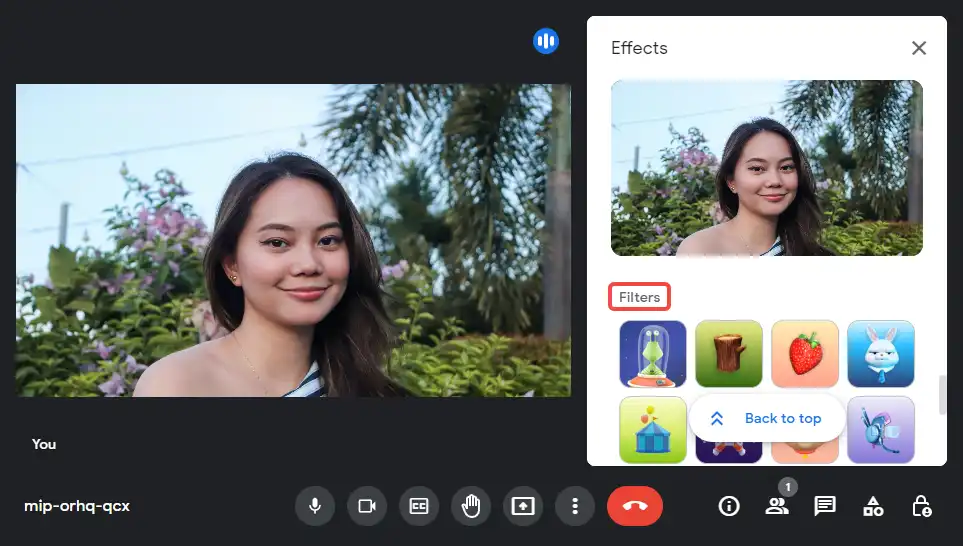
find Google Meet filters during a meeting
Step 4. Click the filters for Google Meet and choose the one you like. You can see the preview. After deciding the one you want, close the window and you can see it has been activated for this call.
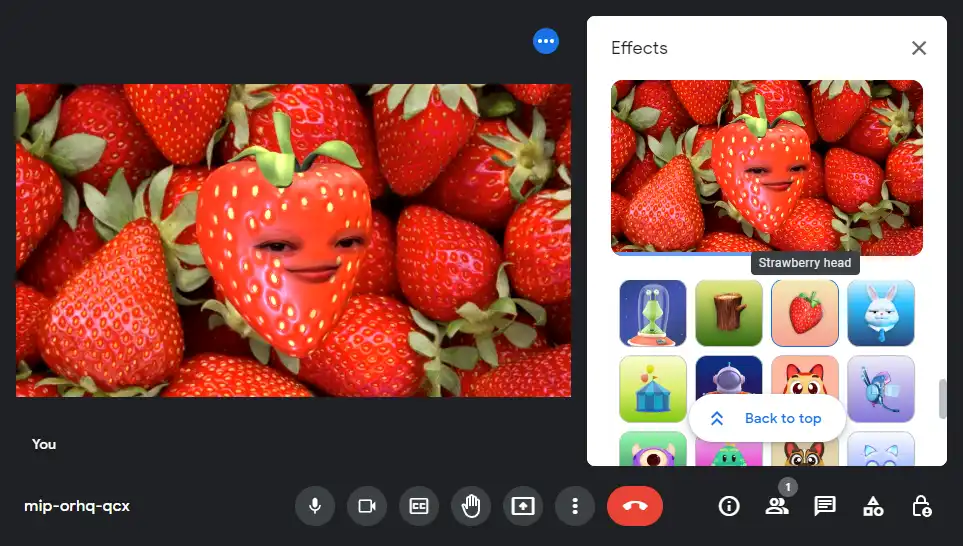
apply a funny filter
You may be interested in How to Blur Background in Google Meet.
How to Use Filters for Google Meet [Phone & Tablet]
Google Meet has been supporting face filters on Apple and Android mobile devices for a long time already.
Just in case, I’ll show you the specific steps on how to use filters in the Google Meet app on a phone or tablet. You can get a fun mask in the chat with just a few simple clicks.
Step 1. Install and open the Google Meet app on your mobile device.
Step 2. Go to the meeting preparation page by pasting a meeting link. Go to Visual Effects by finding the glowing stars icon at the bottom of your image.
Step 3. Swipe to the right to find the Filters option on the far right and click it.
Step 4. Find the one you like from the various face filters provided by Google Meet and click Done at the bottom right.
Step 5. You will be taken back to the chat preparation page and click Join to enter the video chat.
You can also change or remove the filter you applied during a video chat by clicking the Visual Effects button under your video.
Conclusion
This post tells you how to use funny Google Meet filters on a desktop or mobile device.
You could also seek help from virtual webcam software such as Snapchat. A Chrome extension like Visual Effects for Google Meet could also be useful. Hope this post can help you get more fun when video chatting with your family and friends.

