Ever been in a super important business meeting when you’re sharing your findings, and suddenly your colleagues tell you that they can’t hear you? You mute and unmute yourself, and unplug your headphones, but nothing works. A good Windows microphone testing beforehand would have prevented this problem in the first place.
Related Article: Top 4 Webcam Viewers to Test Your Camera on Windows & Mac
Laptops include a built-in microphone that can record voice during a conference call. If your mic is not working properly, your speech becomes distorted, or even if it is delivered, it has a robotic quality. In such cases, you must test the microphone in Windows 10.
This article will look at how to check microphones in windows 11 and 10. We go over a step-by-step procedure on how you can test a Windows microphone with improved sound quality. Let’s look in detail.
Method 1. How to check your Microphone in Windows 10/11
If a microphone in Windows is unable to convey the voice properly, you can test the device with the Windows built-in feature. This allows you to test your voice before connecting to any video call and avoiding possible embarrassment. Let’s look at how you can check the microphone in Windows 11 and 10. The steps are listed below:
Step 1. For Windows 11, go to the notification area in the lower right corner of the taskbar. Click on the speaker icon and Open Sound Settings.

Check Microphone in Windows 11 – Step 1
Step 2. Open the sound page. Go to the Input section, and click on the arrow next to the Microphone option.
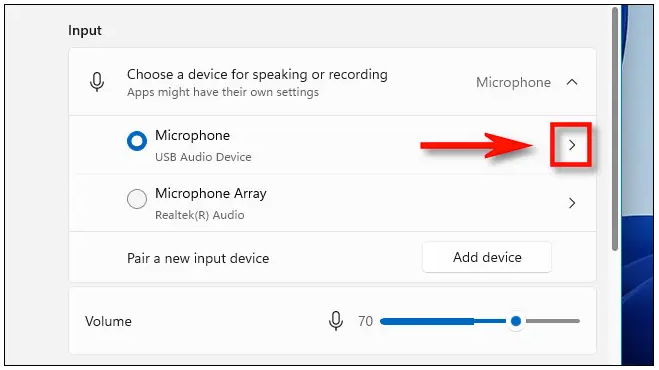
Check Microphone in Windows 11 – Step 2
Step 3. Now, go to Input Settings and scroll down to the “Test Your Microphone” section. Click the “Start Test” button and speak to test the microphone.
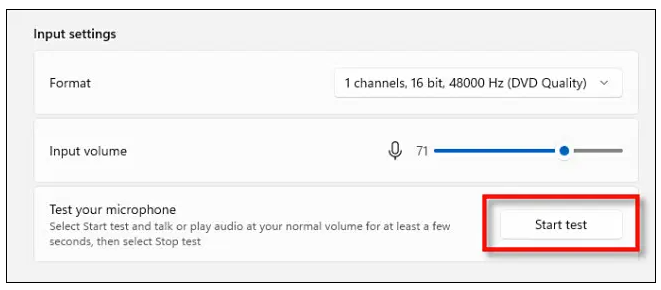
Check Microphone in Windows 11 – Step 3
If everything is fine, you can see the input volume blue bar going on the right side when you talk.
Step 4. Once the test is complete, you can see the test result right next to the Start Test option.
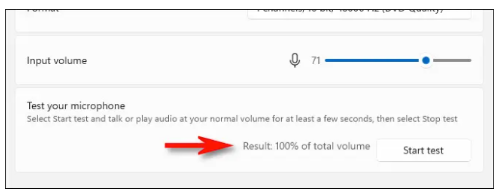
Check Microphone in Windows 11 – Step 4
Ideally, the test result should be above 75% for normal voice. If the input volume is 100%, the sound will be distorted. Lastly, if the sound is less than 50%, then it is too quiet.
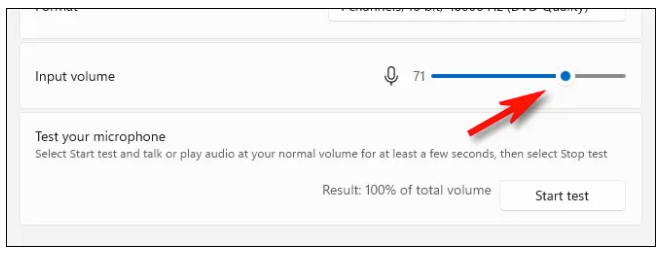
Check Microphone in Windows 11 – Step 5
If you’re a Windows 10 user, you can access the same Sound Settings via Control Panel and test your microphone.
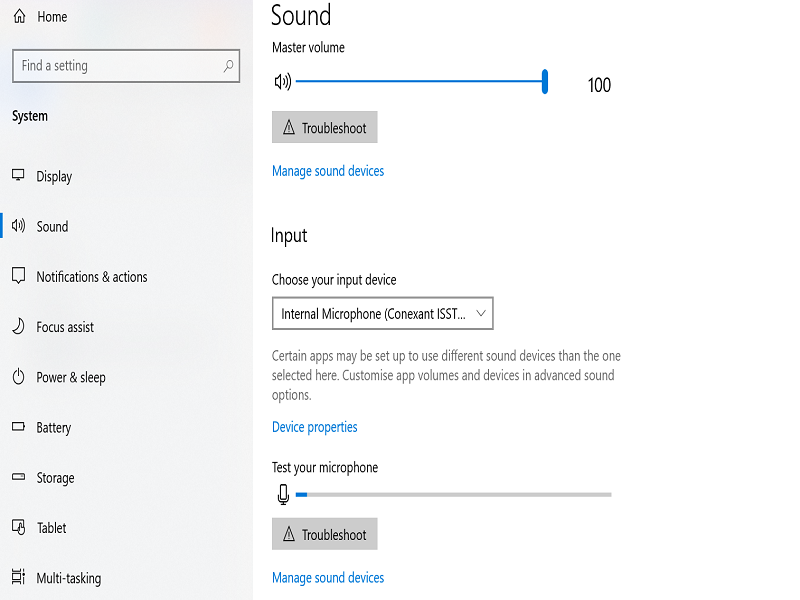
Check Microphone in Windows 10
Method 2. Test your Microphone using Video Chat App
The second method to test the microphone is by using any video chat app. Here, we’re using Skype. To begin testing your Microphone, the steps are listed below.
Step 1. Open Skype and click on the three dots to open Settings.

Test Microphone Using Video Chat App Skype – Step 1
Step 2. Click on Audio & Video > Make a Free Test Call.
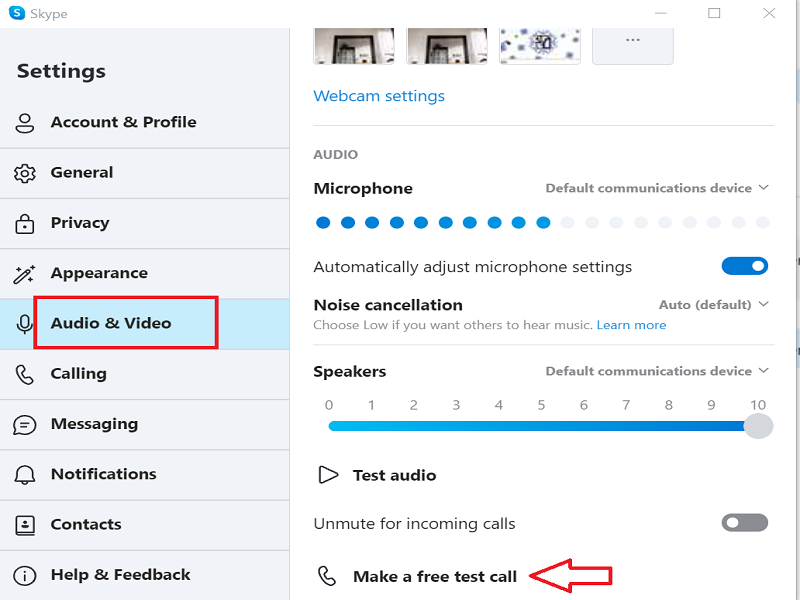
Test Microphone Using Video Chat App Skype – Step 2
It will be a test call, and a female voice will introduce the service for 10 seconds. After the beeping, start speaking. It will record your voice for 10 seconds. After 10 seconds, It will play your recorded voice back.
If you hear your voice properly, it means that you’re ready to make a voice call. If you don’t hear your voice, then there is still some issue with your Microphone.
Method 3. How to Test Your Microphone on PC using Mic Check
The third and easiest method to test a mic in Windows 10 or 11 is by Mic Check. It is a free online tool that you can use easily.
The steps are listed below:
Step 1. Open Mic Check and click on Allow to grant microphone permissions.
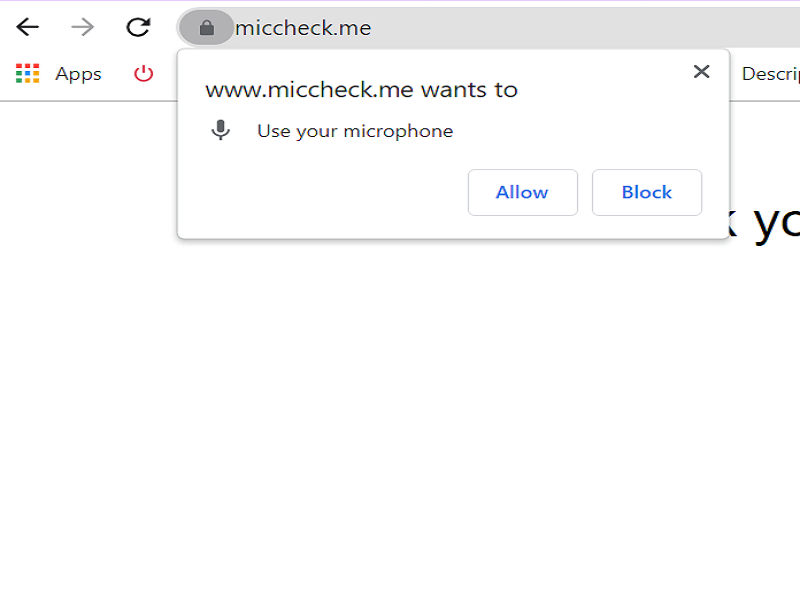
Test Microphone Using Mic Check – Step 1
Step 2. Click on Record and read the sentence written below. “Life is like a box of chocolates; you never know what you’re gonna get.”

Test Microphone Using Mic Check – Step 2
Step 3. Once you are done speaking, click on Stop.
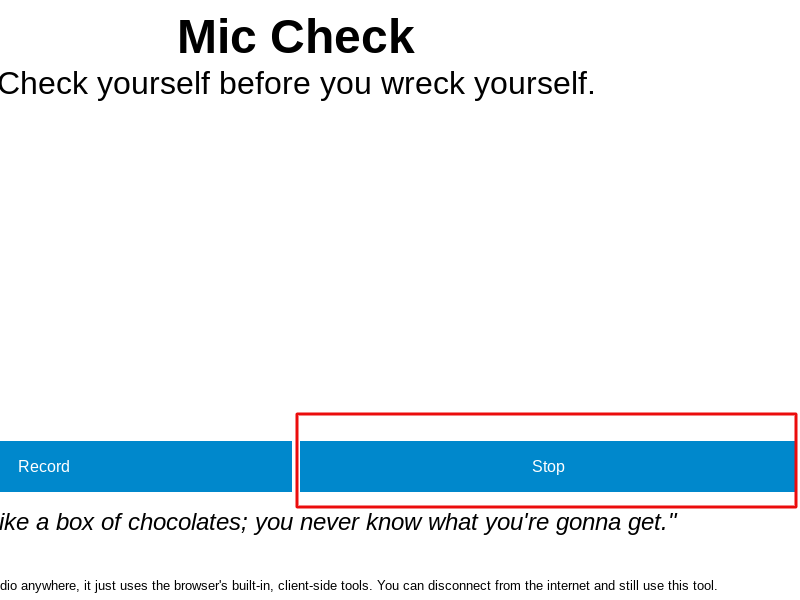
Test Microphone Using Mic Check – Step 3
Step 4. Play the clip to hear the recorded voice.
Conclusion
If you have frequent business meetings, online classes, or even record podcasts in your free time, take our advice and test the microphone beforehand to avoid any problems. We’ve described 3 methods to check the microphone in Windows 11 or 10. These methods are excellent for determining whether your microphone is damaged or whether you simply have internet connectivity troubles generating distorted sound. Select any method and easily test the Windows microphone.


