Your MacBook’s camera (FaceTime camera) is inside the monitor’s frame. It’s usually connected via USB as a UVC or USB Video Class device. The camera hardware can stream video data continuously to its destination port through this connection.
Both software and hardware problems can occur with this kind of architecture. However, following the steps in this tutorial, you can resolve them quickly. Knowing the source of the problem is an essential part of the troubleshooting process. Here we’ll guide you on how to find your FaceTime camera problem and fix it in an organized way.
5 Tips to Fix “There is No Connected Camera” on Mac
Tip 1: Ensure that your FaceTime camera connects by running it in an app.
First, know if your Macbook camera is connected by connecting it with an app. Since you have a Macbook, you should have FaceTime or Photo Booth installed. Go ahead and open any of these apps; it should automatically turn on your FaceTime camera.
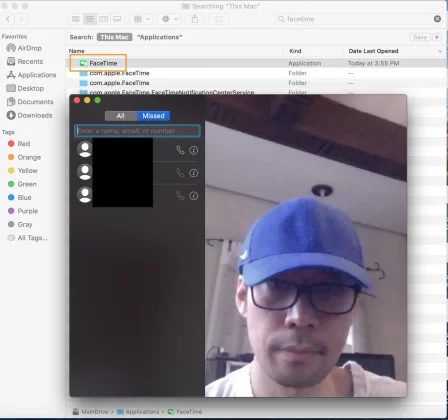
Notice that a green LED lights up beside your Mac camera as it functions. This process shows the user that the camera is running and is ready to take pictures. Because of that, avoid candid or awkward poses while this green LED turns on.
If this does not solve your issue continue with the next tip below.
Tip 2: Ensure that your app has permission to access the Mac camera.
The macOS, much like Windows, needs permission to access necessary hardware in your system, including your webcam. Without permissions, you’ll have a vulnerable system open to hackers. You don’t want to become prey to these outside forces, so allowing only trusted apps to open your webcam is wise.
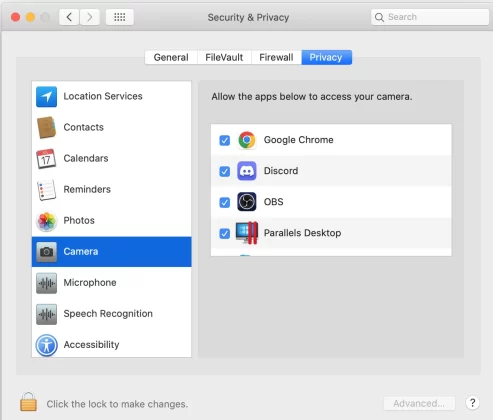
To do this, open System Preferences, then go to the Privacy tab. Select Camera on the left-hand side, then allow only trusted apps on the right-hand side to access your camera. This procedure will ensure your app can connect to your camera.
Tip 3: Ensure that only one app accesses the camera at a time.
Again, much like Windows OS, macOS shares its hardware resources with several applications running simultaneously. However, not all resources can run with applications simultaneously, including your webcam. You’ll notice that you might have to close one app or disable its camera function so that another app can use this resource. The camera’s green LED indicator helps determine which apps use your camera as you are using it. Note that the power-saving function can disable itself and turn off the LED indicator if your app is suspended and only running in the background.
Tip 4: Check your Macbook if it can access Mac camera hardware.
If you’ve tried to access the Mac camera through software, but it’s still not connected, you should check System Information. Like Windows, macOS has its hardware information neatly organized in its System Information. You’ll know which hardware resources are available by accessing this tabularized data. These data include Your Mac camera’s camera hardware. You should see something similar below; otherwise, your camera’s hardware might not function properly, or it’s not connected to your motherboard.
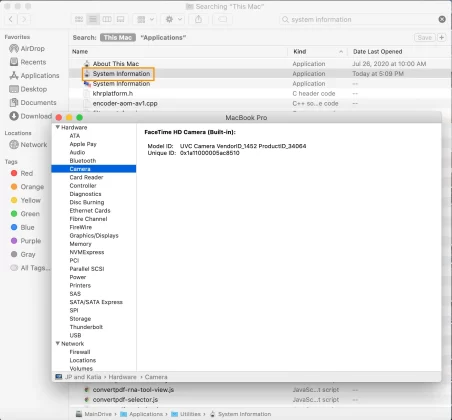
Tip 5: Check if your Mac camera connects properly to its slot.
This tip is for Computer Technicians. If your Mac camera does not show up properly in the System Information, this could be a sign of a hardware issue. If you’re a hardware guy, you’ll want to open up your Mac using some tools in this scenario. Additionally, this will be your next step if there are hard-to-resolve issues not corrected by software.
The camera is connected through a serial connector since it’s a USB device. Find this connector and make sure it’s snug and fits well. If you’re not a hardware guy, proceed to the next tip.
Tip 6: If everything fails, contact customer support.
Calling customer support is your final option with all hard-to-troubleshoot computer-related issues. This procedure ensures guidelines are followed correctly and have experienced technicians troubleshoot your camera.
Bonus Tip: Use iPhone as a replacement for your Mac’s built-in Camera
Another area to explore is using your iPhone to replace your MacBook’s camera. This procedure is a practical solution if you can’t fix the FaceTime camera and have rendered it useless. Additionally, this process acts as an extension of your camera. You can have multiple iPhones as webcams as setup. The setup will make your video presentations more meaningful and easier to follow.
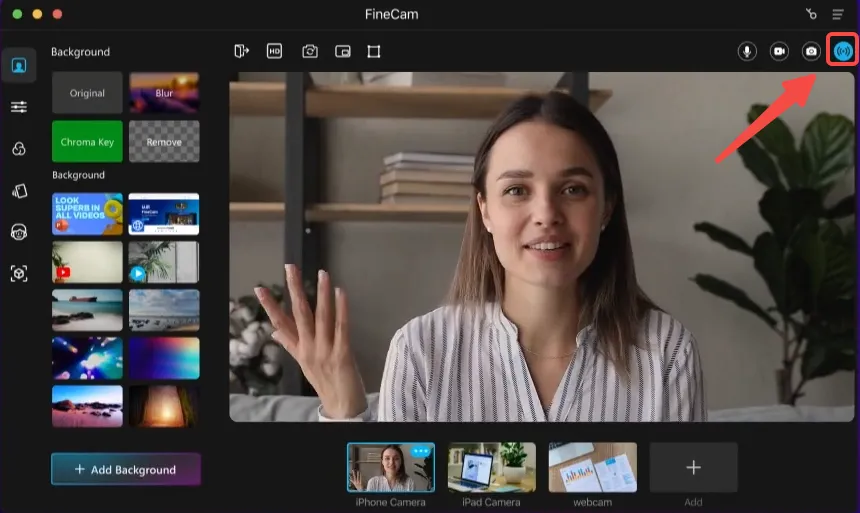
Step 1. Download the FineCam app both on your iPhone, and then download its Mac client.
Step 2. Open FineCam on your iPhone and Mac and connect them. You can choose any video capture device, including your iPhone, as a camera source.
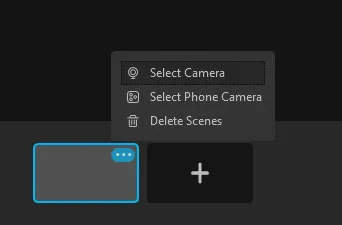
Step 3. Now click on the Virtual Camera button below to enable your iPhone to be a camera source for virtually any video meeting or presentation platform.
Conclusion
These steps fix the ‘There is no connected camera’ on the Macbook issue. With this, you should be able to troubleshoot and fix any problem related to your Mac’s built-in camera.

