Video calling has emerged as a crucial form of communication in the connected world of today. Whether it’s for virtual meetings, catching up with loved ones, or collaborating with colleagues, platforms like Skype have become our go-to choice.
But as soon as you start the call, you realize that your Skype camera is not working. Don’t worry! We’ve got you covered. In this article, we’ll reveal 7 tried-and-true solutions that will revive your camera and have you back in the visual spotlight.
Solution 1: Check Your Camera Settings
The first thing you should do is check your camera settings on Skype. Make sure that you have selected the correct camera device and that it is enabled. You might occasionally have chosen the incorrect device or unintentionally modified your camera’s settings.
To check and adjust your camera settings on Skype, you can follow these steps.
Step 1: Open Skype and click on the three-dot menu icon at the top left corner.
Step 2: Then you should choose Settings.
Step 3: Click on Audio & Video from the left sidebar.
Step 4: Under Camera, choose the camera device that you want to use from the drop-down list.
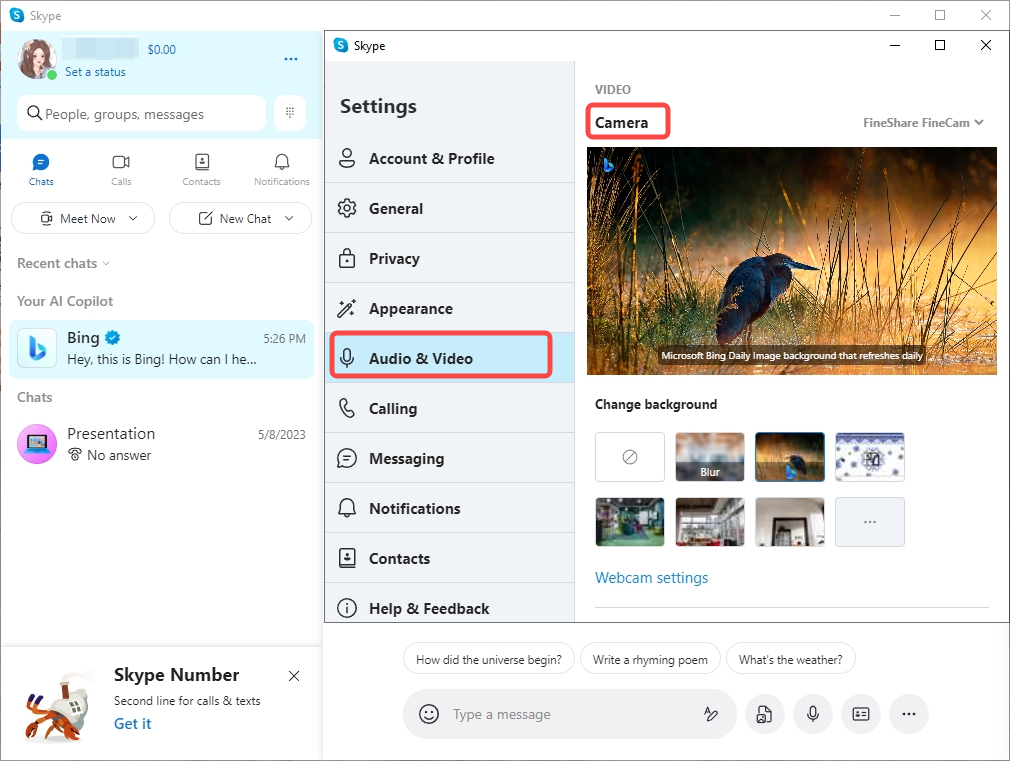
Step 5: Make sure that the toggle switch next to the Camera is turned on. Clicking on it will activate it if it’s off.
Step 6: You should see a preview of your camera feed on the right side of the screen.
If you don’t see anything or if the image is distorted, try adjusting the brightness, contrast, and other settings by clicking on the gear icon next to the Camera.
Don’t miss: Teams Camera Not Working? 8 Effective Ways to Fix It.
Solution 2: Allow Skype to access your camera
Another reason why your camera may not work on Skype is because Skype doesn’t have permission to access it. As a result, you should make sure that Skype has the necessary permissions to access your camera.
To allow Skype to use your camera in privacy settings, follow these steps:
Step 1: Open Settings on your device. You can usually find it in the Start menu or by searching for Settings in the search bar.
Step 2: In the Settings menu, look for the Privacy option and click on it.
Step 3: Locate and click on Camera in the left sidebar. This will display the camera settings on the right side of the window.
Step 4: Enable the toggle switch Allow apps to access your camera.
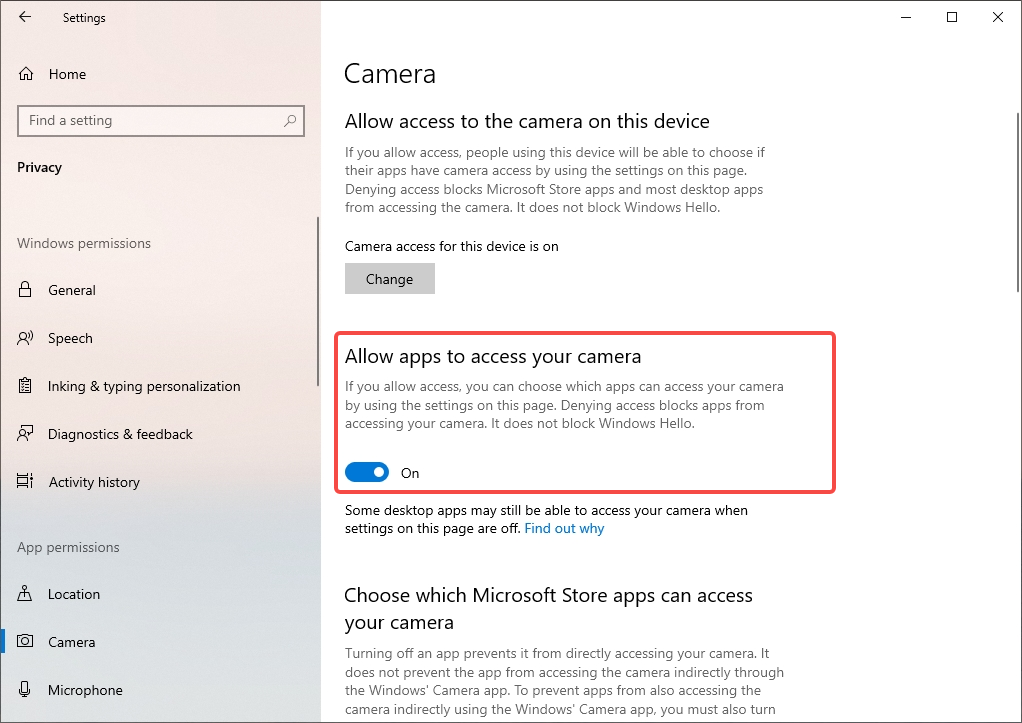
Step 5: Navigate to the Allow desktop apps to access your camera. Here, you can see a list of apps that have requested access to your camera.
Step 6: Find Skype in the list and make sure the toggle switch next to it is turned on.
Step 7: Relaunch Skype to see if your camera can work properly.
Related article: Zoom Camera Not Working? 7 Effective Ways to Fix It.
Solution 3: Update Skype
One of the most common reasons why your camera not working on Skype is because your Skype app is outdated and incompatible with your webcam.
So you can visit the Skype website or your app store to check for updates.
After you update, you can relaunch Skype to see if the camera issue has been resolved.

Solution 4: Update Your Camera Driver
Your camera driver is like the bridge between your computer and your camera device. It helps them communicate and work together smoothly. However, sometimes this bridge can get old or broken, and cause problems.
To fix the camera on Skype not working issue, you need to follow these simple steps.
Step 1: Press the Windows + X keys on your keyboard and select Device Manager from the menu that appears.
Step 2: Expand the Cameras category and right-click on your camera device.
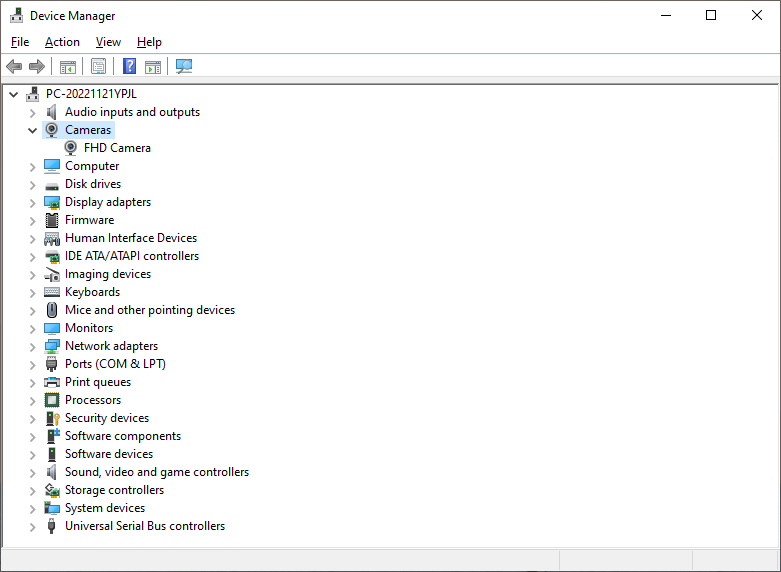
Step 3: From the context menu, choose Update Driver.
Step 4: Choose Search automatically for drivers and wait for Windows to find and install the latest driver for your camera device. You may need to connect to the internet for this process.

Step 5: Restart your computer and check if your camera works on Skype.
You can also read 6 Solutions to Fix Continuity Camera Not Working on Your iPhone.
Solution 5: Restart Your Computer
The easiest solution is the most effective one. A quick restart can solve many issues. And you can also close all the unnecessary programs that are running in the background and hogging your camera or other resources. This way, you can clear some memory and CPU usage and fix any conflicts or issues that may be stopping your camera from working in Skype.
Solution 6: Uninstall and Reinstall Skype
Sometimes, the best way to fix a problem is to start over. This applies to Skype as well. If none of the previous solutions work, you may need to give Skype a fresh start by uninstalling and reinstalling it.
This can help you get rid of any corrupted or missing files that may cause your camera not working problem. It can also help you get the latest version of Skype that may have fixed some bugs or improved some features.
To reinstall Skype, follow these steps:
Step 1: Press the Windows + R keys on your keyboard to open the Run dialog box.
Step 2: Type appwiz.cpl and press OK to open the Programs and Features window.
Step 3: Find Skype in the list of installed programs and right-click on it.
Step 4: Select Uninstall from the context menu and follow the on-screen instructions to complete the process.
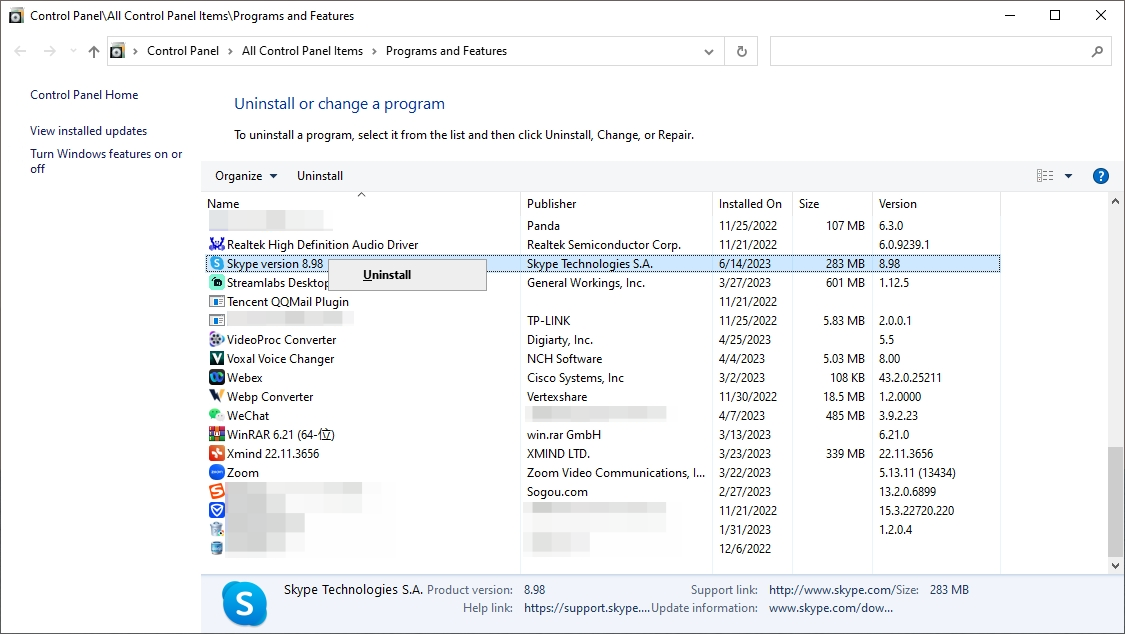
Step 5: Go to Skype’s official website and download the latest version of Skype for your computer.
Step 6: Run the installer and follow the on-screen instructions to install Skype.
Step 7: Open Skype and check if your camera works.
Solution 7: Use iPhone as Webcam for Skype with FineCam
Do you want to enjoy high-definition and wireless video quality on your computer? If you don’t have a webcam or you’re not satisfied with your webcam quality, you can use your iPhone as a webcam for Skype with FineCam.
FineCam is an AI virtual camera software that can turn your iPhone into an HD webcam for your computer. You can use your iPhone camera to make video calls on Skype and other platforms with wireless connectivity and multiple angles. You can remove, blur, and change your backgrounds that suit your mood, such as office, outdoor, nature and space, and many more.
To use your iPhone as a webcam for Skype with FineCam, you need to follow these steps.
Step 1: On your iPhone or iPad, download the FineCam Webcam app from the App Store. Launch it after installing it on your iPhone.
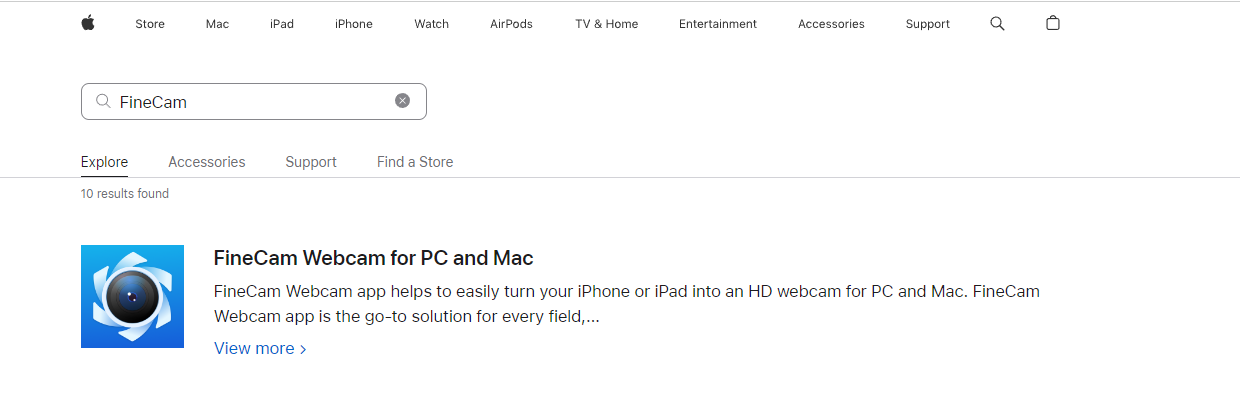
Step 2: Download and install FineCam on your computer.
Step 3: Send the connection request from your computer to your iPhone. Then connect them through a USB cable or the same Wi-Fi network.
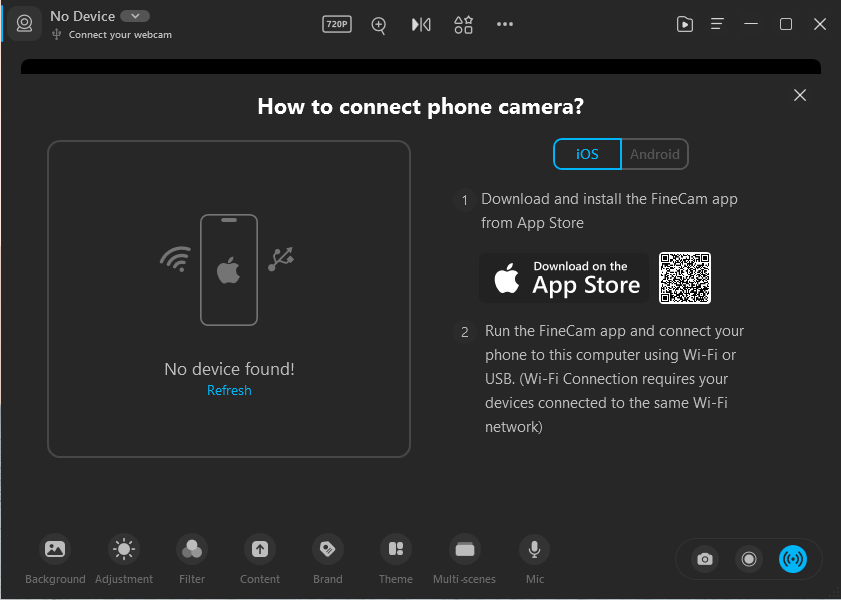
Step 4: Allow the connection request to pop up. Then you can see the connected device and the power level of your iPhone in the top left corner.
Step 5: Open the Virtual Camera button at the bottom right of the FineCam desktop application.
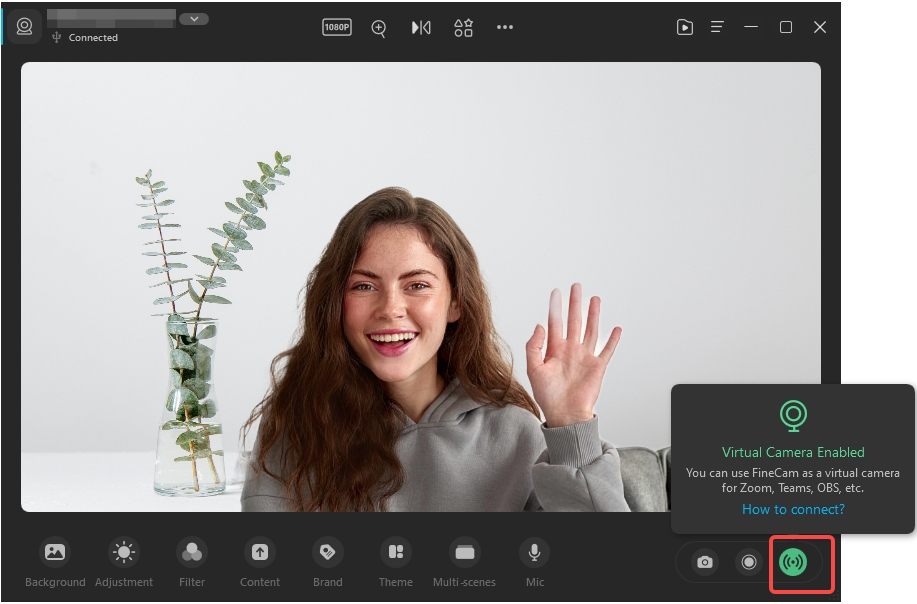
Step 6: Open Skype and log in to your account.
Step 7: Select FineCam as a video source on Skype and start your video call.
You may also want to know: 7 Methods to Fix Discord Camera Not Working.
Conclusion
We hope you found this article to be both educational and helpful. If you try these 7 effective solutions, please share them with your friends and family who may also be facing Skype Camera Not Working problems.
Here we recommend FineCam as the ultimate solution for anyone who wants to stand out on Skype and captivate their audience. So don’t miss this opportunity to upgrade your video experience with FineCam. Download it today and see the difference for yourself!


