OBS (Open Broadcaster Studio) is a free and open-source software for video recording and live streaming. It provides real-time capture, encoding, and broadcasting for YouTube and many other providers. It can take real-time video/audio capturing at a high performance. Besides, suppose you have different types of sources i.e. captures, images, text, and webcam, it can create an accurate scene of them.
If you want to take a video streaming using OBS Studio, you don’t need to have a green screen for your webcam since there are some free virtual green screen plugins that you can use to remove your background. These plugins are free and applicable for Windows, Mac, and Linux.
Based on machine learning techniques, a lot of free and easy-to-use desktop programs can help you quickly remove the webcam background without the green screen, and even replace it with webpages, PPTs, YouTube videos, and more file types. The video here will show you how to remove the OBS background without a green screen.
Top 3 OBS Background Removal Plugins
There are 3 OBS plugins that you can use to remove video background, whether for video recording or streaming.
1. OBS Background Removal – Portrait Segmentation
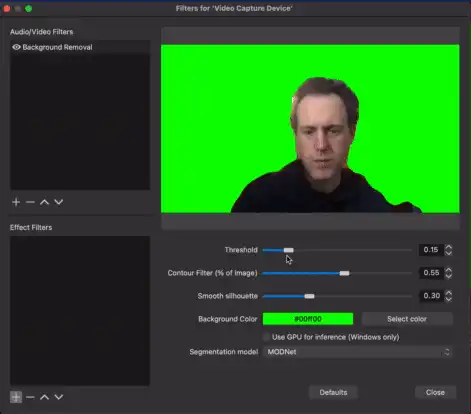
Portrait Segmentation is a free plugin that you can use on OBS Studio to turn your webcam background into a virtual green screen on the computer, regardless of Windows or Mac. The advantage is that this plugin doesn’t require a GPU and works in all OSs!
2. OBS Virtual Background Plugin (Windows)
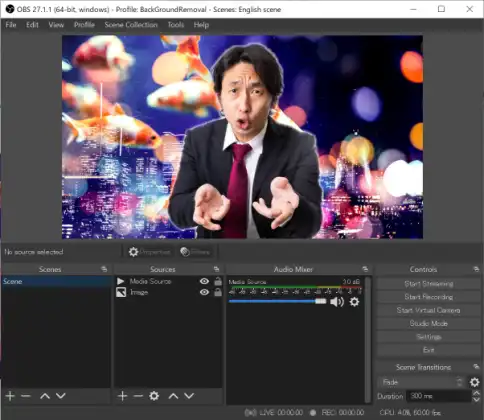
Virtual Background plugin is an OBS plugin for Zoom/Meet-like virtual background features. It uses deep learning-based segmentation to change the virtual background from a portrait image or video. And there is no need to use Chroma Key.
3. OBS Virtual Green Backdrop – GreenCam
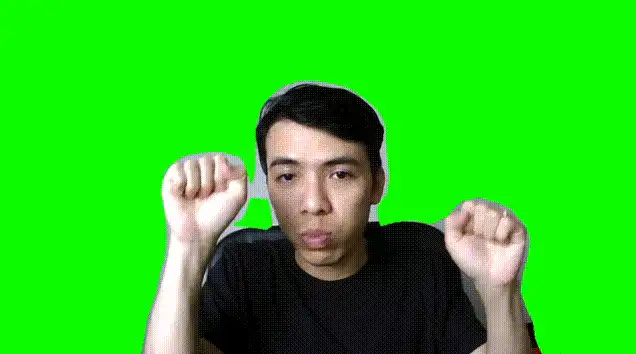
GreenCam is a free virtual green backdrop powered by machine learning tech – Tensorflow and BodyPix. With GreenCam, you can replace the webcam background with green color so that you can use the OBS Chroma Key filter to remove, blur and change the background.
Detailed Steps: Remove OBS Webcam Background without Green Screen
Below you will have detailed step-by-step procedures on how to use one of the OBS background removal plugins to change your webcam background. Let’s get started!
We’ll take OBS Background Removal – Portrait Segmentation as an example.
Step 1: The first thing that you have to do is download the plugin for obs, the link will take you directly to the downloading webpage. Click on the “Go to Download” button.
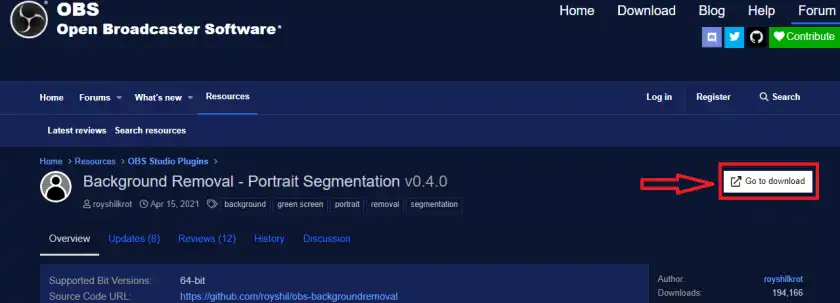
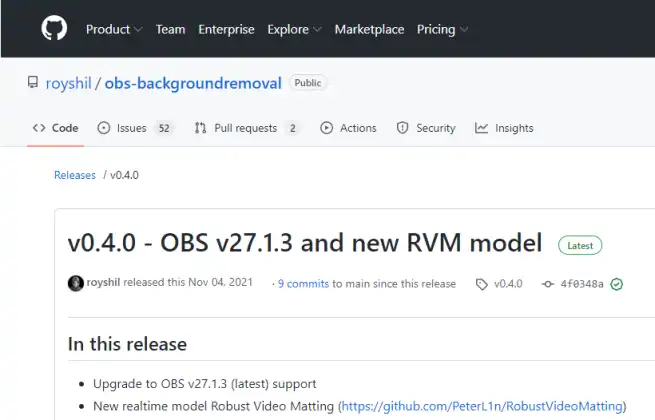
Step 2: Once you press the “Go to download” button, it will take you to a new webpage (GitHub downloading page).
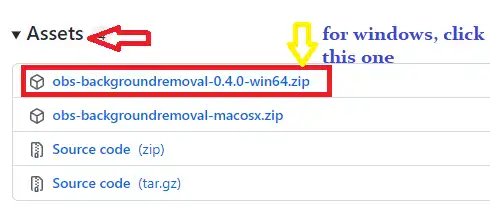
Scroll down till you get Assets. Then choose your operating system.
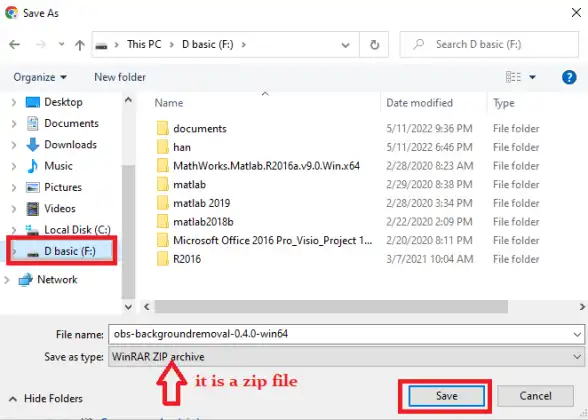
Step 3: Download the zip file and save it on your preferred location (mine is on D: drive) as shown below.
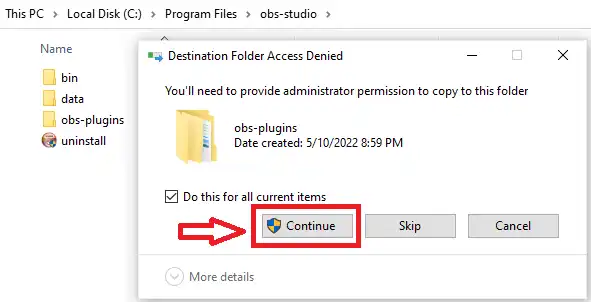
Step 4: Extract the zip file and you will get two folders as shown below in the figure. Copy and paste both folders in the obs-studio installation folder.

Find the installation path of your OBS Studio and paste the plugin files to it. My OBS installation folder is located in the C: drive.

As you perform pasting the folders, you may need to provide administrators’ permission, click on Continue.
Now, you are ready to start using plug-ins for background removal on your webcam in obs-studio.
Step 5: If you already have OBS opened, go ahead and close it, then reopen it. If there is no source found, click the “+” sign to add your webcam.
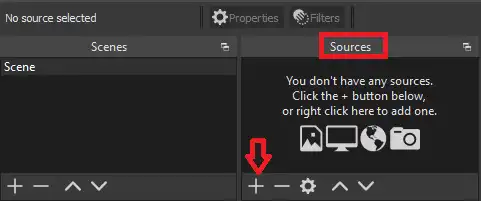
When you click on the “+”, sign you will get the following pop-up, and choose video capture device.
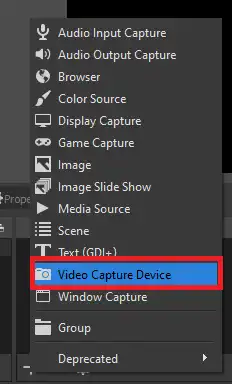
Clicking on your “video capture device” will give the following pop-up. Click “ok”, and don’t forget to make your source visible.
Step 6: Now, you will get your camera with your background.
In the drop-down device list, select your camera (mine is an integrated camera).
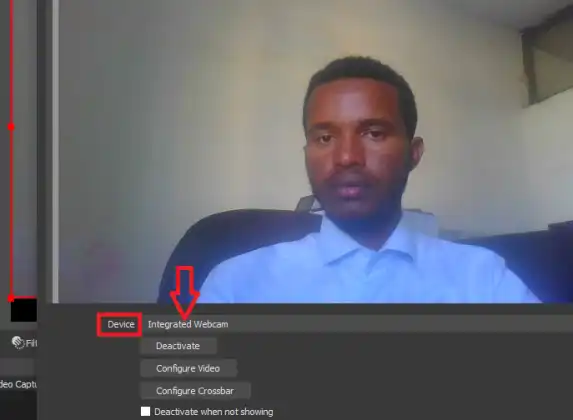
Once you add your camera, go to Sources > right-click on your camera > go to Filters.
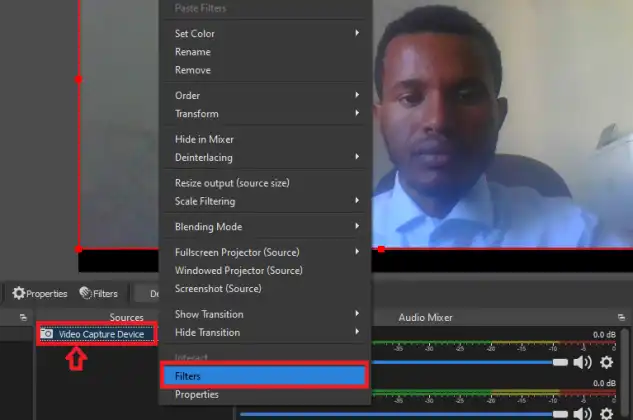
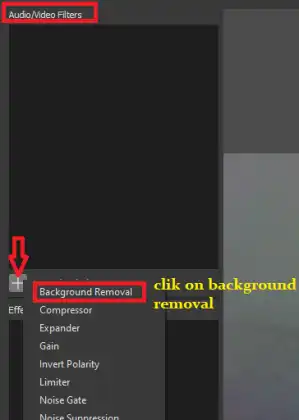
Under Audio/Video filters, click on “+” sign > click on Background Removals > click OK.
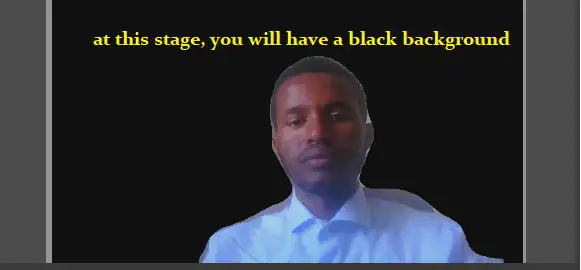
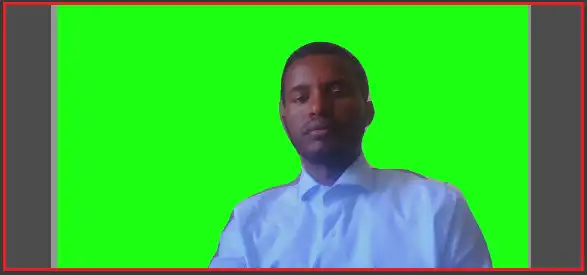
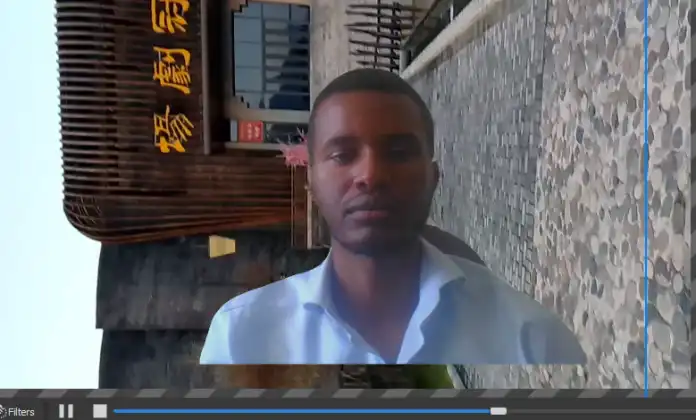
Then as you see, your background is removed.
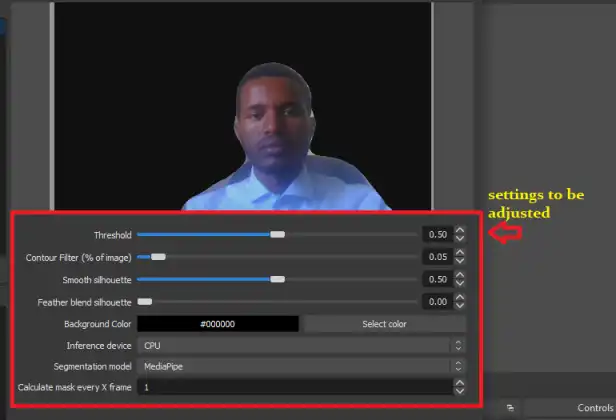
Step 7: Now we have some settings that we have to make adjustments to improve the accuracy of that background color removal.
Here is the deal now, first, you have to add the green screen, and to do that go to background color > click on “select color” > choose green as background color > finally click “ok”.
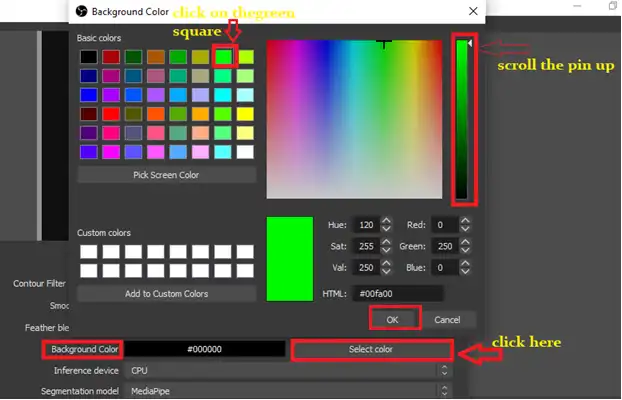
Here, you have to click on the green square in order to make the background of your webcam green. Moreover, you shouldn’t forget to scroll up the pin bar (at the right corner), to increase the density of the color. The density of the color has a direct effect on the precision of the background removal. After doing this you will have a green webcam background.
Step 8: Among the setting characteristics, you can leave the first three adjustments (threshold, contour filter, and smooth silhouette) at their default adjustment. You can increase the level for the feather blend silhouette a little bit.
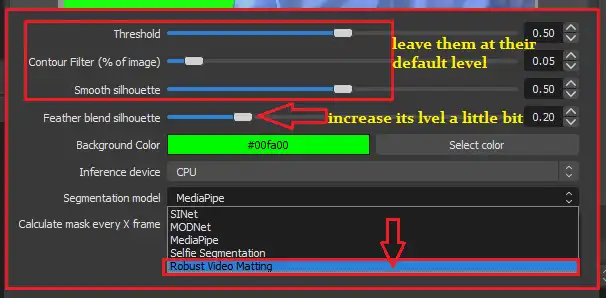
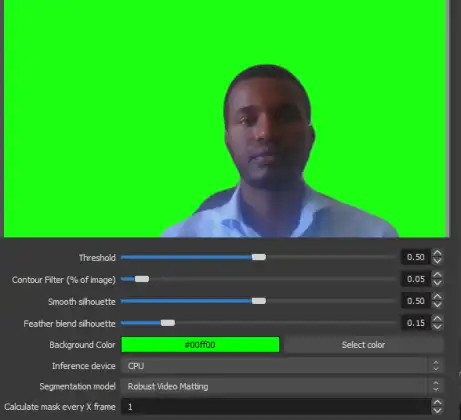
I highly recommend you deal with the segmentation models. You will have five different models (SINet, MODNet, MediaPipe, Selfie Segmentation, and Robust Video Matting). They are the models which perform the removal of the background. It is better to select Robust Video Matting for better accuracy of background removal. If this module is not available, go for MediaPipe or SINet. Finally hit the close button.
After closing, you will have the following window, a webcam with green virtual screen i,e your webcam background removed.
Step 9: Now you need to do is add a background. You can add an image or a video as your background. Let’s take a look at how you are going to add an image and a video one by one. Let’s begin with the image.
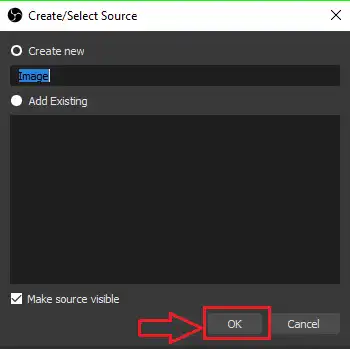
To add an image, go under sources > click on the “+” sign > image.
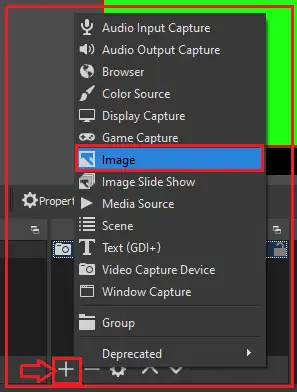
Select “ok”.
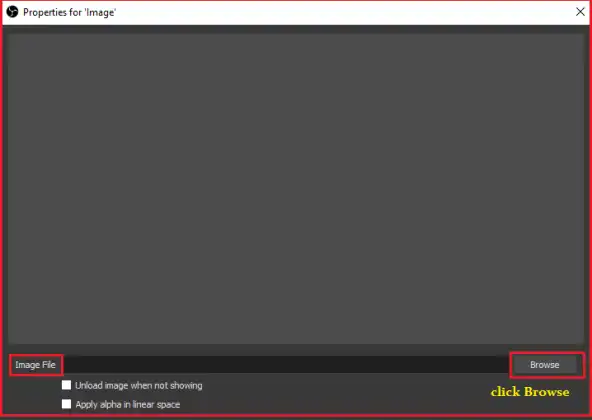
Under the image file select “browse”.
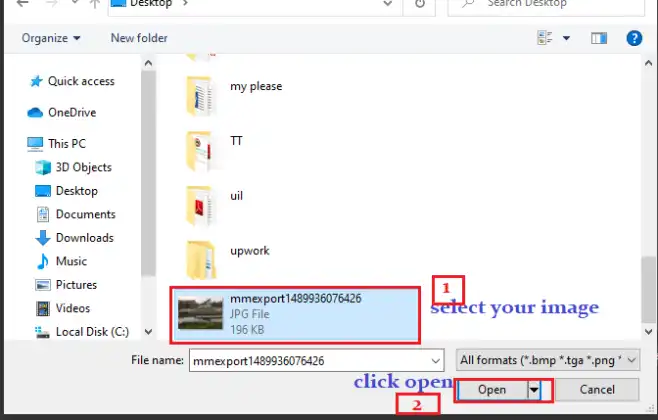
Find the image file that you are interested in to make it your background > open it up.
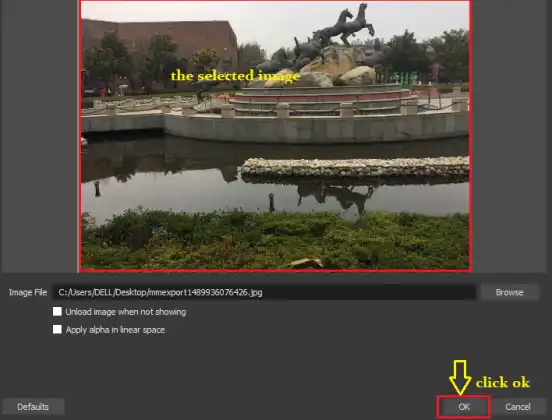
A window with your selected image will pop up and then click “ok”.
Then after, you have to make sure that your image is at the bottom of your webcam. To do that, you have two methods.
- under sources, go to your selected image, double-click on it, drag and put it underneath your webcam.
- under sources, right-click on the image>order>move down.
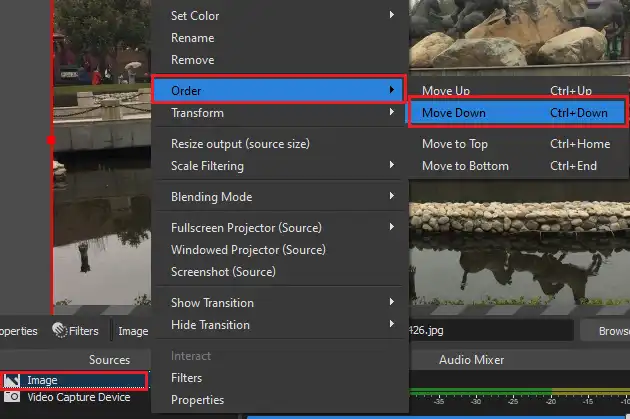
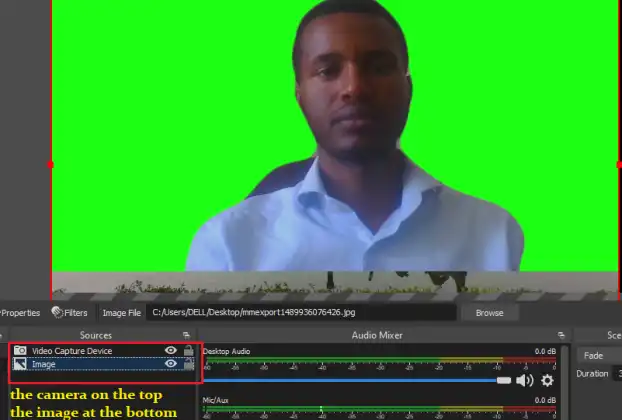
The ordering result will give you the camera at the top and the image at the bottom. At this stage, you will have a green screen still as depicted in the image below. Don’t worry, a single step remains to discard it from your webcam.
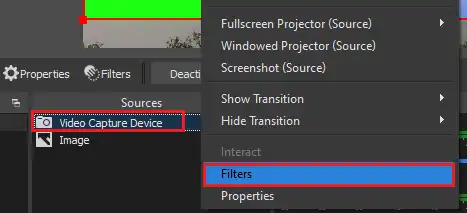
Step 10: Add effect filters. To do this, under sources, you need to right-click on your webcam> click on “filters”,
Under effect filters, select the “+” sign > Chroma Key.
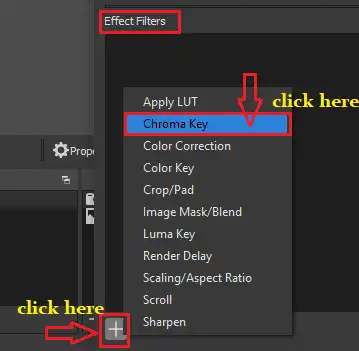
Click OK.

Done! Now you have your background removed.

Now, let’s run for how video can be added as your background. The procedures you have to follow are simple
under sources, click on the “+” sign, and then click on Media Source.
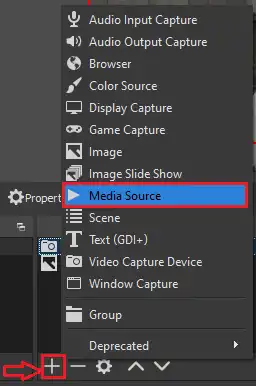
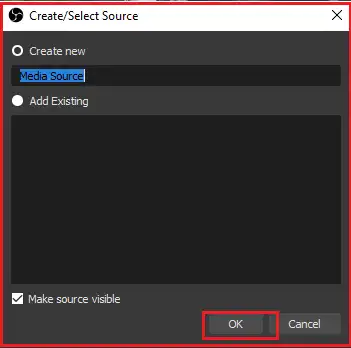
After clicking the Media Source, the following mini window will pop up and you have to click “ok”.
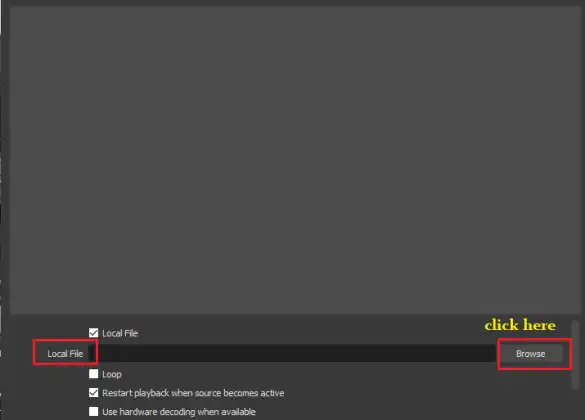
Then, under the local file click on browse and it will let you select the video that you are interested to make as your webcam background.
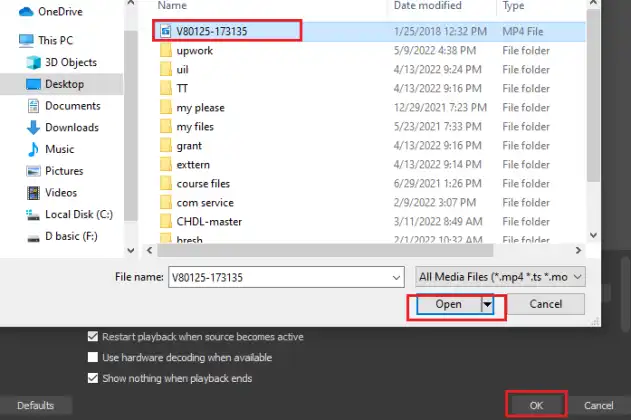
All you have to do is select your video> open it up >and click on OK.
Like that of the image, make sure your video file is underneath your webcam device. Then check the Loop option.

Bonus: Remove, Blur, or Change Webcam Background in One Click
Although OBS plugins enable you to remove the background, the process could be complex for beginners because OBS has a steep learning curve. Therefore, it’s highly recommended to use professional webcam background removal software to easier modify your webcam background.
FineCam is an AI-powered virtual camera software that you can use to remove, blur, or change your webcam background with only one click. The video below will show you how to do that. And if you are interested, you can download and use FineCam and have a try right now.


![How to Blur Background in Google Meet on PC [2025]](https://www.fineshare.com/wp-content/uploads/2022/09/blur-background-google-meet-feature-image-712x400.webp)