When setting up your Webcam for a meeting or using live streaming software, you’d like everything in your background to be neat. You’ll not get your background fixed every time; sometimes, you’re too busy with more important things.
You can blur your background while using your Webcam to fix this issue. But is there an easy way to do this? The answer relies on the following parts of this article.
Method 1. Blur Mac Camera Background on Video Chat Apps
Video conferencing software has become “smart” or intelligent nowadays. We’re nearing the trend where all devices will have AI. Hardware has also become more versatile thanks to the increasing number of transistors you can put on a silicon chip. With these advancements, your webcam and video chat apps can easily blur your background with a few simple steps.
For Zoom:
Step 1. After joining or starting a new meeting, you’ll have these shortcut buttons pop out when you place your mouse pointer at the bottom. Make sure you’ve started your Webcam first by clicking Start Video.
Step 2. More options should be on the same button (now Stop Video). Click the arrow icon, then choose Blur My Background.
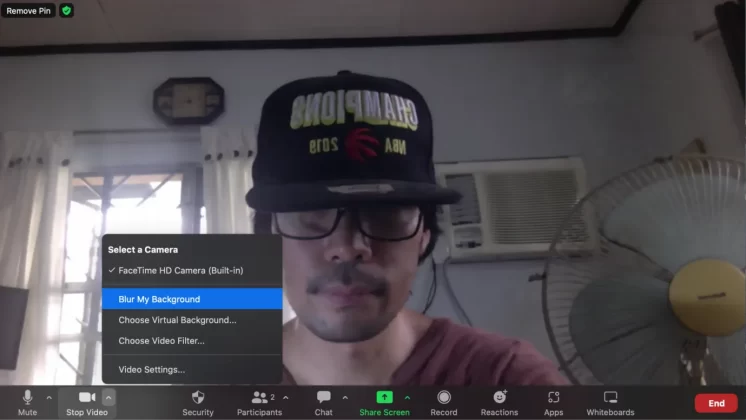
Zoom Blur Background on Mac
It’s that easy.
What to do if the Background Blur is not working with Zoom?
The background blur option for Zoom uses a portion of the processing power of your CPU and your GPU. If your hardware or operating system is not up to it, it might not work. Be sure to have these specs checked:
- You have a Mac with macOS version 10.13 or higher
- You have an Apple M1 processor
- You have an i5 processor with two cores that is 6th generation or higher
- You have an i7 processor with four cores that is 4th generation or higher
For Skype:
Step 1: Open Skype and go to Settings by clicking the more (…) menu at the top beside your name.

Skype Settings on Mac
Step 2. Next, go to the Audio & Video Settings. On the Change background, select Blur.
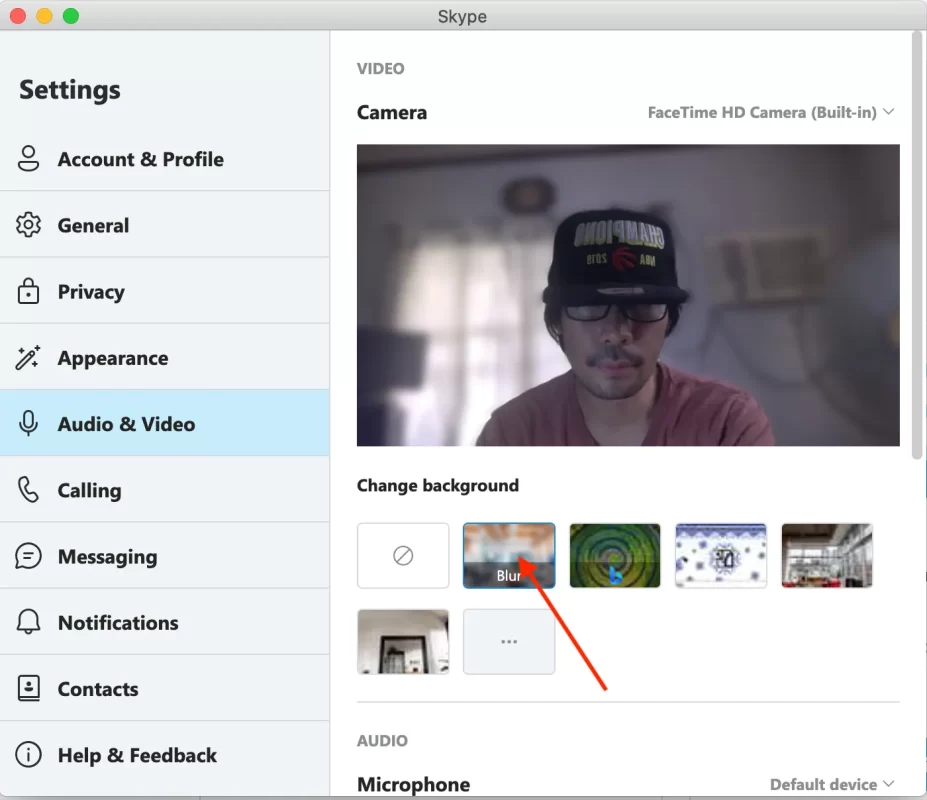
Blur Webcam Background on Mac – Skype
skype-blur-background
For Google Meet:
Step 1: Open Google Meet, then go to your meeting. Make sure to turn on your camera.
Step 2: Below, you’ll find a 3-dot more icon. Click on it; then press Apply Visual Effects.
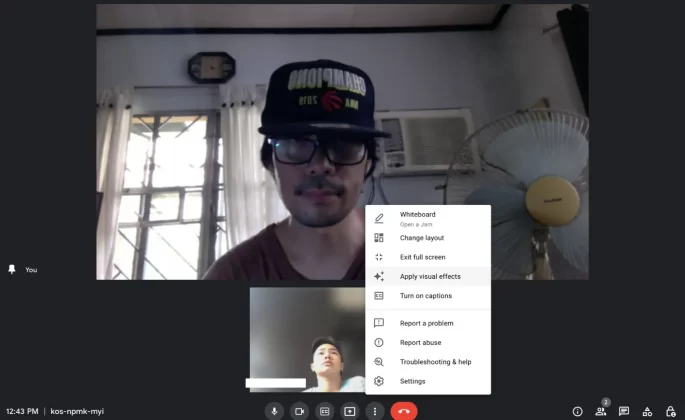
Google Meet Apply Visual Effects
Step 3. On effects, there are three choices. No effect, Blur background 1 and Blur Background 2. Choose what suits your needs.
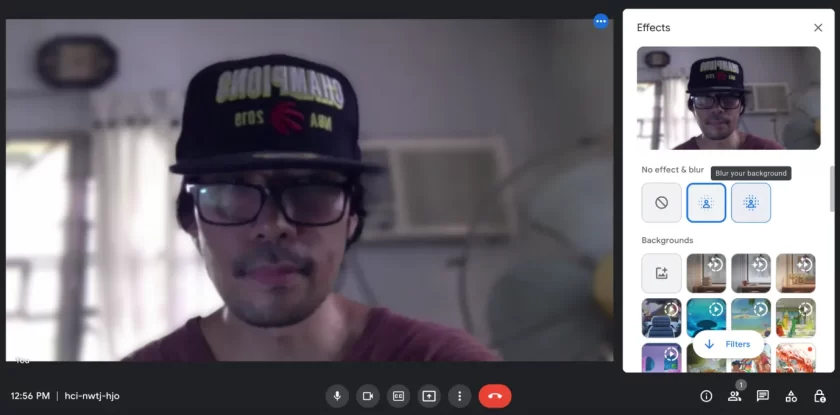
Mac Blur Background on Google Meet
For Discord:
Step 1: Open Discord and enter a Voice channel. Enable Video.
Step 2: There are several ways to blur your background. You can right-click on your video and choose Change Video Background.
Step 3: Click the downward pointing arrow on the videocam button below. Choose Change Video Background.
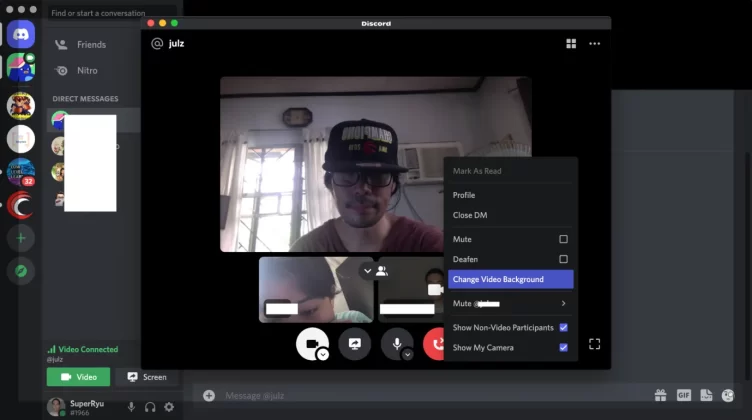
Change Discord Webcam Background on Mac
Step 4: On Video Background, choose your background or choose Blur.
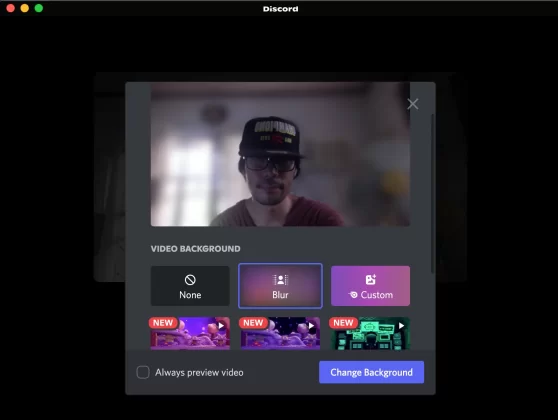
Blur Webcam Background on Discord Mac
Method 2. 1-Click Blur Webcam Background using FineCam
If the video app you use doesn’t support blurring background, you may have to choose one third-party webcam software removal software to make it.
To quickly hide the Mac webcam background, FineCam will be well qualified since it can not only help you blur the background instantly but also make it pretty simple to change the background through uploading images/videos/PowerPoints or pasting the links of webpages/YouTube videos. Furthermore, this tool works with almost all popular video apps such as Zoom, Discord, OBS Studio, Google Meet, etc.
See the steps below to know how to make it:
Step 1: Download and install FineShare FineCam. Mac and Windows versions are available.
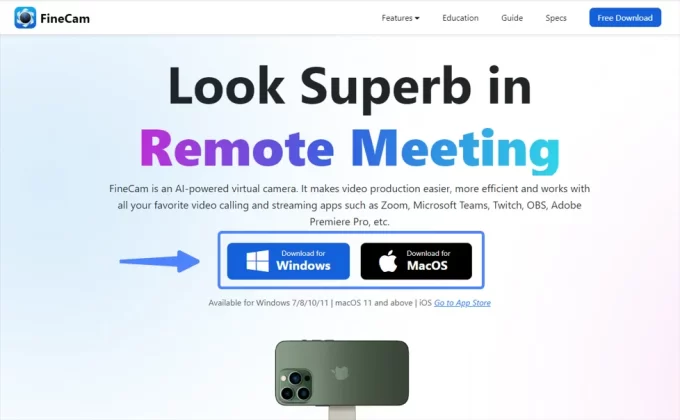
Download FineCam Desktop Client
Step 2: Add one scene and choose your camera source above.
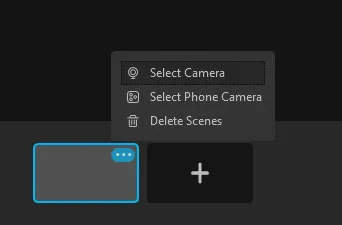
Select Webcam – FineCam
Step 3: Under Backgrounds, click Blur and hover your mouse on the video to find the blur slider. With this blur slider, you can easily adjust the blur degree.
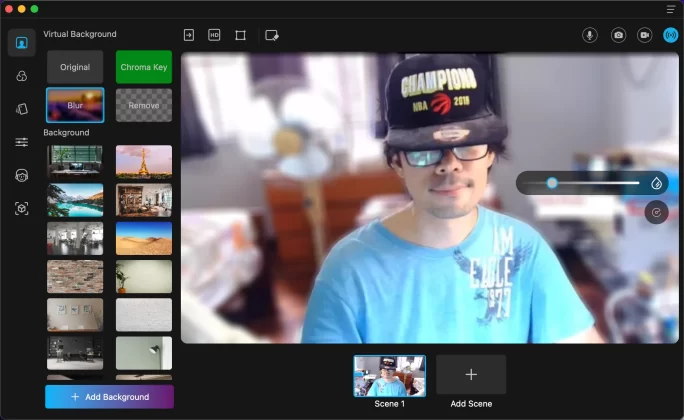
Blur Webcam Background on Mac – FineCam
Step 4: Use the menu on the top right corner, you can take pictures, shoot videos, or enable a virtual webcam so that you can use FineCam on other video apps like Zoom, Google Meet, Discord, OBS Studio, etc.
Method 3. How to Blur Webcam Background on Mac using OBS
The OBS Studio is a popular software for video capture and live streaming. It’s one of the most valuable tools Youtubers are using now for their live sessions. Because it’s a live broadcast, there must be a way to blur the background of the broadcasters’ video to hide their cluttered stuff.
Step 1. First, you should have installed OBS studio on your Mac already.
Step 2. Next, install an OBS plugin called StreamFX.
Step 3. Click Go to Download and find the installer for Mac. It’s preferable to click-control the downloaded file and open it as Apple unofficially supports it. Follow the installation procedure, and make sure the OBS studio app is closed.
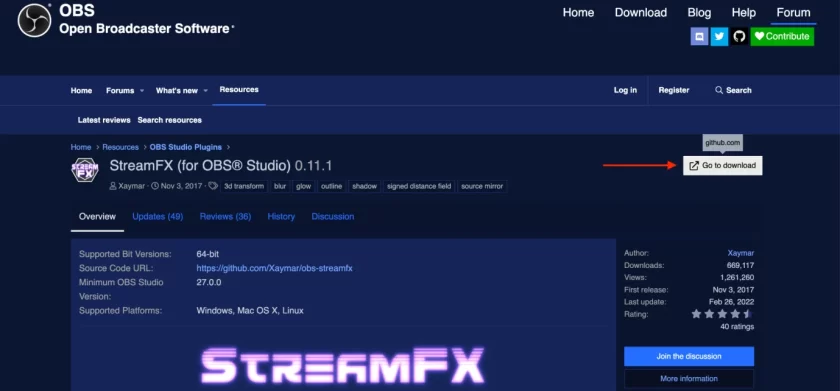
Download OBS StreamFX
Step 4. Now Open OBS Studio. Choose your Video Source and open Filters.
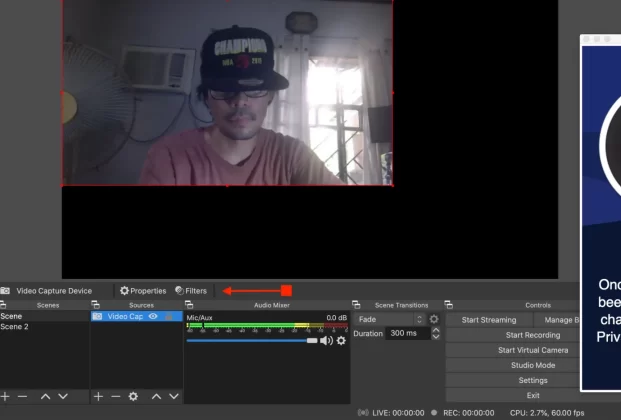
Open Filters on OBS Studio
Step 5: Add an Effect Filter below using (+) and choose Blur.
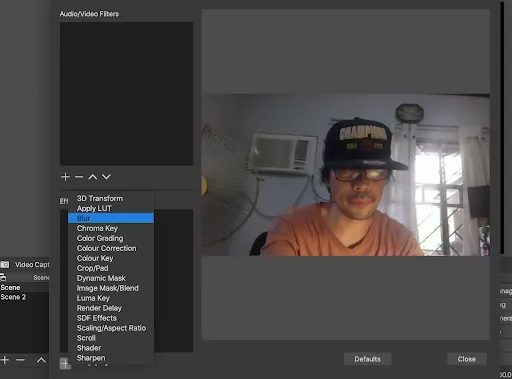
Blur Filter on OBS Studio for Mac
Step 6: Choose a type of Blur. A Gaussian filter is usually processor intensive, while a Dual filter type is not. Then choose to Apply a mask.
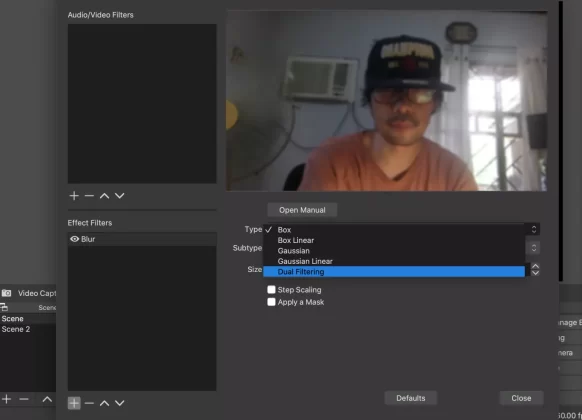
Dual Filtering Blur Type on OBS Mac
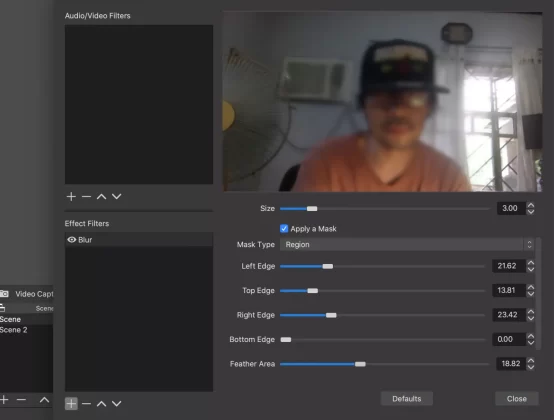
Blur Filter – Mask – OBS Mac
Step 7: You can play with the mask options. The borders of your Blur will be affected by this. Choose the invert region to choose to blur the area outside the image.
Conclusion
This tutorial taught you the three methods to blur webcam background on a Mac. The three methods mentioned are for your Video chat apps, the OBS app, and the XSplit VCam app.



![How to Blur Background in Google Meet on PC [2023]](https://www.fineshare.com/wp-content/uploads/2022/09/blur-background-google-meet-feature-image-712x400.webp)