One may make video calls from the computer to another person using Skype. When speaking on Skype, if you see a poor quality or unclear live video, there are some factors you can examine to ensure you’re receiving the best video possible. You may end up asking ‘Why my webcam is so grainy?’
But we just have a guide for you. Here we’ll tell you the very reasons that cause a grainy webcam. Then we’ll also tell you how to fix the issue. So, let’s get into it!
If your webcam video is so bad, why not try to use your iPhone or Android phone as an HD webcam? Most smartphones can auto-adjust image color and light, to capture up to 2k high-quality videos. Read related article >
Why My Laptop Webcam is Grainy?
1. Drivers for Webcams
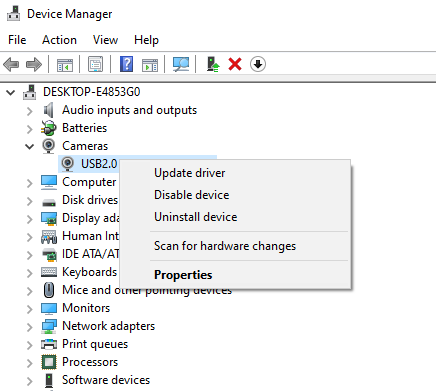
Webcam drivers that are too old or inadequate can lead the webcam to work poorly. A driver is a software program that communicates between the operating system and attached equipment. If your webcam is grainy when using it with Video chat, you must download the latest recent webcam software.
Upgraded driver software is frequently available from the webcam company’s website.

Update, Disable and Uninstall Camera Driver
For details: How to Update Webcam Driver Step by Step
2. Webcam Resolution
The video recording quality and frame rate of the attached webcam limit the picture quality of your camera. The video capture resolution determines the pixel value recorded by the camera. Video capture with more pixels is of higher quality. A greater frame rate also produces a smoother video. Frame rate is defined as the number of frames per second.
Use a webcam with high definition capability, which means it has a resolution of at least 1280 by 720 pixels and a frame rate of at least 30 frames per second.
3. Video Options
You may enhance the quality of your video feed by changing your video options, which may lead to a grainy video.
4. Internet Download Speed
The internet’s slow speed may ruin the video quality. Make sure to have the fastest internet connection.
How to Fix Grainy Webcam on Your Laptop?
Below are the solutions to grainy webcams. And they are also the common solutions to other webcam problems.
Method 1: Change Webcam Parameters
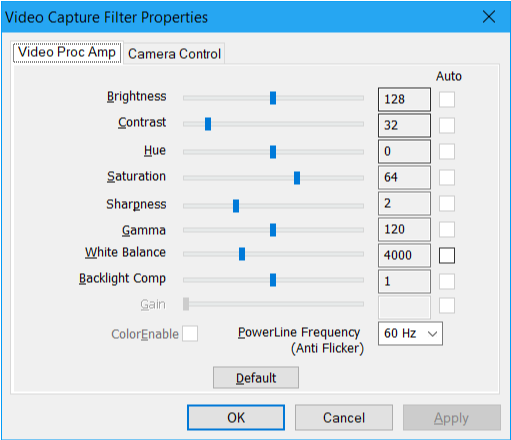
To adapt the lighting in the room, adjust your camera settings such as brightness, contrast, hue, and saturation.

Change Webcam Parameters
- To view your webcam options, open the “Control Panel” by clicking “Start.”
- Select “Hardware” and then “Internal Webcam” from the hardware menu.
- To enter the configuration controls, select the “Properties” tab and move each bar until you reach the appropriate visual parameters for your program.
Method 2: Enhance Backlight
When doing a webcam chat, enhance the accessible lighting behind you but not the lighting near the webcam. Lack of back illumination results in a dimmer image projection and a grainy webcam. Proximity to the camera can cause the image to blanch, making it more difficult to see.
Method 3: Change Pixel Density
Change the pixel density. Reducing your quality can sharpen the visual projection when the picture quality is grainy on a webcam laptop and deformed during a webcam broadcast.
- Right-click on your screen and select “Properties” to reduce the resolution.
- Select “Screen Resolution” from the list of options. Test the image quality by lowering the pixel density one step beneath where it is currently set. If it requires more sharpening, continue the process until the necessary clarity is achieved.
Method 4: Change Video Conference Program Settings

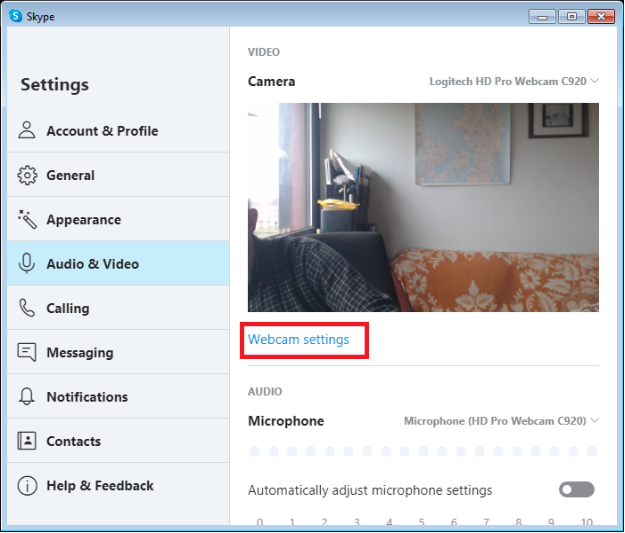
Change Video Conference Program Settings
Make changes to the video conferencing program’s settings. For example, if you’re using Skype:
- Go to “Tools” and click the “Video” button in the left sidebar.
- Select “Webcam Settings”
- Adjust your visual and camera functionality options, such as color and saturation and lighting compensation.
Method 5: Check Connections
Check your connectivity options. If your network’s traffic is high and numerous people are using the same connection to the internet, your bandwidth will be reduced, lowering the clarity of your video display. A minimal bandwidth connection of 128 kbps is required to conduct a decent video session. Go to a website like SpeedTest and do a bandwidth test to check your speed.
Method 6: Clean Webcam
Using the air can clean the lens to remove dust particles. Dust particles might obstruct vision, resulting in a grainy webcam. But you shouldn’t wipe them away with your fingers or a rough towel. Blasting the lens with canned air will clear the lens of dirt and increase picture quality.
Conclusion
These pointers will come in handy if you’re looking for ways to increase the quality of your laptop camera. So, whenever you feel your webcam is grainy, check out any of these methods. Maybe one of them is for you.


