Are you getting a Camera failed message when you join a meeting using Google Meet on your Windows computer? And other video chat apps, including the Windows built-in Camera app, also cannot access the camera? This would be so frustrating when you are going to chat with your students, your business partner, or your workmates.
This article tells you why this problem would happen and shares 10 potential solutions to this Google Meet camera problem.
Why Your Webcam Won’t Work on Google Meet?
A lot of things could cause this Google Meet webcam issue. Google Meet works based on the browser, it may be the Windows Browser issue, such as an outdated browser version, or misconfigured camera settings.
Besides, webcam hardware problems, webcam driver software issues, and Windows system issues can also be the cause.
How to Fix Google Meet Camera Failed and Not Working?
Whatever the reason, you’ll have to check them one by one. Therefore, we listed some potential solutions here that you can follow. Let’s get started to fix your Google Meet failed camera.
Tip 1: Restart your browser
Whether you are using Google, Mozilla, or Internet Explorer, sometimes they may fail to host your video. Consequently, you have to close and reopen your browser and this will allay the short-lived issue. Besides, even though major browsers can host Google Meet, you have to check if your browser fulfills the minimum requirements to conduct Google Meet.
Tip 2: Give camera permission
In order for your browser to conduct your Google meeting, you need to provide permission to your browser to access your camera. The below step will show you how to do it.
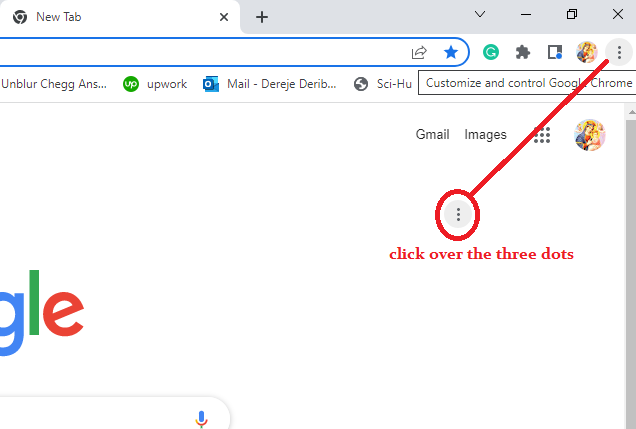
Step 1. Go to Settings, and click on it.
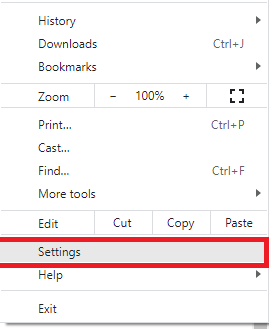
Step 2. Choose the Privacy and Security setting.
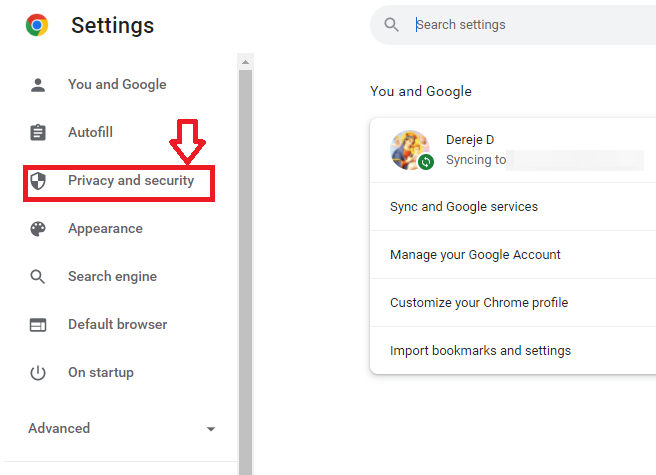
Step 3. Scroll down and select Site Settings.
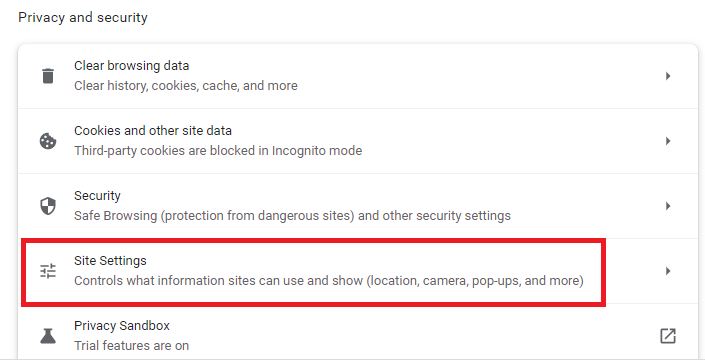
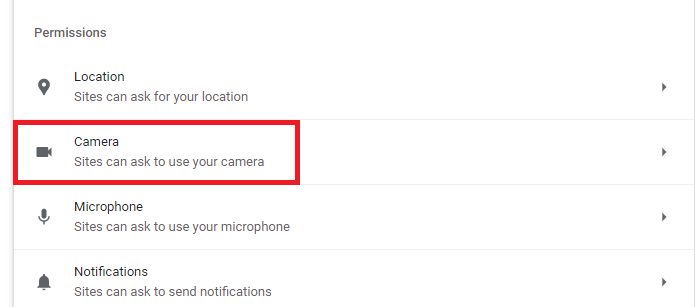
Step 4. Under the permission category, select Camera.
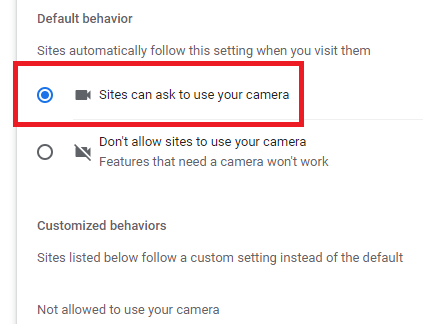
Step 5. Make sure the radio button is on to allow sites to use your camera.
Tip 3: Check your webcam driver
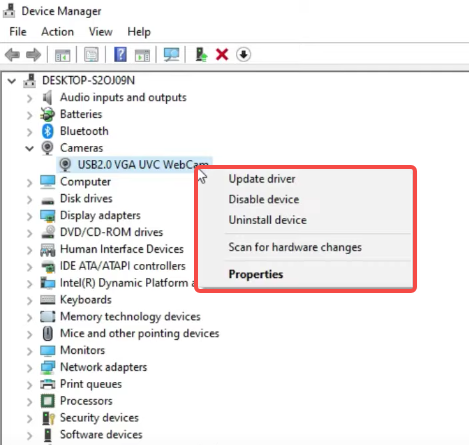
Your webcam driver must function in order to conduct your Google meeting in Windows. The driver may need an update, or you have to reinstall it, or you can disable and enable it back so that your webcam driver problem gets fixed. To do this, you can simply follow the below steps
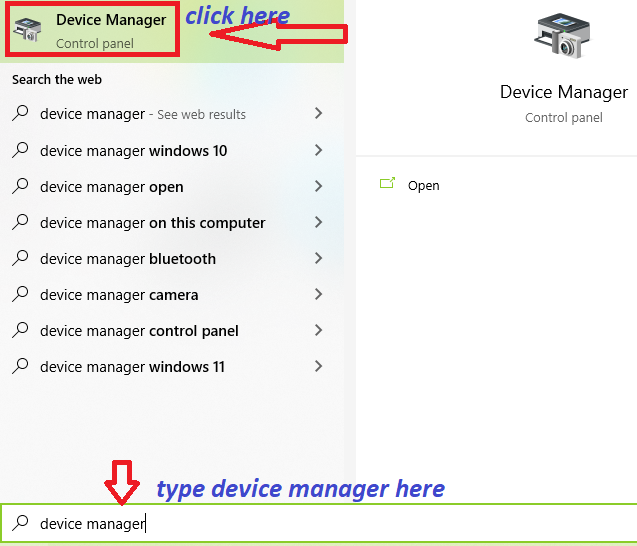
Step 1. Go to your Windows search bar > type Device Manager and open it.
Step 2. Locate on your Camera > right-click on it, and you will get driver options. Depending on your webcam driver problem, choose the options and fix it.
Tip 4: Make sure there are no other Apps using your camera
As there are plenty of video conferencing applications, you may open multiple applications that need the function of your webcam. A single webcam device won’t run and function on a single window for multiple video-conferencing applications. Suppose you are hosting a Zoom meeting, your Google Meet will be denied to access your camera. So turn off/close other applications and provide your webcam for your Google meeting alone.
Besides, if you are conducting using your laptop, inspect if your camera indicator light is flashing. If the light is on, survey and slam any app using your camera in the background. After that, you can organize and join your Google meeting and click the camera icon to enable your webcam.
Tip 5: Make sure you have chosen the camera you want to use
In many web browsers, Google Meet uses the system’s integrated webcam. As you may have different Windows camera Apps (MnayCam, YouCam, iGlasses, Magic Camera, etc.), it is a must to configure or arrange Google Meet based on your interest or preference.
How to configure it? The following easy steps will illustrate the process.
- Open Google Meet on your browser.
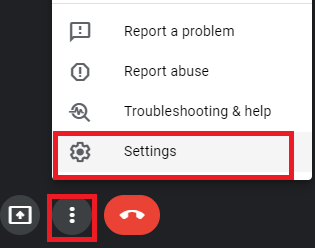
- Click the gear icon > open settings.
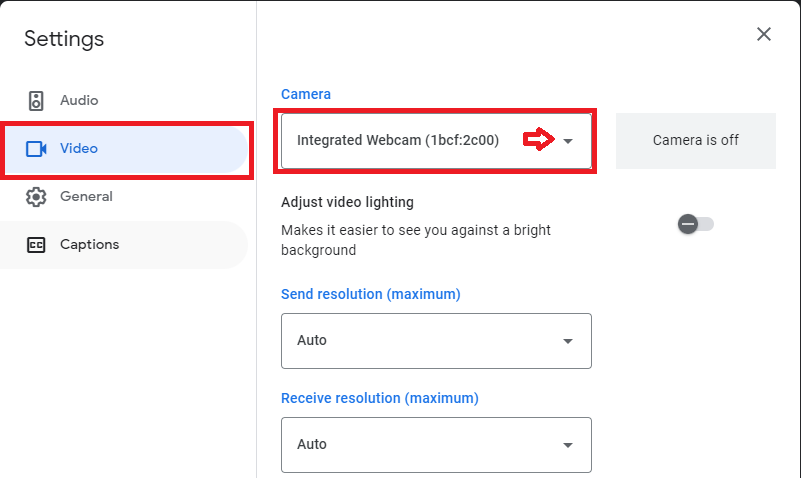
Go to the Video tab and open it.
Click on the default camera and select your favorite camera.
Tip 6: Make sure you have enabled the camera on Google Meet.
Google Meet has two options for your webcam, these are disabling and enabling. Suppose you don’t want to show your face to other participants, you can disable it and continue to communicate in audio alone. But if you want to expose your face to other colleagues, you have to enable the camera on Google Meet. The below picture shows how to enable it.
Open Google Meet on the bottom center, find the gadget for the camera and click on it. Then it gets enabled.

Tip 7: Restart your computer
Your browser may fail to set forth your Google meeting if any kind of software conflict occurs on your PC. This kind of problem may cause your webcam to malfunction. Besides, your browser may carry out many pages, hold large catch files, browse many histories, and so on. Therefore, the browser won’t conduct Google meetings. The best solution to clean up this problem is to restart your computer.
Tip 8: Use your phone as a webcam
If your system’s integrated camera stops working, you can use your phone as a temporary webcam so that you will not miss your Google Meet schedule. There are lots of free apps that you can use to turn your phone into an HD webcam.
Tip 9: Use your digital camera as a webcam
Now let’s say your PC webcam stops working and you have no smartphone camera to replace it, I wonder what will be the remaining options to proceed with your Google meeting. At this stage, it is recommended to use your digital camera as a webcam.
Tip 10: Buy a new camera
Lastly, here is the deal, if you try the above none tips and can’t fix your Google Meet camera, you have to buy a new camera. The following link will direct you to the purchasing websites.

