How to Record Voice with FineVoice Voice Recorder for PC
Are you looking for a way to record your voice with amazing quality and versatility? Whether you want to make podcasts, audiobooks, voiceovers, or educational videos, FineVoice Voice Recorder for PC is the perfect solution for you.
In this guide, we will tell you how to use the FineVoice Voice Recorder for PC to record voice from multiple audio sources such as microphones, system audio, iPhone, and local audio files.
How to Record Voice from Different Audio Sources?
With FineVoice Voice Recorder on PC, you can effortlessly mix audio, music, and vocals. It supports recording from multiple audio sources, whether it’s from a microphone, computer, iPhone, or your existing audio files.
Step 1: Download, install, and launch FineVoice. If this is your first time running FineVoice, please follow the setup instructions.
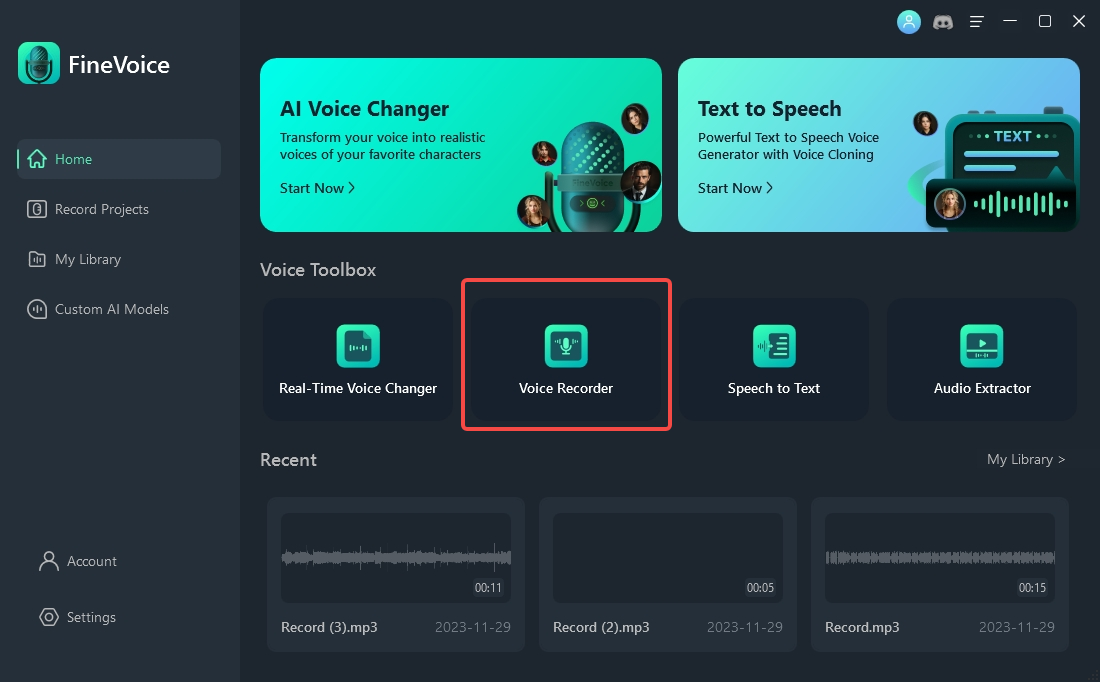
Step 2: Click the Voice Recorder tab on the main interface to use this voice recorder.
Step 3: You can add different audio sources for your recording. Click the + Add audio source to add sources like Microphone, System audio, iPhone Airplay, and Local Audio File.
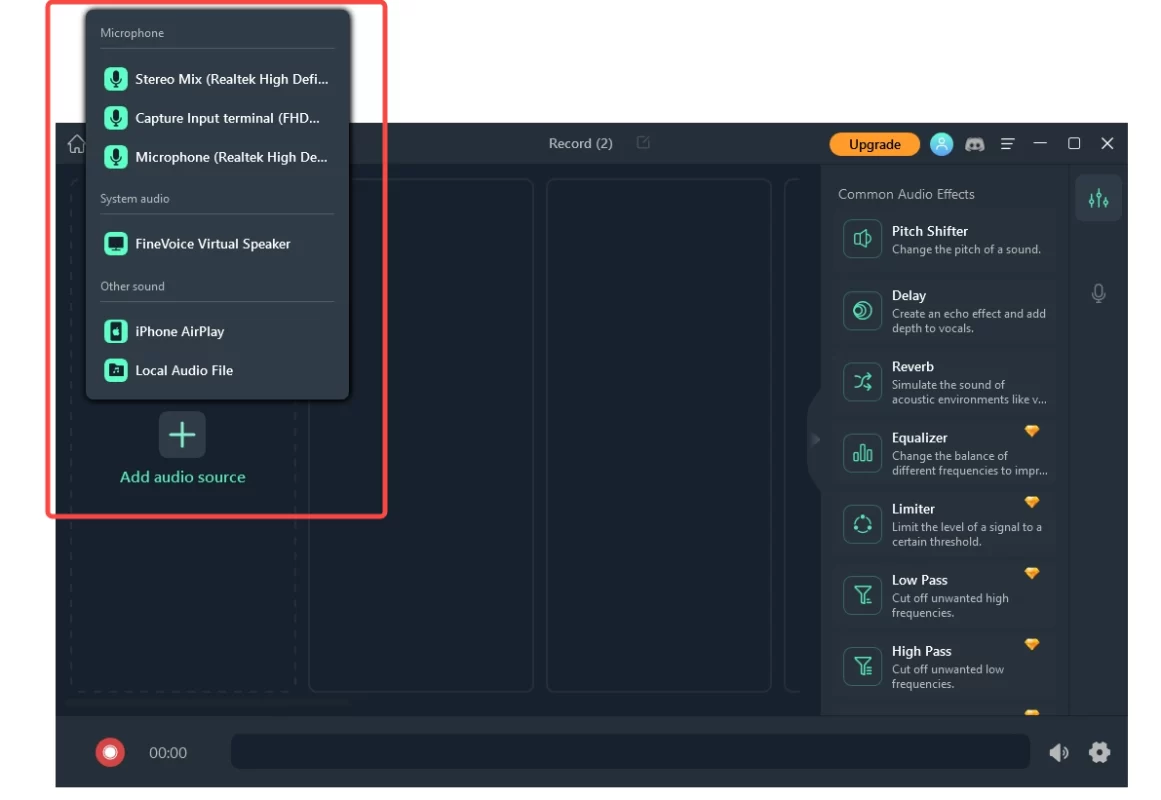
Microphone: On the popup menu, select a microphone under the Microphone tab.
System audio: On the popup menu, select FineVoice Virtual Speaker under the System audio tab. Follow the instructions to set FineVoice as the output device.
Other sound(iPhone Airplay & Local Audio File):
iPhone Airplay: Select the iPhone Airplay option under the Other sound tab. Follow the screen instructions to stream iPhone sound to FineVoice.
Local Audio File: Select Local Audio File to upload audio files. It can support file formats: MP3, AAC, AC3, AMR, MP2, and WAV.
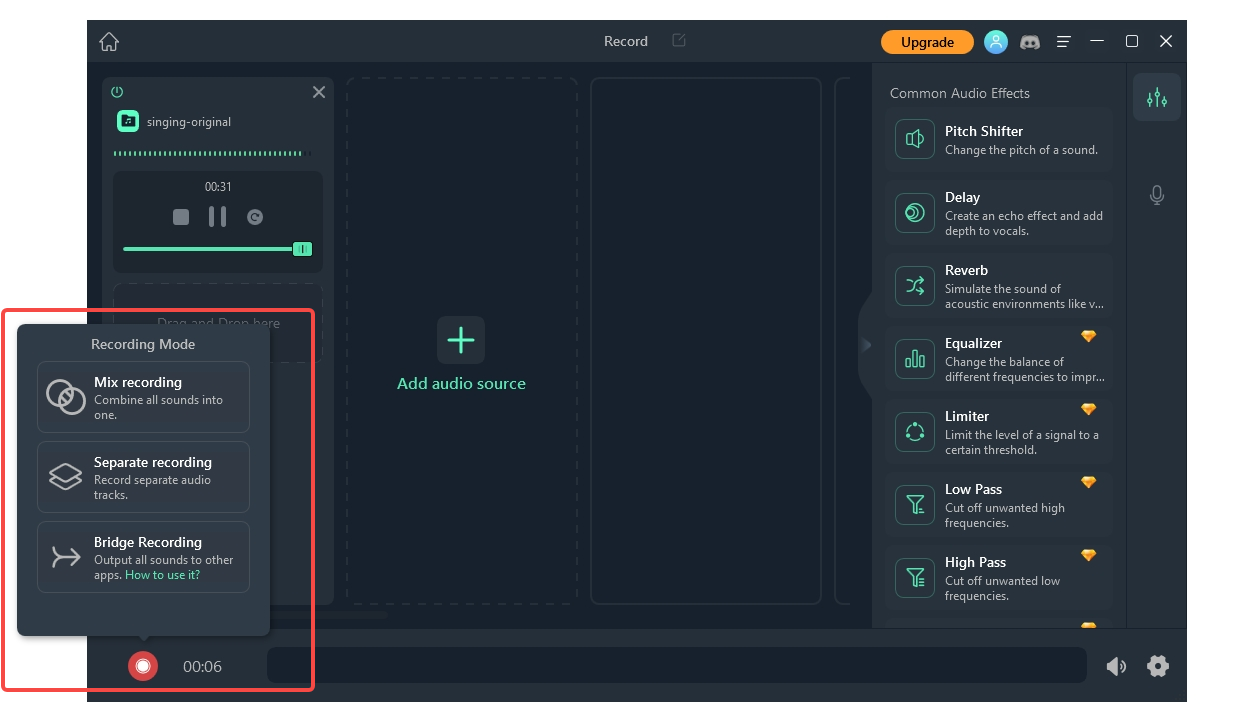
Step 4: Click the red Record button at the bottom of the interface. You can choose from 3 Recording Modes: Mix Recording, Separate Recording, and Bridge Recording. The waveform will show you the real-time volume. Click Pause or Stop to control the recording.
Step 5: You can click the Volume button to adjust the appropriate volume. Click the Recording Settings button to choose whether to Hear your own voice and the Output format is MP3 or WAV.
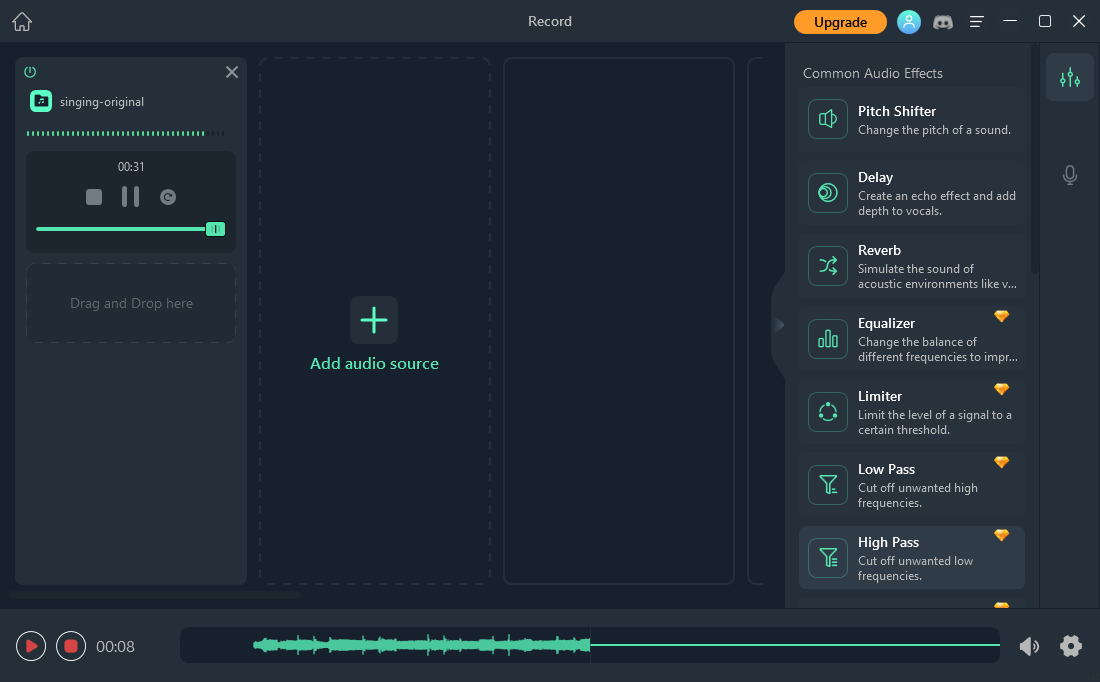
Step 6: FineVoice saves the audio recording file automatically when you click Stop. Click the play icon to listen to the recording.
How to Apply Effects When Recording Voice?
In this part, we will walk you through the steps on how to apply audio & voice effects when recording voice with FineVoice Voice Recorder for PC.
The first thing you should do is to download and install FineVoice on your computer. And then Launch FineVoice.
Click the Voice Recorder tab on the main interface to use this function.
How to Add Audio Effects?
You can add dozens of audio effects while you are recording your voice. Here is how to do it.
Step 1: Drag and drop ones to the blank section under an audio source on the right panel.
Step 2: Click and adjust each audio effect with its parameters to create funny audio.
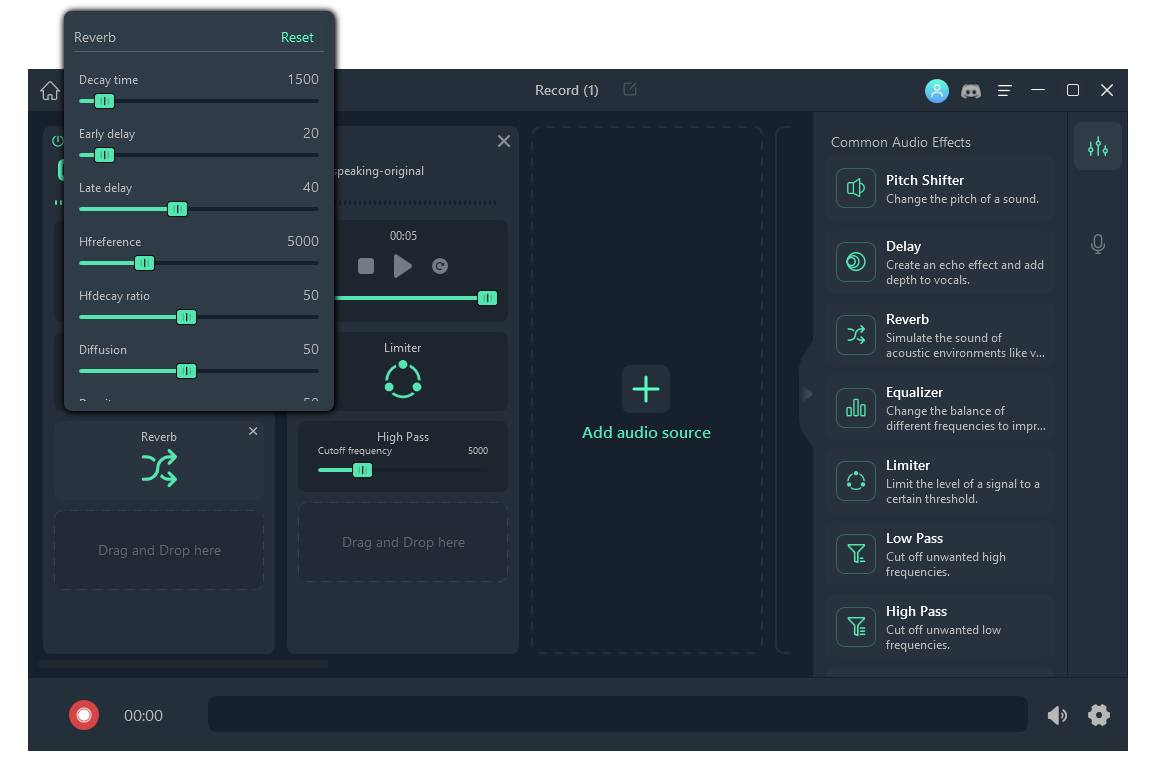
Step 3: Hover on an audio effect and click the X icon to delete it.
The same audio effect cannot be added repeatedly within the same channel.
How to Add Voice Effects?
Besides modifying voice with audio effects, you can make an audio sound like the other person. Here are the specific steps as follows.
Step 1: Click the second button on the right sidebar. Open the Voice Effects feature, and you can choose the voice effects you want from the drop-down menu.
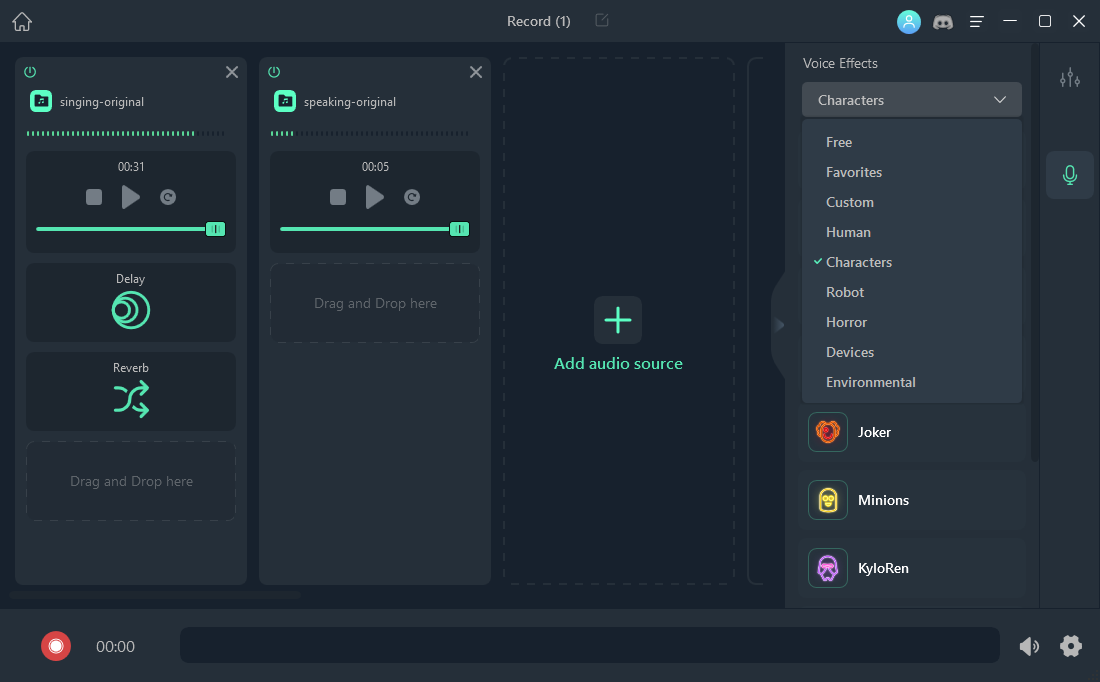
Step 2: Switch between different categories and find the one you want to use. Drag and drop a voice effect to the blank section under an audio source.
Step 3: Click and customize a voice effect with the parameters.
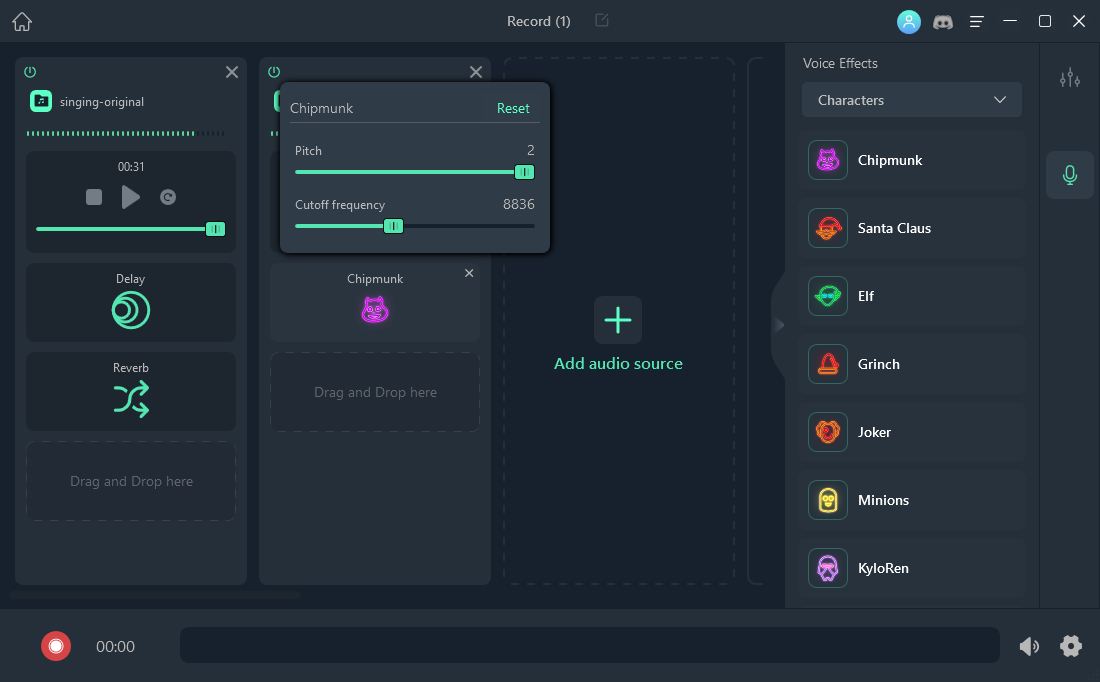
Step 4: If you want to cancel the added voice effect, click the X icon to delete it.
Only one voice effect can be applied per audio channel.
FineVoice Voice Recorder for PC is a simple and powerful voice recorder that can help you record your voice with amazing quality and versatility. Try it now!
Can't find the answer to your question?
Contact us and we’ll get back to you as soon as we can.