How to Use Virtual Backgrounds in FineCam
How to remove your webcam background with/without a green screen? With FineCam’s powerful background feature, you can remove, blur or change your original webcam background with one click.
Let me walk you through how to use virtual backgrounds in FineCam.
Open FineCam Background Feature
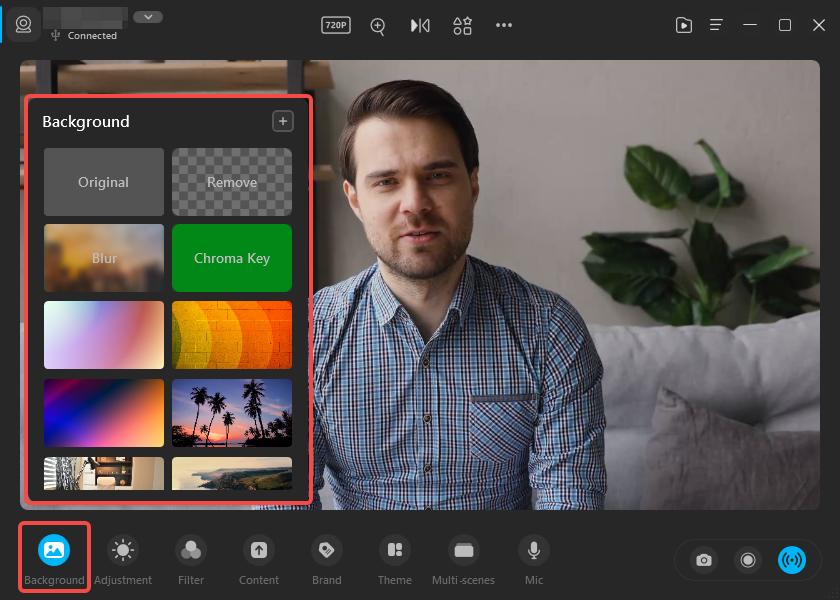
After connecting the webcam you want to use, find and click the Background tab on the bottom navigation bar. On the pop-up panel, you can see what you can do with your webcam background.
Remove, Blur, or Change Your Background without a Green Screen
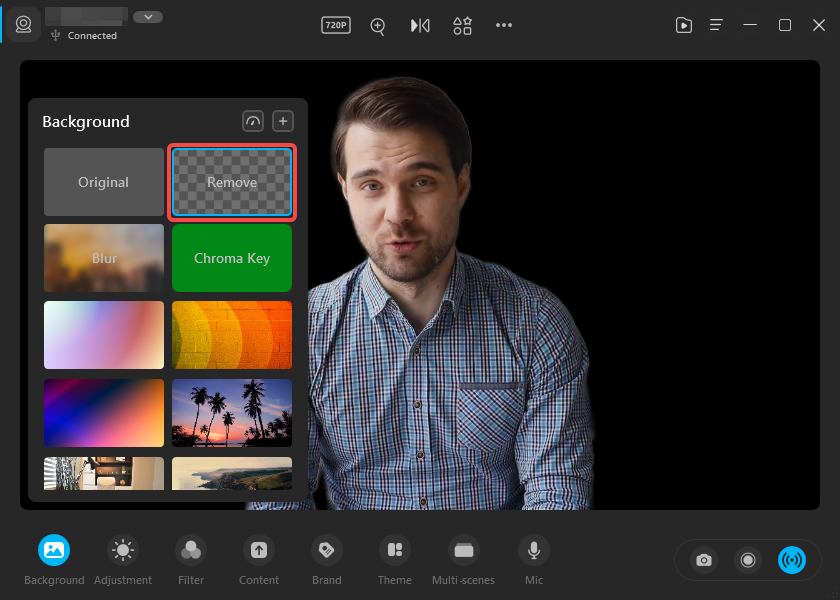
Remove Background
Click the Remove option to remove your webcam background without a green screen.
Blur Background
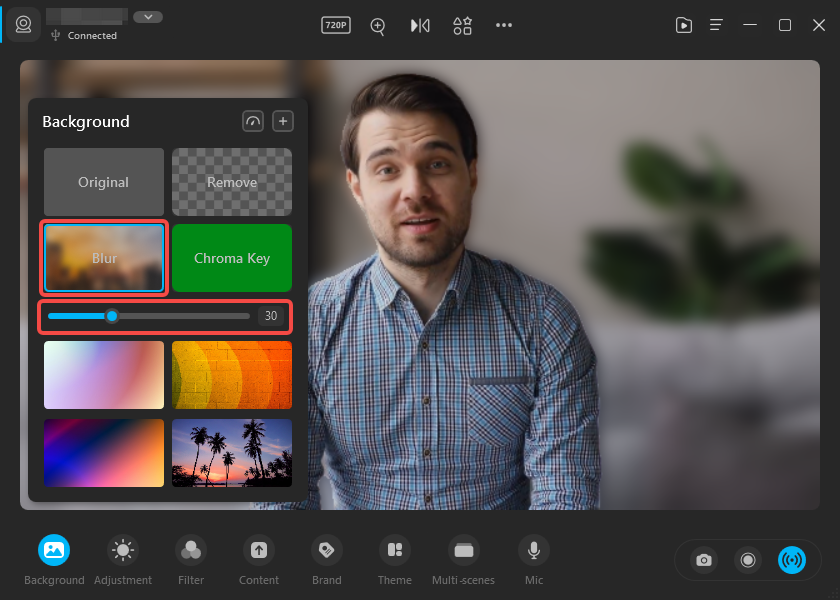
Click the Blur option to remove your webcam background without a green screen.
Move the slider to change the blur intensity.
Apply Preset Virtual Backgrounds
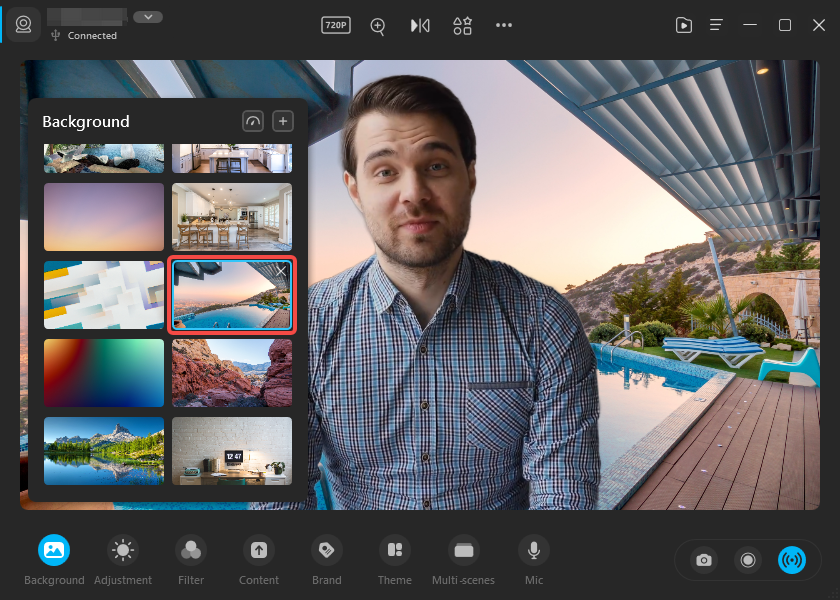
FineCam offers you more than a dozen of preset virtual backgrounds. Scroll down the Background panel, and click on a preset background to replace your original background without a green screen.
If you have a green screen, you can use FineCam to remove or replace your green video background by clicking on the Chroma Key option.
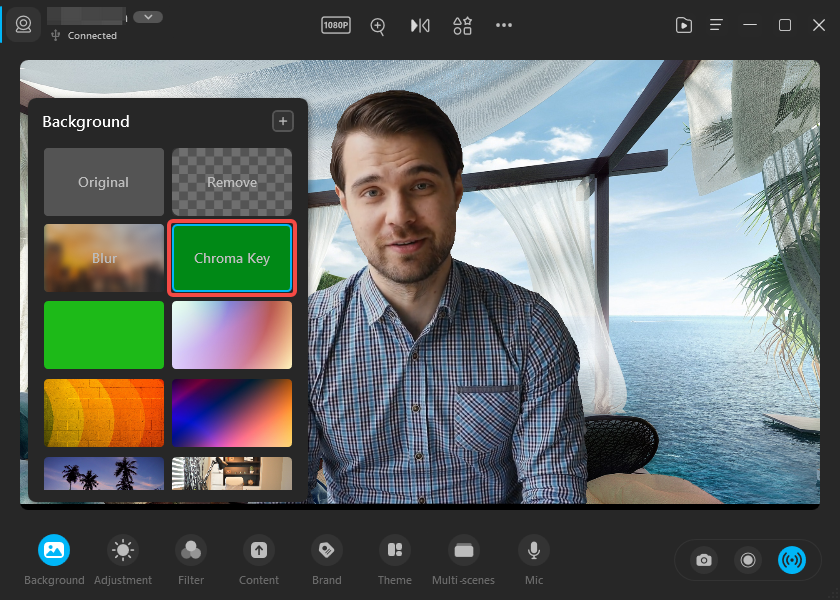
You can adjust the quality of background removal. The Haute quality can give you a better background removal effect, but it requires better computer performance. The smooth quality can save GPU consumption and you’re your video smoother.
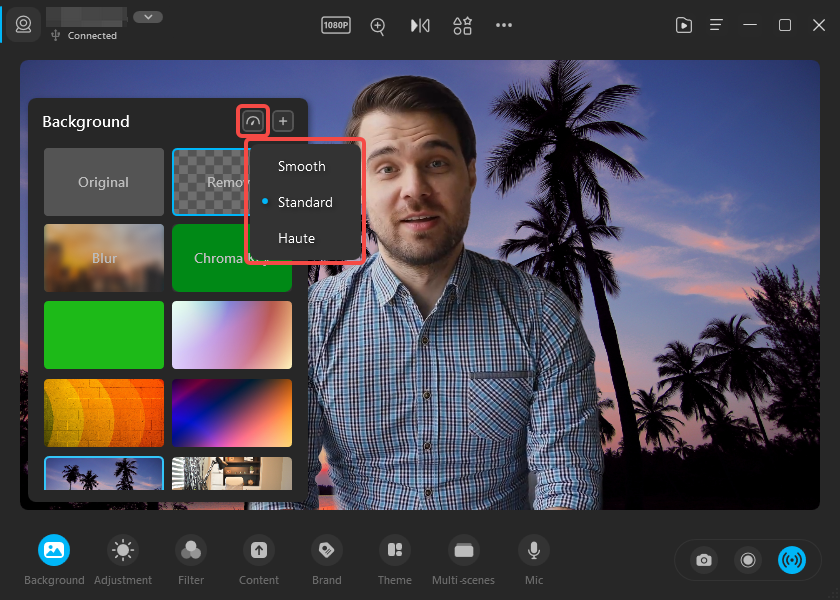
Add Custom Backgrounds from Local or Background Library
You can add local image files and HD backgrounds from the FineCam background library.
Click the plus icon to open the menu.
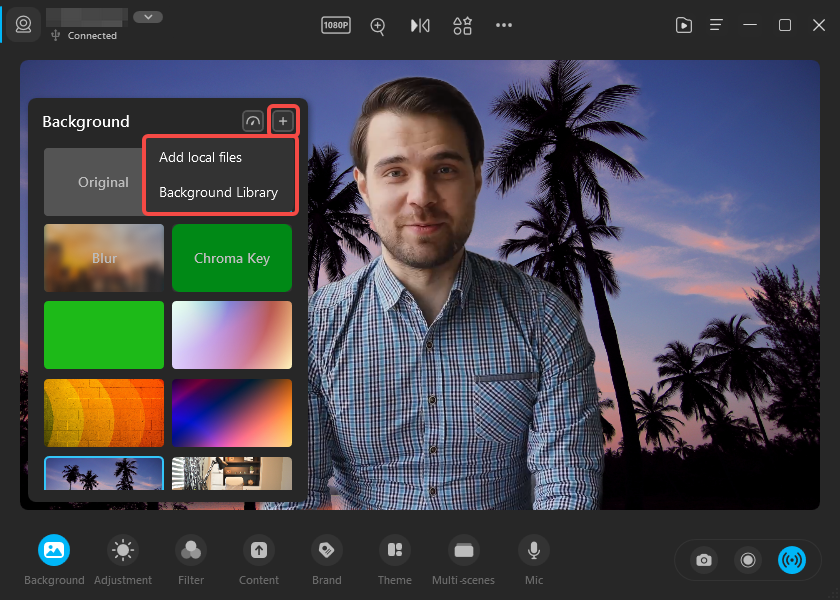
FineCam allows you to import image files in JPG, JPEG, PNG, BMP, and HEIC.
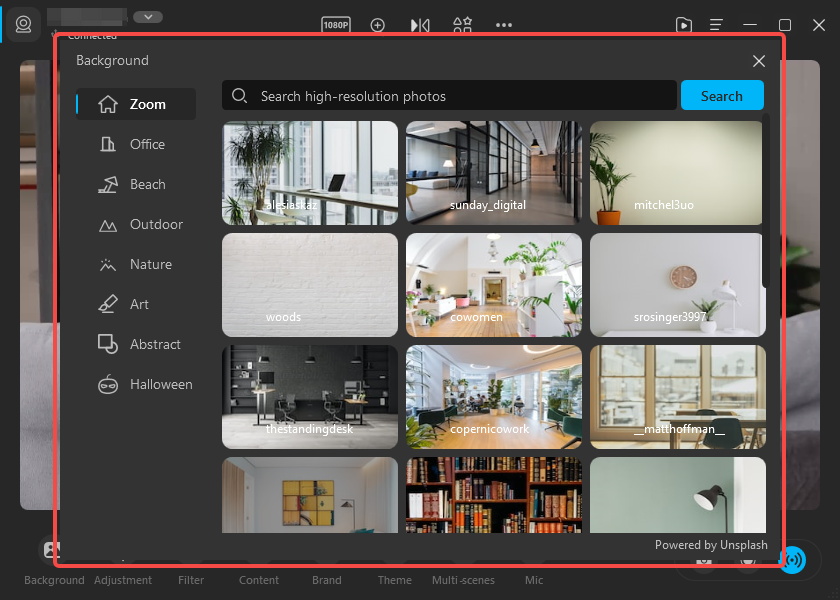
And you can find millions of HD webcam backgrounds from the library powered by Unsplash.
Click on the background you like. After downloading, the background can be found on the background panel.
Can't find the answer to your question?
Contact us and we’ll get back to you as soon as we can.